Friday, May 11, 2012

More of the Beads from the Class - w Jeri Warhaftig

As I did with the classes I've taken in the past few years, I'm sharing what I made in the class. Not because they are wonderful - but because they are first beads and learning experiences.

And so that I can come back and look at them later. ;-) And maybe snicker a little. ;-)

Brace yourself - there's a lot of them. 

Embossed copper inclusions - you saw this bead a couple of days ago - so I'm just adding it here for completeness. 


 More copper inclusions - and learning to keep them looking coppery and shiny, instead of shifting to red. (Background glass is CiM Kryptonite, btw.)


 Getting there. Bead release broke on me though.

 Nice, but still not what I was trying to do.


Bingo! Now it's starting to work for me! 


This is the same bead, after sandblasting, btw. 


Working with Dichro. Again, bead release broke on me and so I didn't finish it. 


Which made it a good bead to test the sandblasting on. No sense of loss if it messes up! Lesson learned from this one - much more masking required.


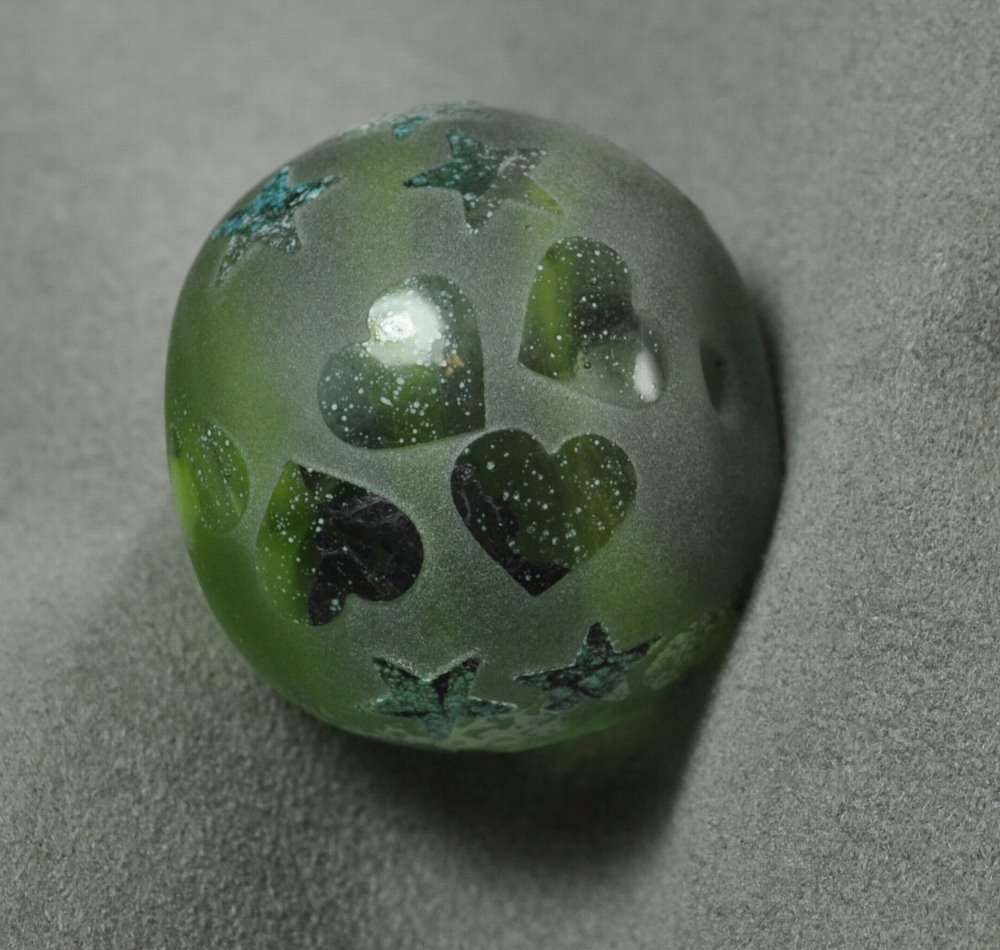
We explored the ol' enamel + copper foil effect.  Base is Kryptonite, white enamel, copper foil.


 This is a hollow - decorated with the same enamel and foil effect, and sandblasted.


Dichro on red bead.  Happy with this one.


And on a leaf. Yeah - it's blue leaf. 
 

We also practiced encasing dichro on coloured backing. Here's the leftover chunk. 


We played with putting objects into a key mandrel. 


Silver foil + rubino effect. 

The sandblasting totally saved this bead - it was butt ugly. It was a hollow I lost control of, gave up and mashed and rolled in frit.  It is now moderately interesting.


This is what my workstation looked like after a few hours of my toolbox barfing out tools. 

(Yes - I moved the Tim Horton's bag before I lit the torch.)


 It's ... black. Actually - it's enamel.


And this is the same bead, after masking and sandblasting.


 And the other side.


 Other assorted beads. 


 So help me - all I could think of was this reminded me of those acrylic toilet seats with the plastic fish in them. 


Urg. This was a swing and a miss. 


 Hey - there's the Taxco frit on the obsidian base again!


And a proof of concept - dragons wrapped around a bead - and sandblasted. Needs work yet - but shows promise. 


Thursday, May 10, 2012

More Reactive Frit Combos

More frit combos. I think there is something to combining these reactive/reduction frits - as the unpredictability of the chemistry from the frits reacting with each other as well as the base glass give even more extraordinary results.

 This is a base of CiM Obsidian, with Belladonna Honey Glaze frit on the left, and BD Royal Purple on the right. Notice the overlap in the center.


BTW - CiM Obsidian is my new "must-have" glass - for it's reactions with silver and silver glass.


This is the combo as above, Obsidian, with Honey Glaze on the left and Royal purple on the right, but reduced.


 And this is a base of Vetro Black - with Honey Glaze on the top, Royal Purple on the bottom, reduced lightly, encased (out of the flame - to avoid unreducing) and mashed.


Awesomeness!


Wednesday, May 09, 2012

Belladonna Honey Glaze - Rod

I also got some of the Belladonna Honey  Glaze in rod form - although - to be fair, it was more like stringer. Very thin rods. 


Because I didn't have  much of it, I made a base of clear, then encased it in the Honey Glaze. It didn't seem very dark - so I did 3 layers of encasing before I had some colour that I thought looked appealing.

I struck it a little (cool and reheat) and then did a gentle reduction. Note the iridescence in the reflection.


This is a base of white. This time, I only needed a single layer of Honey Glaze encasing - it coloured up much better. The right side of the bead was reduced. 


This is a base of Vetro black, and Honey Glaze stringer - reduced - and it over reduced, I think I didn't let it cool enough - it went smokey and ick - so I unreduced it (turned the oxygen back up) and burned off the haze. The end result is quite interesting.


Tuesday, May 08, 2012

From the class - Jeri Warhaftig

I just finished up a class with Jeri Warhaftig on the weekend, and those of you who have read back in this blog know that I don't have any expectations of getting beads I like from any class. I'm there to learn. I'm out of my comfort zone (although, learning in your own studio or one that you use frequently  - home field advantage, so to speak - is a huge plus!) - I'm pushing the envelope and sometimes it pushes back.


However, I have to say,  I'm pretty happy with this one.


This is about an inch across, using copper foil and goldstone, and sandblasted, using the new sandblasting set up at beadFX.

Thank you, Jeri and Neil. You were awesome!

Monday, May 07, 2012

Learning Something New

The last four days of classes were fabulous! There's a bunch of reasons to take a class - learn a specific technique, learn a new approach, change your perspective, put some juice back in your mojo - but the best is mostly too much to hope for - when you get a great group of students and awesome teachers and you have great synergy and everyone learns and new things get discovered.

There was so much good stuff - I'm having a hard time figuring out what to focus on here!

But these past days with Jeri Warhaftig and her husband Neil - were fabulous - we covered soooo much.

Focus. Pick one thing.

Ok.

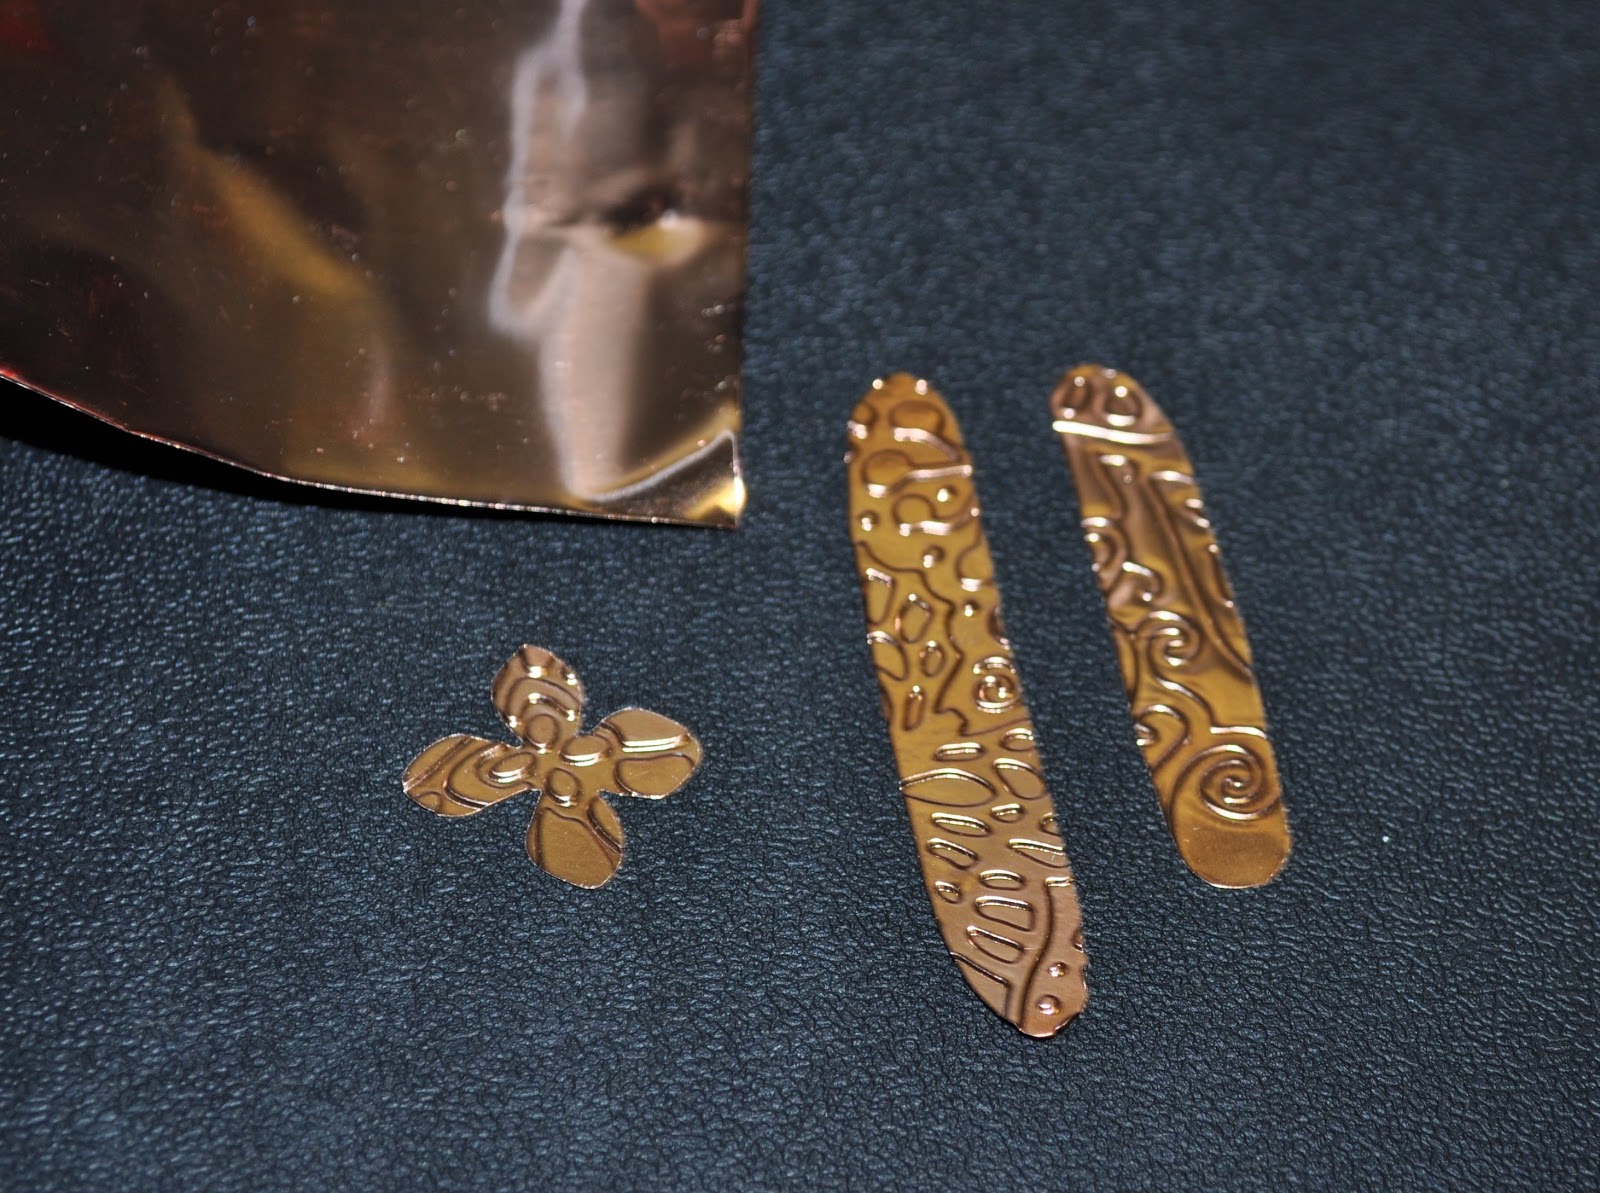
s32187 Tools - Sizzix Vintaj -  BIGkick - Embossing and Shape Cutting Machine (1)Copper foil inclusions in a lampwork bead. Somewhere, early in the process of talking about including copper foil in a bead, I had the inspiration to try embossing the copper foil using the new Sizzix/Vintaj Big Kick Machine.(Available from beadFX - but instore only.)

So we scooped up some copper foil, and headed over to the other class room where the BigKick is stored, and tried both the Embossing Plated and the Etching plates. The lightweight 40 gauge copper that we were using works beautifully - taking a nice crisp pattern from either process.


The long oval on the far right is "Etched" - it is a single, rubbery plate with the design as a series of lines - it makes a pattern that is thin, raised lines, as you can see. The long oval in the centre is using the "Emboss" - which is a folder, with two metal plates, one a reverse of the other, and it gives you a pattern that is less about lines and more about areas. The little flower is also using the Emboss plate.


So - does it hold up to being included in a bead? Can you see the pattern, or does it degrade?

Yes it does hold up! Beautifully, as a matter of fact.


And there are oodles of patterns to choose from!

Remember - you read it here first! If you were looking for justification to purchase the Big Kick machine (or any of it's siblings) - here you go.

Saturday, May 05, 2012

Belladonna Honey Glaze Frit

Also from Belladonna - Honey Glaze frit.


 This is a base of clear, with Honey Glaze frit, melted in.

This is a base of clear, with Honey Glaze frit, melted in and reduced. It makes a nice lustre, fumes the clear, and also seems to strike to a darker colour. 

Unfortunately - I let it cool too much in the reducing stage, and it cracked into two perfect halves. However - I know exactly what I want to do with these - fuse them into cabochons. 

Thursday, May 03, 2012

Belladonna - Royal Purple Frit

Belladonna - you may remember - is a new, boutique line of 104 glass in some specialized colours. This is Royal Purple, as a frit.

Royal Purple is a blue purple, more like Tanzanite than Amethyst. 


This is a base of clear, Royal Purple frit,  melted in. 

This is a base of clear, with Royal Purple, and reduced. Reduction didn't seem to affect it. It did seem to get darker - more like it was striking, but maybe that was just me getting more frit on the bead.

Nice colour - I personally prefer the purple that don't have a lot of red in them.

Tuesday, May 01, 2012

More Taxco and Deep Purple

 More beads featuring frit! These are featuring the last two frits I tried, Taxco and Deep Purple, both 104 CoE frits from Trautman Art Glass.

 
 This is a base bead of clear, with Deep Purple on the left half and Taxco on the right. Melted in and reduced.


 This is a base of black (CiM Obsidian) - Taxco and Med Purple, applied randomly. Some dots of clear, also random, melted in, and reduced.


 This is a base bead of Obsidian, Taxco and Med Purple, melted in, reduced, and encased.


 And the other side. This is awesome - I love these colours.

This is a base of Obsidian, Taxco, reduced, encased, smashed and shaped, and ridges put into it. 

Same again, Obsidian base, Taxco. I noticed the blue colour happening between the frit before reducing it, so I was probably working in a slightly reducing flame to start. There was more blue between the frit after reduction - so it is probably the black reducing and going blue with the silver from the Taxco. Mental note: I must try just fuming some Obsidian with silver.)

 And the other side.

I am really liking these!