I've reviewed Magic before, but here it is again anyway.
This is a 104 glass from Reichenbach. It's kind of a nondescript opaque brown rod - but it can do some pretty interesting things.
This was a black base, magic, encased, and mashed.
This is the other side of the same bead. Personally - grey and yellow are not a winning combo - so this side is not doing it for me. It looked better when it went into the kiln.
This one, and the rest of them here, are done with stringer and not encased. It seems that more is less, and less is more. I'm using it like Raku - heat it a lot, cool it quickly by mashing or marvering.
The figure playing the drums is pretty cool - and completely accidental. The blue in the back ground is actually not from the magic - it might be Kronos, I think. I don't appear to have recorded what it was.
This one has a patch of silver foil on it.
Definitely go for smaller amount for more colour drama. Why that should be - I don't know. Maybe it thins out better? Cools faster? Maybe all the interesting stuff happens at the boundaries.
Maybe it just likes to live on the edge? ;-)
Tuesday, March 06, 2012
Saturday, March 03, 2012
Studio set up - more pics
As promised, more on the recent studio redesign, with pictures for your reference. You know, just in case you are building an 8-person flameworking studio using natural gas and oxygen. ;-)
Just for reference - this is what the studio looks like overall. Metal covered tables down the centre, with a table in between for the kilns. We had a power line dropped from the ceiling for the kilns, with two dedicated circuits, one 220 for the "silver" kiln, and one 110 for the "blue" kiln.
In the far corner - you can see two pipes running up the wall and across.
These are the pipes - the bottom one is gas, and the upper one is oxygen. Since this photo - the oxygen has been labeled with black on green labels to indicate that it is oxygen. (Black on green - it's a by-law. Make your own labels - it's cheaper.)
The pipes run down the wall and under the table. They are on "stand offs" which support them off the floor. The original plan was to run them under the bottom of the table - but the gas fitter suggested this and it is a much better idea, as the tables can be moved now without damaging the piping.
In the back room - away from the students and torchers is the gas booster. This brings the gas up to a pressure that will run all the torches simultaneously. It is noisy - and having it out of the room is won-der-ful! It's not so much loud as "white noise" - but you really notice it when you turn it off. Now it in a back room where no one "lives" - so it's not annoying anyone.
Next to it is the 3-place manifold for the oxygen. We have hooked up three tanks, and we set two to 10 psi, and the third to 8 psi - ensuring that the two primary tanks empty first, and the 3rd is the reserve.
This has already been very useful, in that we just had one of the oxygen regulators fail. Previously - this would have meant 2 torches were out of commission, and we would have been making an emergency trip to get a replacement. Now, it is not impacting the torching at all, and we can replace it at our leisure.
We've also posted a sign (since this photo) that says "Low Pressure Oxygen system - do not connect high pressure tanks with out a regulator." Another by-law. The wrench for removing the regulators is also attached to the wall with a length of chain. This is also a by-law - but has been very well received by all - as it prevents the wrench from walking away.
We have a set of little signs - just a folded sheet of paper and some string, that we hang on the tanks. They say "full" on one side, and "empty" on the other. We use these to distinguish between full and empty tanks. Some places use chalk and write on the tank - that works too - but we have had better luck keeping track of signs than chalk. ;-)
Hope that's useful to you!
Just for reference - this is what the studio looks like overall. Metal covered tables down the centre, with a table in between for the kilns. We had a power line dropped from the ceiling for the kilns, with two dedicated circuits, one 220 for the "silver" kiln, and one 110 for the "blue" kiln.
In the far corner - you can see two pipes running up the wall and across.
These are the pipes - the bottom one is gas, and the upper one is oxygen. Since this photo - the oxygen has been labeled with black on green labels to indicate that it is oxygen. (Black on green - it's a by-law. Make your own labels - it's cheaper.)
You can also see the sink we have installed for cleaning beads, etc. I really did want that sink closer to the corner - but I wasn't there when they installed it.
Each torch has it's own connection and shut-off valve for gas and oxygen - so a torch can be removed and swapped out without affecting anyone else working. (The green hose is the oxygen and the black is the gas.) Each torch has a 6 foot hose running to the connector, and the hoses are velcro'ed up out of the way to the legs at the side of the torches. No more hoses getting in the way!
We added a connection and a gauge at the end of the line to monitor oxygen pressure. I wanted to know if we were losing pressure due to friction at the end of the line. Turns out, we are not (this gauge is reading zero as the line wasn't charged when I took the photo.)
In the back room - away from the students and torchers is the gas booster. This brings the gas up to a pressure that will run all the torches simultaneously. It is noisy - and having it out of the room is won-der-ful! It's not so much loud as "white noise" - but you really notice it when you turn it off. Now it in a back room where no one "lives" - so it's not annoying anyone.
Next to it is the 3-place manifold for the oxygen. We have hooked up three tanks, and we set two to 10 psi, and the third to 8 psi - ensuring that the two primary tanks empty first, and the 3rd is the reserve.
This has already been very useful, in that we just had one of the oxygen regulators fail. Previously - this would have meant 2 torches were out of commission, and we would have been making an emergency trip to get a replacement. Now, it is not impacting the torching at all, and we can replace it at our leisure.
We've also posted a sign (since this photo) that says "Low Pressure Oxygen system - do not connect high pressure tanks with out a regulator." Another by-law. The wrench for removing the regulators is also attached to the wall with a length of chain. This is also a by-law - but has been very well received by all - as it prevents the wrench from walking away.
We have a set of little signs - just a folded sheet of paper and some string, that we hang on the tanks. They say "full" on one side, and "empty" on the other. We use these to distinguish between full and empty tanks. Some places use chalk and write on the tank - that works too - but we have had better luck keeping track of signs than chalk. ;-)
Hope that's useful to you!
Thursday, March 01, 2012
Christening the New Studio
Had to christen it, right? Baptism by fire? Anyway - this shot turned out pretty cool. Love the way you can see the heat coming off the flame.
Wednesday, February 29, 2012
Reichenbach 104 L 2015: Pink Lady
I personally feel like I have hardly had time to sit down at a torch lately - and judging from my out-put - I would say that is about right. The glass gods could be working a little harder at conspiring to get me to the torch for my taste - I think they are slacking a bit here.
Anyway - I did manage to sneak in a minute or two to check out the Reichenbach (after typing that 7 different ways - I hope I finally got it right!) - Pink Lady. This is a pretty intense transparent pink - in the tradition of the Reichenbach furnace glasses - so I immediately tried working it thin.
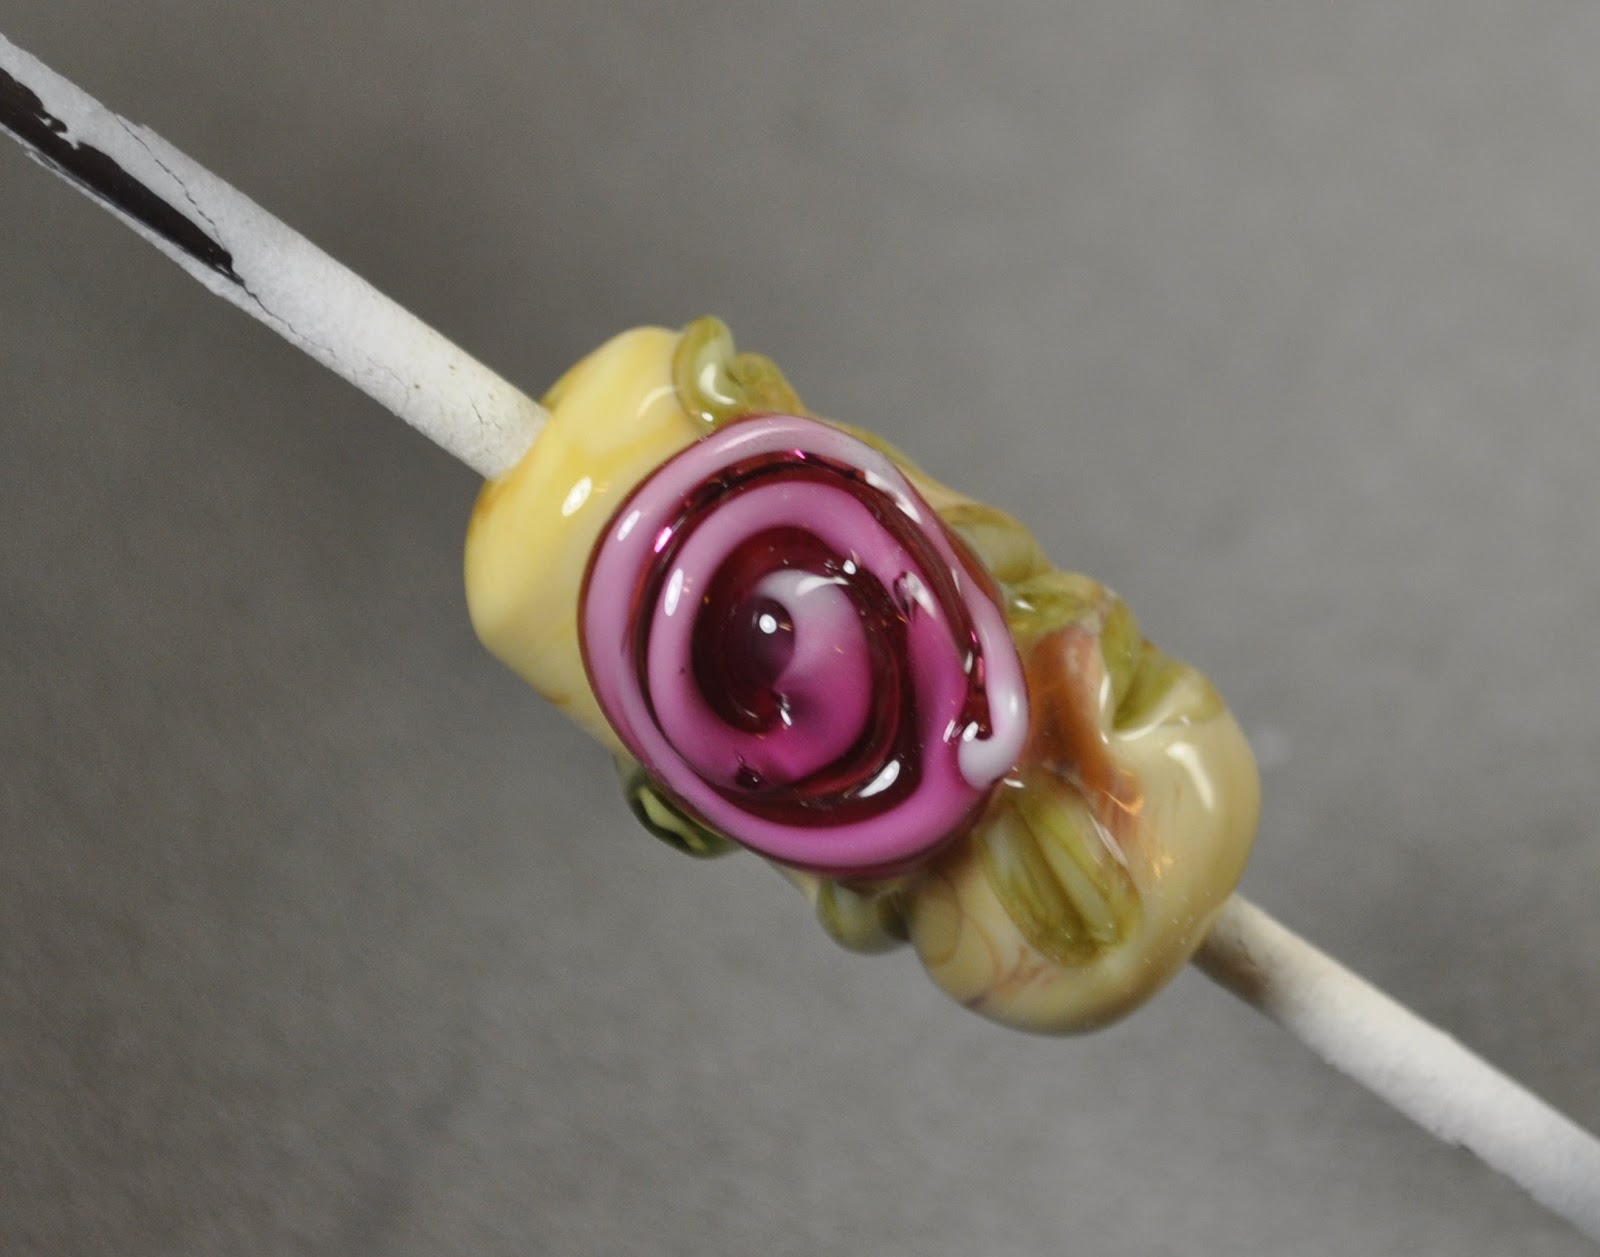
This is Pink Lady, laid down in a thin encasement, over white. It is an intense fuchsia pink - very nice - but I did get a smidgeon of scorching (near the left side - see the greyish bubbles). Don't work it too hot.
I then made some encased cane - Pink Lady over white - pulled into stringer - and made some of those ghastly traditional spiral roses.
If you aren't familiar with these, these are traditional on the old "wedding cake" Venetian beads - lots of goldstone and little pink roses.
To make them, make your cored cane, then make a base bead. Spot heat a circle on the bead to glowing, but not soft. Heat the tip of the stringer to make it sticky, and start in the middle of the circle. Work to the side of the flame, in that spot where, when you bring the stringer up to the flame - it starts to glow. Start in the middle of the circle, and make a spiral with the stringer, trying to keep it as tight as possible. (Tip, push on the stringer as you use it. Once it is glowing - it is too hot to control. Your goal is to have it hot enough to soften and move, just before it starts to glow.)
Melt in enough to have it stick - try not to overheat it and let is smear.
The sad part is, they really do resemble roses, no matter how sloppily done (witness my pics!). Some green ribbon cane swiped on for leaves completes the illusion.
It's an interesting phenomenon - our brains really do try to impose order on the world by seeing familiar things and interpreting patterns. Like a pink spiral becomes a rose. Not sure if it would work with another colour - would blue cored-cane give the illusion of blue roses?
The reason I dislike them is because they are like hearts - charged with a lot of sentimentality and preciousness. In other words - they have become a cliche - for me - like white picket fences and gingham aprons.
But don't let MY prejudices stop you from having fun making them! ;-)
Tuesday, February 21, 2012
More on Plumbing - Connecting the Torch - Teflon Tape vs Dope
Here's a picture of a torch - after correct installation.
This is a Nortel Minor Burner. The black hose is the gas, and the green hose is oxygen. Both are using "B" fittings. Notice the dope - white, on the gas, and the orange T-tape - teflon tape - on the oxygen.
Notice also the gas fittings have notches cut into the outside. Gas fittings are threaded to screw on in the opposite direction from usual (so lefty - tighty instead). This is so you don't attach a flammable gas line to a breathable gas line by mistake. You literally can't do it.
It takes two wrenches to undo and tighten the fittings - otherwise the torch just gets bent out of shape. The plumbing inside the torch is easy to bend once you start going at it with a wrench - and you don't want to do that. You notice the plate on the side marked "plate to stablize fittings" on the illustration above? If you have an older torch, and do not have these, but are planning to convert your torch from the barb fittings to the B fittings, contact jean@nortelmfg.com to obtain these plates. They just bolt on and stabilize the connectors so that you don't bend them while taking the fittings off.
Below, marked by the yellow arrows, is the adapter, and in hot pink, is the B fitting. Notice there is no dope or tape between these two. B fittings do not require tape and should seal tightly without it. If they don't - generally - there is some contamination or the fitting is damaged. It was the presence of a sealant in this area - between the pink and yellow - that clued us in that there was something wrong (see last post.).
Thursday, February 16, 2012
Studio Design - Oxygen Systems
--
HERE LIES WILLIE DOYLE.
HE THOUGHT EVERYTHING WORKED BETTER WITH OIL
--
Here is another thing you really need to know when building your own studio.
Oil and Oxygen are a bad combination. Don't mix oil and oxygen. Ever.
Don't oil your oxygen fittings. Don't lubricate anything with oil around pure oxygen. Do not oil your fittings. Don't store oil near oxygen. Got that - tattoo it on your soul - no oil and oxygen.
I say this because I have known it for so long that I assume everyone knows it, but apparently not. Welders know it - they were taught it when they took the welding course.
Here's another tip - not all gas fitters are welders.
--
Ok - let's move on to more positive information. I was recently involved in a studio move and re-design (hence the paucity of posts lately!). One of the criteria was to streamline the look and function of the studio by moving the oxygen tanks outside of the actual flameworking studio.
In the past, a single oxygen tank fed a pair of torches - so when the oxygen ran low, you needed to stop two torchers and swap out a tank - which meant - for the six stations that were there, you needed three tanks in use, and at least three in reserve, and probably three empty for pick up, for a total of nine tanks in rotation. That's a lot of storage, and lease fees, and you still have students running out of oxygen mid-bead if you don't watch the gauges.
We wanted a better solution.
What we planned, therefore, was a manifold to hook up multiple tanks in another room, and a pipe to run into the room, and to near each workstation, and hoses to make the final jump to the torch. One system, mulitiple tanks - no running out of oxygen.
What kind of pipe to use? We were concerned with two things - one being the material that the pipe is made of, and the other was the size - diameter.
What the pipe was made of was significant in that we should have no undue reactions or corrosion from the oxygen, and size in that it be large enough that there is still sufficient pressure at the end of the run. Size does matter. ;-)
A long run of hose or pipe will reduce flow just through friction - and if you don't believe that - replace your garden hoses with 3/4 inch hose and see what a difference it makes when you water the lawn. I had already noticed a very large difference just in the varying hose lengths that we were using. (Tip - don't have your hoses longer than they really need to be.)
We went with "Black Iron" pipe - because that was what was being run for the Natural Gas that was also being piped into the room. The Natural Gas comes from the city pipes, but is not at sufficient pressure to run 6 torches, let alone 8 or 12 - and so it runs through a booster - which is fairly noisy - and we wanted that out of the room too. While I personally prefer Propane for working glass - sometime Natural Gas is just easier. And you never run out.
But what we didn't realize was that Black Iron pipe - and for that matter, pretty much all pipe unless specified otherwise - comes with a light coating of oil to prevent corrosion. Remember what I said about oil and oxygen?
The pipefitter did a brilliant job running the pipe, setting it up and installing it - very neat and well planned - built the manifold, valves, etc. Assembled it all with a sealant known as "dope." Remember what I said about not all gas fitters are welders?
Dope - pipe sealant - is a non-hardening paste that ensures a gas/air tight seal and says on the container "NOT FOR USE WITH OXYGEN SYSTEMS." It contains oils to keep it flexible and prevent it from drying out and hardening and no longer being an effective sealant.
Fortunately - the gas fitter went ahead and hooked up the lines to the torches and used rather a lot of dope to seal the fittings. And when we saw this - his rather generous use of dope on the B fittings (which don't need dope - more on that in another post) - got us thinking about the dope, and then saying - wait - if he didn't know that - then what else didn't he know? ... It got us to look much closer - realize that the entire system had been sealed with the dope, and ... this was a problem.
In the end - we had to have the oxygen line disassembled, the dope cleaned off the fittings, reassembled using orange Teflon tape (rated for oxygen) - and then flushed with a hot water and TSP (Tri-Sodium Phosphate) solution, then flushed with clean water - then blown out with air to dry out the lines. The TSP flush is the procedure to remove the oil coating from the pipe. (As the pipe was already in place, we set up a barrel with the hot TSP solution and a hose attached to a transfer pump (an inline pump, like a waterbed pump works) - and a hose from the other end running back to the barrel. The solution was pumped through several times, then again with the clear water flushes. Not really a big deal.)
So - lessons learned.
- Oil and Oxygen do not co-exist
- Not everyone knows this
- Assume that the pipes have an oil coating and have it cleaned
- Ensure that the joins are sealed with teflon tape (Orange - rated for oxygen.)
If we were doing it again, we think we would opt for a brazed copper pipe for the oxygen (all the useful information showed up after the choice had been made!) - but we would still have it cleaned to remove oils.
The good news is that the diameter of pipe we chose is brilliant - and we have great oxygen pressure and no variation in pressure/flame as torches are turned on and off.
I'll get you some pictures of the system and set up in case you need ideas for your own system.
(The whole thing is a tad embarrassing - wish we had all the right data at the beginning of the project! But I publish it so that you don't make the same mistakes.)
Sunday, February 05, 2012
CiM 805: Obsidian (Again)
CiM's Obsidian, as I've mentioned before, is a very, very dark, warm grey - that reads as black when used by itself.
I thought I would try it with some Opal Yellow (Effetre 266) in a twistie.
The Obsidian does bleed out into the Opal Yellow, but in a very pleasing way - the warm grey/brown working nicely with the warm, buttery Opal Yellow. The end result is a sort of toasted zebra effect.
I thought I would try it with some Opal Yellow (Effetre 266) in a twistie.
The Obsidian does bleed out into the Opal Yellow, but in a very pleasing way - the warm grey/brown working nicely with the warm, buttery Opal Yellow. The end result is a sort of toasted zebra effect.
Saturday, January 28, 2012
CiM 103 Crimson
Here is the other of the two new transparent reds - Ruby Slippers and Crimson - from CiM -
and, as I said before - I struggled with these.
Note: Transparent reds are striking colours - they lose their colour when heated to molten - and then you let them cool, and re-introduce them to the flame, and the "strike" - regaining their red colour. Generally - I have no problems with the transparent reds.
I started with the same difficulty with Crimson as I did with Ruby Slippers. Again, I don't know if it was me or the glass. Other testers did say it took a while too.
The one on the left (yellow) - I heated to clear and kilned it that way - so all that yellow colour developed in the kiln. The one on the right, it turned cloudy - and you can see that it has a lot of brown in the haze.
I did eventually get this one to strike - a rather nice, bright shade of red. Unfortunately - I spent so much time cooling it and re-heating it a little that it cracked when it came out of the kiln.
'This one was a base of Crimson, encased. It struck almost immediately when I encased it, But it also went hazy too. And while it is a prettier colour in real life - it also cracked.
This one struck when I marvered it - but it is so dark - it is hard to tell that it is red. However, with the trails of Triton - it is a rather handsome bead!
Gobs of potential in this colour - but I had difficulty with it. Your milage may vary.
Note: Transparent reds are striking colours - they lose their colour when heated to molten - and then you let them cool, and re-introduce them to the flame, and the "strike" - regaining their red colour. Generally - I have no problems with the transparent reds.
I started with the same difficulty with Crimson as I did with Ruby Slippers. Again, I don't know if it was me or the glass. Other testers did say it took a while too.
The one on the left (yellow) - I heated to clear and kilned it that way - so all that yellow colour developed in the kiln. The one on the right, it turned cloudy - and you can see that it has a lot of brown in the haze.
I did eventually get this one to strike - a rather nice, bright shade of red. Unfortunately - I spent so much time cooling it and re-heating it a little that it cracked when it came out of the kiln.
'This one was a base of Crimson, encased. It struck almost immediately when I encased it, But it also went hazy too. And while it is a prettier colour in real life - it also cracked.
This one struck when I marvered it - but it is so dark - it is hard to tell that it is red. However, with the trails of Triton - it is a rather handsome bead!
Gobs of potential in this colour - but I had difficulty with it. Your milage may vary.
Thursday, January 26, 2012
CiM 104 Ruby Slippers
Two more transparent reds - Ruby Slippers and Crimson - from CiM - and I struggled with these. I don't know what it was - but I could NOT get Ruby Slippers to strike.
Transparent reds are striking colours - they lose their colour when heated to molten - and then you let them cool, and re-introduce them to the flame, and the "strike" - regaining their red colour. Generally - I have no problems with the transparent reds.
But not these two. I had the same problem with both Ruby Slippers and Crimson. I don't know if it was me or the glass. I did try both of them on the same day - for what ever that is worth.
Other testers for Ruby Slippers report results from difficulty striking to a "glorious, garnet red."
From the left, we have Ruby Slippers on white, on clear, and two self coloured beads. The end one (yellow) - was clear when it went into the kiln. Maybe they needed to kiln strike.
Again - Ruby Slippers, and I was definitely having trouble striking it. It was also hazing up on me. The haze has come out sort of a muddy colour.
Although - if you wanted to do something with a variegated yellow and orange - this might be just exactly what you are looking for.
Transparent reds are striking colours - they lose their colour when heated to molten - and then you let them cool, and re-introduce them to the flame, and the "strike" - regaining their red colour. Generally - I have no problems with the transparent reds.
But not these two. I had the same problem with both Ruby Slippers and Crimson. I don't know if it was me or the glass. I did try both of them on the same day - for what ever that is worth.
Other testers for Ruby Slippers report results from difficulty striking to a "glorious, garnet red."
From the left, we have Ruby Slippers on white, on clear, and two self coloured beads. The end one (yellow) - was clear when it went into the kiln. Maybe they needed to kiln strike.
Again - Ruby Slippers, and I was definitely having trouble striking it. It was also hazing up on me. The haze has come out sort of a muddy colour.
Although - if you wanted to do something with a variegated yellow and orange - this might be just exactly what you are looking for.
Tuesday, January 24, 2012
Wave bead
Random eye candy - here's one of my signature "wave" beads - done in "Earth" and Eff. Med Lapis. It is done on the Sirius system mandrel and insert.
It doesn't showcase the "Earth" well - but it's bluuuue. How bad can it be? ;-)
Sunday, January 22, 2012
CiM 102: Valentine Revisited
I wanted to revisit CiM Valentine - as I had this nagging sense that I just hadn't done it justice.
After all - I really like it - and I was wondering why the photos seemed so dark and dreary.
So I remade the beads - and here you see, from the left, two self coloured beads, one encased in clear, and one with white dots with Valentine on top.
Boy - those are not what you would call red.
I tried them under various lights around my studio - and finally - I took them outside to shoot - which I almost never do.
et Voila! Despite superiour lighting technology - this colour pops in overcast and bright sunlight - revealing it's true redness.
BTW - the encased one - while looking lighter than the un-encased red - has not cracked. (Opaque reds frequently are fussy about being encased.) It's not a real deep encasing - but there it is.
So there you go - shoot your Valentine in the sun.
Make what you will of the symbolism in that! ;-)
After all - I really like it - and I was wondering why the photos seemed so dark and dreary.
So I remade the beads - and here you see, from the left, two self coloured beads, one encased in clear, and one with white dots with Valentine on top.
Boy - those are not what you would call red.
I tried them under various lights around my studio - and finally - I took them outside to shoot - which I almost never do.
et Voila! Despite superiour lighting technology - this colour pops in overcast and bright sunlight - revealing it's true redness.
BTW - the encased one - while looking lighter than the un-encased red - has not cracked. (Opaque reds frequently are fussy about being encased.) It's not a real deep encasing - but there it is.
So there you go - shoot your Valentine in the sun.
Make what you will of the symbolism in that! ;-)
Thursday, January 19, 2012
Gas Terminology Translation
Around the world - different terms get used for the gas we use to run our torches - so here's a little clarification as I understand it - mostly for my European readers - who are often baffled by our terminology.
In North American (Canada and the US) - we mostly run our torches on Propane or Natural Gas.
For those in Europe who are wondering what the heck natural gas is: Natural Gas is a piped gas - part of the utilities (like water and electricity) - and not necessarily available outside of major urban centres. It is about 90% methane.
Butane is what we fuel cigarette lighters with. Also - some of the small torches for brazing and soldering run on butane.
Propane is sold in tanks, or delivered to large tanks for those using it - mostly in more rural areas - for home heating, cooking or industrial applications.
Propane is stored as a liquid in the tank, and what you are burning is the vapor as the gas evaporates. (But is sold in pounds - i.e. a 20 lb tank.)
Propane burns at about 50 degrees F hotter than natural gas - which doesn't sound like much.
But - my experience is - you can melt the glass a lot faster with propane than natural gas. The propane makes, for want of better terminology, a "denser" flame - it seems to transfer the heat more efficiently. The difference, all else being equal - is quite dramatic.
I also have experienced far less problems in "scorching" or "burning" the glass when working low in the flame with propane than natural gas. I can work far closer to the torch face with propane than with natural gas. If I get down close to the candles (those blue fingery parts of the flame coming directly off the torch face) - with natural gas, I'm more inclined to get grey smokey effects in the glass.
I have certainly heard some lampworkers comment about being careful of propane because of built up of contaminents in the tanks and hose - and it may have been in the past that the quality control for propane was not as good - but I have never had a problem personally.
Propane is scented to make it easy to find leaks - the resulting scent is very distinctive - I find it nauseating - but you should never smell it - the burn from the torches is very clean.
One other thing to remember - propane is heavier than air, so if it spills, it will sink to the ground. When you plan your studio space - think about this. So, if you are setting up in a basement - look for floor drains. Leaked gas could conceivably "fall" to the floor, flow into the drain and accumulate. If there is an electric sump pump in the drain to keep the water levels down, when it starts - electric motors can spark and "whomp" - potential for explosion. (Natural Gas is neutral - it just mixes.)
Likewise - look around for gas-fueled furnaces, water heaters, with a pilot light.
Some of the smaller, portable torches like the Hot Head and the Fireworks will run on a MAPP gas canister - for as long as those continue to be available. (They are being phased out here). MAPP gas is a propane blend - it has added ingredients to make it burn hotter. Mostly it gets sold in small containers for light welding and soldering and hooking up to portable equipment, like camping stoves. (They will also run on propane.)
I don't pretend to be an expert on this - just throwing some info out there for you to think about. If you want an expert - read Vic Henley's articles in the glass community magazines.
Oh, which do I prefer? Propane - I would rather melt with propane - but natural gas has the advantage of being delivered in a pipe directly to your studio and you never run out.
Well - that turned into a sort of brain dump - hope someone finds it helpful though. ;-)
PS - if you have some info about the gas used in your country - leave a comment!
In North American (Canada and the US) - we mostly run our torches on Propane or Natural Gas.
For those in Europe who are wondering what the heck natural gas is: Natural Gas is a piped gas - part of the utilities (like water and electricity) - and not necessarily available outside of major urban centres. It is about 90% methane.
Butane is what we fuel cigarette lighters with. Also - some of the small torches for brazing and soldering run on butane.
Propane is sold in tanks, or delivered to large tanks for those using it - mostly in more rural areas - for home heating, cooking or industrial applications.
Propane is stored as a liquid in the tank, and what you are burning is the vapor as the gas evaporates. (But is sold in pounds - i.e. a 20 lb tank.)
Propane burns at about 50 degrees F hotter than natural gas - which doesn't sound like much.
But - my experience is - you can melt the glass a lot faster with propane than natural gas. The propane makes, for want of better terminology, a "denser" flame - it seems to transfer the heat more efficiently. The difference, all else being equal - is quite dramatic.
I also have experienced far less problems in "scorching" or "burning" the glass when working low in the flame with propane than natural gas. I can work far closer to the torch face with propane than with natural gas. If I get down close to the candles (those blue fingery parts of the flame coming directly off the torch face) - with natural gas, I'm more inclined to get grey smokey effects in the glass.
I have certainly heard some lampworkers comment about being careful of propane because of built up of contaminents in the tanks and hose - and it may have been in the past that the quality control for propane was not as good - but I have never had a problem personally.
Propane is scented to make it easy to find leaks - the resulting scent is very distinctive - I find it nauseating - but you should never smell it - the burn from the torches is very clean.
One other thing to remember - propane is heavier than air, so if it spills, it will sink to the ground. When you plan your studio space - think about this. So, if you are setting up in a basement - look for floor drains. Leaked gas could conceivably "fall" to the floor, flow into the drain and accumulate. If there is an electric sump pump in the drain to keep the water levels down, when it starts - electric motors can spark and "whomp" - potential for explosion. (Natural Gas is neutral - it just mixes.)
Likewise - look around for gas-fueled furnaces, water heaters, with a pilot light.
Some of the smaller, portable torches like the Hot Head and the Fireworks will run on a MAPP gas canister - for as long as those continue to be available. (They are being phased out here). MAPP gas is a propane blend - it has added ingredients to make it burn hotter. Mostly it gets sold in small containers for light welding and soldering and hooking up to portable equipment, like camping stoves. (They will also run on propane.)
I don't pretend to be an expert on this - just throwing some info out there for you to think about. If you want an expert - read Vic Henley's articles in the glass community magazines.
Oh, which do I prefer? Propane - I would rather melt with propane - but natural gas has the advantage of being delivered in a pipe directly to your studio and you never run out.
Well - that turned into a sort of brain dump - hope someone finds it helpful though. ;-)
PS - if you have some info about the gas used in your country - leave a comment!
Glow Frit
I did some experimenting with a stash of glow frit that I recently came across.
The instructions said to make stringer from the frit, so I did that.
To do this, (make stringer from frit, that is) - start with a rod of clear glass and a heat the end of the clear until you have softened the end, then use it to pick up a chunk of frit on the end rod. Bring that back to the flame and heat it to soften it, and then pick up another chunk of frit and melt it in Keep repeating this, until you have a nice sized gather - big enough to pull into a stringer. Repeat as necessary for more stringers as required.
For this first bead, I started with a clear core, then added the glow frit-stringer, and then encased with CiM Caribbean, and then shaped into a cube.
You can see I burned something - not sure if it was the clear or the frit or the Caribbean - but ick.
However, this is it glowing! Nice glow, eh? Really quite dramatic.
Next - I tried a marble. This time, instead of the stringer, I just got a big ball of clear hot, and jammed it down into the frit and picked up a big chunk, and then just worked around it, encasing it, adding dichro, etc.
I trapped a lot of air in there, inadvertently, by doing it that way - but I did get a nice, substantial chunk of frit.
Resulting in this marble - when you turn out the lights! The frit was labelled blue - hence the blue glow.
The glow effect is quite strong, and yes - like every other glow-in-the-dark thing that is not actively radio-active - you have to "charge" it up under a strong light.
But I tell you - two of us in the bathroom - with the lights out - (at the studio) - squealing like schoolgirls - totally made one customer's day. ;-)
The instructions said to make stringer from the frit, so I did that.
To do this, (make stringer from frit, that is) - start with a rod of clear glass and a heat the end of the clear until you have softened the end, then use it to pick up a chunk of frit on the end rod. Bring that back to the flame and heat it to soften it, and then pick up another chunk of frit and melt it in Keep repeating this, until you have a nice sized gather - big enough to pull into a stringer. Repeat as necessary for more stringers as required.
For this first bead, I started with a clear core, then added the glow frit-stringer, and then encased with CiM Caribbean, and then shaped into a cube.
You can see I burned something - not sure if it was the clear or the frit or the Caribbean - but ick.
However, this is it glowing! Nice glow, eh? Really quite dramatic.
Next - I tried a marble. This time, instead of the stringer, I just got a big ball of clear hot, and jammed it down into the frit and picked up a big chunk, and then just worked around it, encasing it, adding dichro, etc.
Resulting in this marble - when you turn out the lights! The frit was labelled blue - hence the blue glow.
The glow effect is quite strong, and yes - like every other glow-in-the-dark thing that is not actively radio-active - you have to "charge" it up under a strong light.
But I tell you - two of us in the bathroom - with the lights out - (at the studio) - squealing like schoolgirls - totally made one customer's day. ;-)
Tuesday, January 17, 2012
Gas Consumption - Nortel Torches
Currently in the process of re-design the studio for beadFX - where I teach - as they are moving to a new location - which is one of the reasons I've been very quiet lately. (The other has to do with my mother being ill - but that's another story.)
So - trying to figure out how big a gas line we need. We're going with Natural Gas (again) - and I got the following figures from Peter at Nortel Mfg - so I thought I would publish them here - in case someone else needs them, or I need them at some point in the future.
For Natural Gas
Mega & Minor Torch - at 1/4 psi, uses 3 litres per minute
Midrange Torch - at 1/4 psi, uses 8 litres per minute
Usage increases with psi increase - possibly up to 50% more.
BTUs - calculate at 35 btus/litre.
This is the info I fed to the gasfitter - got it straight from Peter.
Just don't ask me to explain it! ;-)
So - trying to figure out how big a gas line we need. We're going with Natural Gas (again) - and I got the following figures from Peter at Nortel Mfg - so I thought I would publish them here - in case someone else needs them, or I need them at some point in the future.
For Natural Gas
Mega & Minor Torch - at 1/4 psi, uses 3 litres per minute
Midrange Torch - at 1/4 psi, uses 8 litres per minute
Usage increases with psi increase - possibly up to 50% more.
BTUs - calculate at 35 btus/litre.
This is the info I fed to the gasfitter - got it straight from Peter.
Just don't ask me to explain it! ;-)
Wednesday, January 04, 2012
CiM 203 Pimento Ltd Run
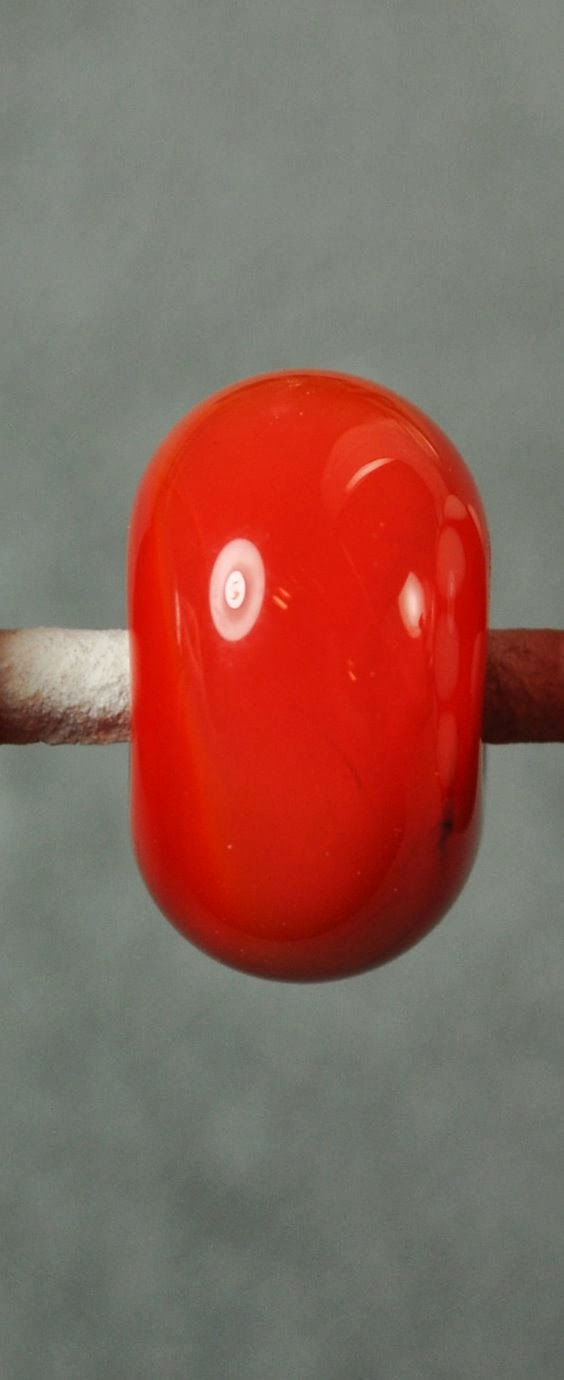
Pimento - from Creation is Messy - a vibrant, eye-popping orange.
This is a happy, happy colour. - bright and cheery and in-your-face saturated!
This is also a really soft opaque - this melted very fast.
Here are two self-coloured spacers.
This one had dots of a light turquoise (CiM Fremen) - you can see there has been a reaction and there is a handsome dark grey line around the Fremen.
This is encased in clear - and is slightly lighter in real life than the un-encased versions - although it is tough to see that here. By the way - that is pretty normal for encased opaque oranges and reds - to show lighter.
And with ivory dots. A real creamsicle colour combo. Hmmm - ivory core beads with an encased of Pimento, (with the core showing at the sides - like a white heart bead) - nummy.
A really cheerful colour. Love this one.
This is a happy, happy colour. - bright and cheery and in-your-face saturated!
This is also a really soft opaque - this melted very fast.
Here are two self-coloured spacers.
This one had dots of a light turquoise (CiM Fremen) - you can see there has been a reaction and there is a handsome dark grey line around the Fremen.
This is encased in clear - and is slightly lighter in real life than the un-encased versions - although it is tough to see that here. By the way - that is pretty normal for encased opaque oranges and reds - to show lighter.
And with ivory dots. A real creamsicle colour combo. Hmmm - ivory core beads with an encased of Pimento, (with the core showing at the sides - like a white heart bead) - nummy.
A really cheerful colour. Love this one.
Monday, January 02, 2012
Subscribe to:
Posts (Atom)