Monday, April 30, 2012

Trautman Deep Purple Frit

Trautman Art Glass, Deep Purple, in a frit. This is a 104 COE frit. Who am I, and what have you done with my brain? I'm starting to like frit!


 The frit is a deep reddish purple.


Over clear, and melted in. 


This is Deep Purple, over clear, melted in, and reduced. The clear has fumed to yellow, and the deep purple has gone shades of opaque ocean blue. (It looked more sea green when it was hot.)


Wednesday, April 25, 2012

Frit: Taxco

This is Trautman Taxco - available as a frit.


I really enjoyed this frit. More so than the glass, as I remember.

I think I might have been expecting more intense colours from the rods - but I was quite happy with the subtle effects that I got from the frit - especially when combined with other frits - as you will see in upcoming posts.


This bead was a clear base, and rolled in Taxco - which was just melted in. There was a lot of bubbles and it did look sort of scummy at the time - but it came out looking fine.


 This one is also a clear base, rolled in Taxco, and melted in and then reduced. The frit has fumed the clear, giving a golden tone to the clear, and making the frit appear more greenish.


I liked this - I can definitely see uses for spacers like this in extending a set themed on turquoise colours. But, as I said, it gets better in more exotic combos. Stay tuned. 


Follow these posts on Facebook - like me here: DragonJoolsGlass
 

Monday, April 23, 2012

Graphite Mold - Stacked Cylinders

Here's another graphite mold for shaping beads. It's sort of a stacked cyclinder - but here's a hint - you don't have to use the entire length of the mold cavity!


I actually found this one to be very easy to use - easier than most of the others I've tried. I started with a cylinder - shaped it, and then added a "spare tire" in the middle, and used the mold to refine the shape. 

 I didn't actually add the 3rd level of cylinders, as I rather liked what I had - and decided to quite while I was ahead!

I think it would look cool done in bright, primary colours - opaques - oranges and greens and yellows and reds and blues. Bright, playful colours. Maybe with some spots or bumps added too. Fun beads!


Saturday, April 21, 2012

Looking forward to Class with Jeri Warhaftig

I've signed up for 4 days of classes with Jeri Warhaftig - to be held at the newly re-designed studio at beadFX. As I was the re-designer - I'm looking forward to seeing how well the space is going to work!

A few years ago - ok, quite a few- I think it was 2006 - I bought a bead at auction at the ISGB gathering. I managed to lose the maker's info - but I was pretty darn impressed with the bead. It was - is - I still have it - cobalt blue, iridescent like carnival glass, and with a deeply etched pattern - almost like cut glass. It was hard to believe that it was handmade - the pattern was so crisp and tight and deep. I didn't know about sandblasting beads then - and I couldn't decide if it was carved or etched.

In looking at this bead from Jeri's site - I realize now that it was one of her beads! - and that it was sandblasted. And now I get to take a class with her. How cool is that? (The one I have is very similar to the one pictured! The dark areas in the pattern are actually the sandblasted parts - the glass is cut away there!)

Sandblasting is a process of using a stream of small, rough particles (like - SAND) to carve away part of the bead and leave a textured pattern on the surface. It opens the door to going beyond making beads and gives you many more options to customize your work.  You might also recognize the technique from Diana East's classic beads. There is a really nice video here that gives you some insight as well.

Jean from Nortel Mfg (manufacturer of the Nortel torches, Minor, Mega, Mid-range, etc.) tells me that Jeri is an absolute sweetheart of a teacher - very kind and patient - always good to hear! 


It has meant that the studio bought a whack of equipment for this class - sandblasting cabinet, air compressor, media recovery - so this will add a whole new level to glass beadmaking - as the equipment is not going away, and will be available after. I really want to get my head around how to use the equipment - so that after the class - I can continue to use it and find ways to incorporate it into my own work.

--
Jeri is scheduled to teach "Demystifying Dichroic and Conquering Copper" - a two-part class on May 3 and 4th. This class is $425 for the two days, and includes all the glass (including the dichro!!!), etc, that you will require. If you have favorite tools, your own glasses, you are welcome to bring them (I suggest marking them with tape or nail polish or paint to make them easy to i.d.) - but everything is provided.

The second class is on May 5 and 6 - the Saturday and Sunday and is "Sandblasting Lampworked Beads." We are installing a sandblasting unit expressly for this class - but it won't be going away after the class - we will still have it available for use - so unless you want it sitting there while you wished you knew how to use it - I suggest you sign up. This class is $450 - and again - everything you need is included. The description of the class states that you "should be able to make large beads with reasonable competency" in order to be successful - which would pretty much describe all the folks who got started by taking a class with me!

If you want to see more of Jeri's work - check out her website at jeribeads.com.
--


The classes are just week after next - May 3-4 and 5-6. There are spaces left - so you should jump on this opportunity right now. Jeri is NOT teaching at Bead and Button and has a limited teaching schedule this year - so this is a really good opportunity - especially for those in the Southern Ontario area - as the cost savings of not having to travel to the US are huge! Email Jenny H at beadfx and sign up now!

Monday, April 16, 2012

Kiln Troubleshooting

Well - I'm back. Back from some serious time away from the torch and from glass. I think I would like to say that time spent at the torch is not deducted from your allotted days on earth.

Anyway - while I have many new insights on eldercare and aging - having spent a lot of hours staring in the mirror of my future - this blog is about lampworking - so I will save those insights - with the exception of the following: Do the things you love. Do them now. You might live a long, long time - and maybe you'll have another 40 or 50 years to do the things you love - but it would be tragic if you lived another 50 years, but were incapacitated and couldn't do them. Like arthritis robbed you of the fine motor skills in your hands, or you had the physical skills - but not the mental capacity to be trusted with a torch.  

So - as you might imagine - a break of some weeks and I was itching to get back to the torch. As soon as I could, I fired up the kiln, and went off to load the dishwasher while it was heating up. However, apparently my long break without my regular sacrifices of bad beads and exploding rods to the glass gods had angered them, and when I returned to my kiln, it was blinking a message for me - not the happy and warm message of 972 - my temperature of choice, but tcL - alternating with the distinctly chilly 74 of ambient room temperature.

D4mn.

I dug out the manual - which - in defiance of all expectations - I have read and do keep handy for reference. However, there was no mention of a tcL error message - but it did say that tcF was a "themocouple failure." Hmmm. Not a good thing.

I went to the Paragon website for more insight into the error message - and downloaded a newer version of the manual. (Here is a link to it - for the 4.0 controller - just in case you need it. )

The manual was very helpful, and said that tcL is "thermocouple lag" - which is 

The heating rate is slower than 9°F / 5°C per hour, and the actual kiln temperature is more than 100°F / 56°C away from the programmed temperature. The tCL alarm becomes inactive above 500°F. To return to the display, press any key.
Causes:
  1. Worn or burned out elements, defective relays, low voltage, and defective thermocouple.
  2. On kilns that use a portable controller, the thermocouple has fallen out of the firing chamber.
  3. A bare spot on the thermocouple lead wires has touched a grounded object inside the kiln switch box causing the thermocouple to short out.
  4. You have programmed a cooling segment temperature that is below room temperature.

I could eliminate 4 easily by checking the program. 2 was also easily eliminated - not a portable controller. As it had been working, and it hadn't been moved - 3 seemed unlikely - so something in the #1 cause seemed the most probable.

I held a lit lighter up near the thermocouple - and the temperature readout started to climb - ok - the thermocouple still works.

Checking out the elements was tricky - because it means sticking your head in the kiln - until my s.o. came along and pointed out that I could just use my cell phone camera - just take a picture and then look at the picture.


Good idea! The cell phone can also just provide illumination if that's what you need.

At that point - he got involved and unscrewed the controller and went at it with a multi-meter and determined that the relay had failed. I can do a lot of things - but poking around with a multi-meter and getting meaningful results is not one of them.

A quick phone call to Jean at Nortel had Paragon calling me back, and confirming the part I needed. A replacement relay was overnighted and hubby installed it - and I was back in business 36 hours from the initial failure.

Kudos to Paragon and Nortel for their outstanding customer service. I wish more companies understood that customer service is a value, not a cost! And thanks too to Dan for diagnosing and installing it! ;-)


Monday, April 02, 2012

Brief interruption

No - I haven't fallen off the face of the planet. I am currently dealing with some family stuff - hope to be back soon!

Thursday, March 22, 2012

Reichenbach Reduction 96 146 Iris Black

Oooops - thought this looked cool - Iris Black - so picked up a couple of rods and as I go to try it, I realized that it is 96 COE.


I thought I would risk it on the ivory and just keep it to a small amount and see if I could get away with it.

So far - it seems ok. I hit it with a light reduction flame and it brought up a nice metallic sheen, and fumed the ivory.

As I don't stock a lot (any!) 96 COE glass - I thought I would use it by itself in this wavy heart, made on the Sirius system mandrel. Again, a light reduction brings up a nice metallic look.

But anyway - it's a 96 - so the take-away is: read the entire label before buying glass. ;-)


Sunday, March 18, 2012

Lauscha Opaque Pink

Yep, it's opaque. I'm no longer disappointed by these yummy colours that come out commonplace. If Lauscha says "Opaque" - they darn well mean it.

Labelled L SNO 420 Op Pink - from an old stash from Glassdaddy.com - not sure if they are still selling.

It's a angel-skin soft pink. A little darker on the sides where is got less direct heat. Nothing like the unworked rod.

Wednesday, March 14, 2012

Fun with Filigrana

Here's a good way to use filigrana.

Filigrana - if you are new to this, is a commercially made glass rod (from Effetre) that is a coloured core with a clear outer layer. You can, of course, make your own, but having lots of consistent rods open up some creative possibilities - such as, making hollow beads!

This hollow was made with pink filigrana - which is actually a white core, with a layer of transparent pink, and then a clear encasing. Some of the filigrana colours are simply an encased colour, but a few are actually 3 layers. You can see in these photos, the pink over the white. It makes for a more interesting and complex look.

Make it the same as you would any other hollow - building up disks and then either building them up until they touch, or softening them with heat and moving them together until they touch.

Another neat variation is to make one disk in one colour and the other in a different color.


Thursday, March 08, 2012

Colours in Glass

Over the years - you pick up some info about the metals used to make the colour in glass. You learn early on that gold makes pinks and purples - and when the price of gold shot up - we saw the price of the purples and pinks shoot up too.

The ivories and yellows are sulfur-based - and they react with the copper-based colours - the greens and turquoise blues.

Tin gives you white, and manganese gives you black, and some of the browns are made with gold too. Chrome was used for the reds - although for health reasons - other elements have been found. Ditto for the colour we know as cobalt blue.

However, while reading Discover1  - I came across a very interesting article on the "Rare Earths" - a category of elements that are neither particularly rare nor earthy. It's a good article - worth reading.

However - the part that really grabbed my attention was this passage:

Glass doped with cerium oxide effectively absorbs ultraviolet light ... . Two other rare-earth metals, neodymium and praseodymium, work their magic at the other end of the spectrum. They impede infrared light and so are incorporated into welders' goggles to protect workers eyes from the heat. These oxides also absorb yellow and green, so glass made with them has a characteristic mauve tinge. 

Geez  - could you describe our didymium lenses any better? Ooo - Di - meaning two - neodymium and praseodymium.

That explains that.

But wait - it gets better.

More broadly, rare earths add colour ... . Glazes on earthenware dishes contain oxides ... tin (white), copper (blue) or iron (amber). But rare-earth oxides ... create more exotic hues, such as pink and lime green. ... erbium oxide ... gives a subtle tone -  more pink lemonade than Pepto-bismol.

 So think about those fabulous new pinks that we have seen, like the Pinks from CiM - Gelly's Sty - a pink like no other in any of the other glass palettes.

Hmmm. Veddy interesting.

I realized that this information may not buy you anything - but I still think it is fabulous to know this stuff!


 --
1Discover Magazine, "Elements of Modern Style," by Hugh Aldersey-Williams. pp 62 - 67

Tuesday, March 06, 2012

Reichenbach 104 - 6210: Magic

I've reviewed Magic before, but here it is again anyway.

This is a 104 glass from Reichenbach. It's kind of a nondescript opaque brown rod - but it can do some pretty interesting things.

This was a black base, magic, encased, and mashed. 

 This is the other side of the same bead. Personally - grey and yellow are not a winning combo - so this side is not doing it for me. It looked better when it went into the kiln.
 This one, and the rest of them here, are done with stringer and not encased.  It seems that more is less, and less is more. I'm  using it like Raku - heat it a lot, cool it quickly by mashing or marvering.


 The figure playing the drums is pretty cool - and completely accidental. The blue in the back ground is actually not from the magic - it might be Kronos, I think. I don't appear to have recorded what it was.
 This one has a patch of silver foil on it.
Definitely go for smaller amount for more colour drama. Why that should be - I don't know. Maybe it thins out better? Cools faster? Maybe all the interesting stuff happens at the boundaries.

Maybe it just likes to live on the edge? ;-)

Saturday, March 03, 2012

Studio set up - more pics

As promised, more on the recent studio redesign, with pictures for your reference. You know, just in case you are building an 8-person flameworking studio using natural gas and oxygen. ;-)

Just for reference - this is what the studio looks like overall.  Metal covered tables down the centre, with a table in between for the kilns. We had a power line dropped from the ceiling for the kilns, with two dedicated circuits, one 220 for the "silver" kiln, and one 110 for the "blue" kiln.

In the far corner - you can see two pipes running up the wall and across.


 These are the pipes - the bottom one is gas, and the upper one is oxygen. Since this photo - the oxygen has been labeled with black on green labels to indicate that it is oxygen. (Black on green - it's a by-law. Make your own labels - it's cheaper.)

The pipes run down the wall and under the table. They are on "stand offs" which support them off the floor. The original plan was to run them under the bottom of the table - but the gas fitter suggested this and it is a much better idea, as the tables can be moved now without damaging the piping. 

You can also see the sink we have installed for cleaning beads, etc. I really did want that sink closer to the corner - but I wasn't there when they installed it.

Each torch has it's own connection and shut-off valve for gas and oxygen - so a torch can be removed and swapped out without affecting anyone else working.  (The green hose is the oxygen and the black is the gas.) Each torch has a 6 foot hose running to the connector, and the hoses are velcro'ed up out of the way to the legs at the side of the torches. No more hoses getting in the way!
 
We added a connection and a gauge at the end of the line to monitor oxygen pressure. I wanted to know if we were losing pressure due to friction at the end of the line. Turns out, we are not (this gauge is reading zero as the line wasn't charged when I took the photo.)


In the back room - away from the students and torchers is the gas booster. This brings the gas up to a pressure that will run all the torches simultaneously. It is noisy - and having it out of the room is won-der-ful! It's not so much loud as "white noise" - but you really notice it when you turn it off. Now it in a back room where no one "lives" - so it's not annoying anyone.

Next to it is the 3-place manifold for the oxygen. We have hooked up three tanks, and we set two to 10 psi, and the third to 8 psi - ensuring that the two primary tanks empty first, and the 3rd is the reserve. 

This has already been very useful, in that we just had one of the oxygen regulators fail. Previously - this would have meant 2 torches were out of commission, and we would have been making an emergency trip to get a replacement. Now, it is not impacting the torching at all, and we can replace it at our leisure.

We've also posted a sign (since this photo) that says "Low Pressure Oxygen system - do not connect high pressure tanks with out a regulator." Another by-law.  The wrench for removing the regulators is also attached to the wall with a length of chain. This is also a by-law - but has been very well received by all - as it prevents the wrench from walking away.

We have a set of little signs - just a folded sheet of paper and some string, that we hang on the tanks. They say "full" on one side, and "empty" on the other. We use these to distinguish between full and empty tanks. Some places use chalk and write on the tank - that works too - but we have had better luck keeping track of signs than chalk. ;-)

Hope that's useful to you! 

Thursday, March 01, 2012

Christening the New Studio

Had to christen it, right? Baptism by fire? Anyway - this shot turned out pretty cool. Love the way you can see the heat coming off the flame.


Wednesday, February 29, 2012

Reichenbach 104 L 2015: Pink Lady

Well - the studio redesign for beadFX is done, and while there are just a few more items to take care of - it is up and running.

I personally feel like I have hardly had time to sit down at a torch lately - and judging from my out-put - I would say that is about right. The glass gods could be working a little harder at conspiring to get me to the torch for my taste - I think they are slacking a bit here.

Anyway - I did manage to sneak in a minute or two to check out the Reichenbach (after typing that 7 different ways - I hope I finally got it right!) - Pink Lady. This is a pretty intense transparent pink - in the tradition of the Reichenbach furnace glasses - so I immediately tried working it thin.

This is Pink Lady, laid down in a thin encasement, over white. It is an intense fuchsia pink - very nice - but I did get a smidgeon of scorching (near the left side - see the greyish bubbles). Don't work it too hot.

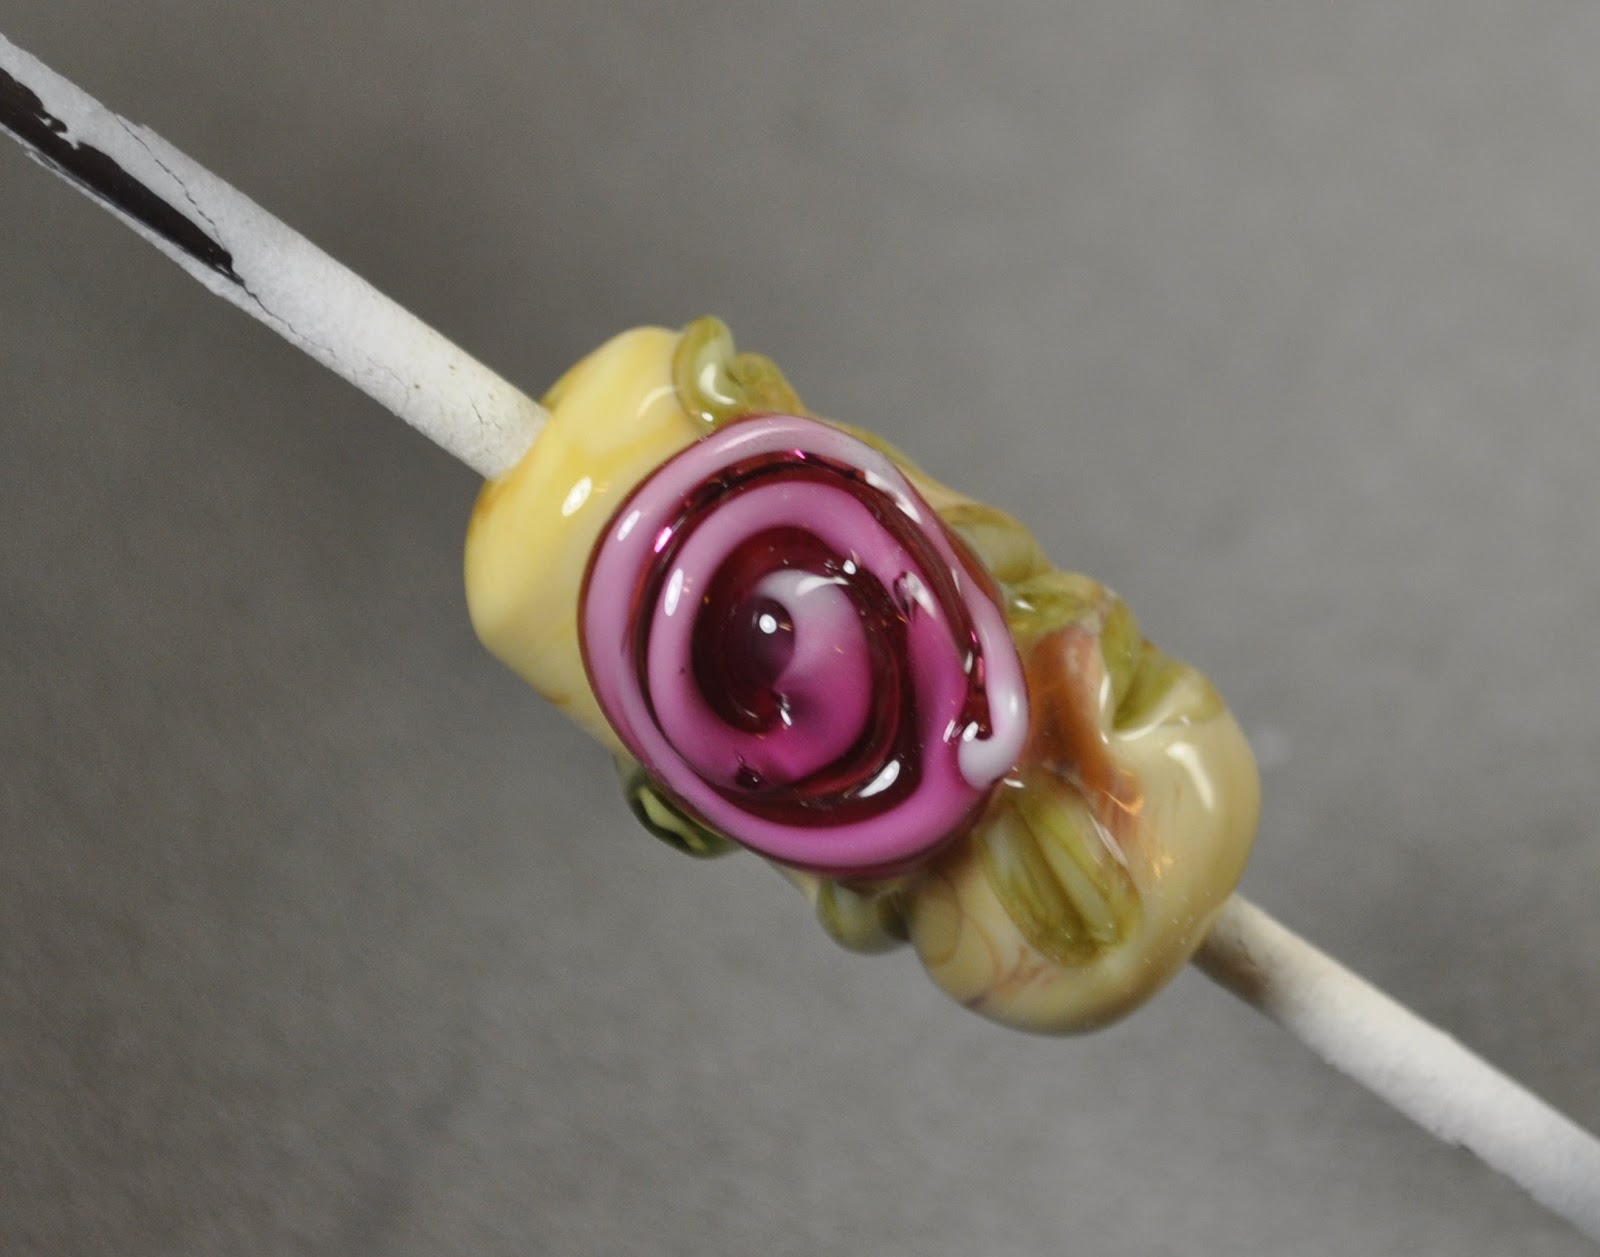
 I then made some encased cane - Pink Lady over white - pulled into stringer - and made some of those ghastly traditional spiral roses.

 If you aren't familiar with these, these are traditional on the old "wedding cake" Venetian beads - lots of goldstone and little pink roses.
 To make them, make your cored cane, then make a base bead. Spot heat a circle on the bead to glowing, but not soft. Heat the tip of the stringer to make it sticky, and start in the middle of the circle. Work to the side of the flame, in that spot where, when you bring the stringer up to the flame - it starts to glow. Start in the middle of the circle, and make a spiral with the stringer, trying to keep it as tight as possible. (Tip, push on the stringer as you use it. Once it is glowing - it is too hot to control. Your goal is to have it hot enough to soften and move, just before it starts to glow.)

Melt in enough to have it stick - try not to overheat it and let is smear.
 The sad part is, they really do resemble roses, no matter how sloppily done (witness my pics!). Some green ribbon cane swiped on for leaves completes the illusion.
 It's an interesting phenomenon - our brains really do try to impose order on the world by seeing familiar things and interpreting patterns. Like a pink spiral becomes a rose. Not sure if it would work with another colour - would blue cored-cane give the illusion of blue roses?
The reason I dislike them is because they are like hearts  - charged with a lot of sentimentality and preciousness. In other words - they have become a cliche - for me - like white picket fences and gingham aprons.

But don't let MY prejudices stop you from having fun making them! ;-)

Tuesday, February 21, 2012

More on Plumbing - Connecting the Torch - Teflon Tape vs Dope


Here's a picture of a torch - after correct installation.

This is a Nortel Minor Burner. The black hose is the gas, and the green hose is oxygen. Both are using "B" fittings. Notice the dope - white, on the gas, and the orange T-tape - teflon tape - on the oxygen.

Notice also the gas fittings have notches cut into the outside. Gas fittings are threaded to screw on in the opposite direction from usual (so lefty - tighty instead). This is so you don't attach a flammable gas line to a breathable gas line by mistake. You literally can't do it. 

It takes two wrenches to undo and tighten the fittings - otherwise the torch just gets bent out of shape. The plumbing inside the torch is easy to bend once you start going at it with a wrench - and you don't want to do that. You notice the plate on the side marked "plate to stablize fittings" on the illustration above? If you have an older torch, and do not have these, but are planning to convert your torch from the barb fittings to the B fittings, contact jean@nortelmfg.com to obtain these plates. They just bolt on and stabilize the connectors so that you don't bend them while taking the fittings off.

Below, marked by the yellow arrows, is the adapter, and in hot pink, is the B fitting. Notice there is no dope or tape between these two. B fittings do not require tape and should seal tightly without it. If they don't - generally - there is some contamination or the fitting is damaged. It was the presence of a sealant in this area - between the pink and yellow - that clued us in that there was something wrong (see last post.).


Thursday, February 16, 2012

Studio Design - Oxygen Systems

--
HERE LIES WILLIE DOYLE.  
HE THOUGHT EVERYTHING WORKED BETTER WITH OIL
--


Here is another thing you really need to know when building your own studio.

Oil and Oxygen are a bad combination. Don't mix oil and oxygen. Ever.

Don't oil your oxygen fittings. Don't lubricate anything with oil around pure oxygen. Do not oil your fittings. Don't store oil near oxygen. Got that - tattoo it on your soul - no oil and oxygen.

I say this because I have known it for so long that I assume everyone knows it, but apparently not. Welders know it - they were taught it when they took the welding course.

Here's another tip - not all gas fitters are welders.


--

Ok - let's move on to more positive information. I was recently involved in a studio move and re-design (hence the paucity of posts lately!). One of the criteria was to streamline the look and function of the studio by moving the oxygen tanks outside of the actual flameworking studio.

In the past, a single oxygen tank fed a pair of torches - so when the oxygen ran low, you needed to stop two torchers and swap out a tank - which meant - for the six stations that were there, you needed three tanks in use, and at least three in reserve, and probably three empty for pick up, for a total of nine tanks in rotation. That's a lot of storage, and lease fees, and you still  have students running out of oxygen mid-bead if you don't watch the gauges.

We wanted a better solution.

What we planned, therefore, was a manifold to hook up multiple tanks in another room, and a pipe to run into the room, and to near each workstation, and hoses to make the final jump to the torch. One system, mulitiple tanks - no running out of oxygen.

What kind of pipe to use? We were concerned with two things - one being the material that the pipe is made of, and the other was the size - diameter.

What the pipe was made of was significant in that we should have no undue reactions or corrosion from the oxygen, and size in that it be large enough that there is still sufficient pressure at the end of the run. Size does matter. ;-)

A long run of hose or pipe will reduce flow just through friction - and if you don't believe that - replace your garden hoses with 3/4 inch hose and see what a difference it makes when you water the lawn. I had already noticed a very large difference just in the varying hose lengths that we were using. (Tip - don't have your hoses longer than they really need to be.)

We went with "Black Iron" pipe - because that was what was being run for the Natural Gas that was also being piped into the room. The Natural Gas comes from the city pipes, but is not at sufficient pressure to run 6 torches, let alone 8 or 12 - and so it runs through a booster - which is fairly noisy - and we wanted that out of the room too. While I personally prefer Propane for working glass - sometime Natural Gas is just easier. And you never run out.

But what we didn't realize was that Black Iron pipe - and for that matter, pretty much all pipe unless specified otherwise - comes with a light coating of oil to prevent corrosion. Remember what I said about oil and oxygen?

The pipefitter did a brilliant job running the pipe, setting it up and installing it - very neat and well planned - built the manifold, valves, etc. Assembled it all with a sealant known as "dope." Remember what I said about not all gas fitters are welders?

Dope - pipe sealant - is a non-hardening paste that ensures a gas/air tight seal and says on the container "NOT FOR USE WITH OXYGEN SYSTEMS." It contains oils to keep it flexible and prevent it from drying out and hardening and no longer being an effective sealant.

Fortunately - the gas fitter went ahead and hooked up the lines to the torches and used rather a lot of dope to seal the fittings. And when we saw this - his rather generous use of dope on the B fittings (which don't need dope - more on that in another post) - got us thinking about the dope, and then saying - wait - if he didn't know that - then what else didn't he know? ... It got us to look much closer - realize that the entire system had been sealed with the dope, and ... this was a problem.

In the end - we had to have the oxygen line disassembled, the dope cleaned off the fittings, reassembled using orange Teflon tape (rated for oxygen) - and then flushed with a hot water and TSP (Tri-Sodium Phosphate) solution, then flushed with clean water - then blown out with air to dry out the lines. The TSP flush is the procedure to remove the oil coating from the pipe. (As the pipe was already in place, we set up a barrel with the hot TSP solution and a hose attached to a transfer pump (an inline pump, like a waterbed pump works) - and a hose from the other end running back to the barrel. The solution was pumped through several times, then again with the clear water flushes. Not really a big deal.)

So - lessons learned.

  • Oil and Oxygen do not co-exist
  • Not everyone knows this
  • Assume that the pipes have an oil coating and have it cleaned
  • Ensure that the joins are sealed with teflon tape (Orange - rated for oxygen.)
The system is now oil free, safe, and working beautifully.

If we were doing it again, we think we would opt for a brazed copper pipe for the oxygen (all the useful information showed up after the choice had been made!) - but we would still have it cleaned to remove oils.

The good news is that the diameter of pipe we chose is brilliant - and we have great oxygen pressure and no variation in pressure/flame as torches are turned on and off.

I'll get you some pictures of the system and set up in case you need ideas for your own system. 

(The whole thing is a tad embarrassing - wish we had all the right data at the beginning of the project! But I publish it so that you don't make the same mistakes.) 


Sunday, February 05, 2012

CiM 805: Obsidian (Again)

CiM's Obsidian, as I've mentioned before, is a very, very dark, warm grey - that reads as black when used by itself.

I thought I would try it with some Opal Yellow (Effetre 266)  in a twistie.

The Obsidian does bleed out into the Opal Yellow, but in a very pleasing way - the warm grey/brown working nicely with the warm, buttery Opal Yellow. The end result is a sort of toasted zebra effect.