Rogue - an interesting streaky grey - streaked with browns.
Not sure if this is a reaction, like a reduction, or a streakiness. Any way - these four spacers are just wound out of Rogue. The grey is a sort of a blue grey - and the brown streaks - which are variable - almost like a transparent - add a very interesting and organic touch.
Normally - I would assume this is a streaky glass - but something about the end of the partially worked rod just has me wondering about that.
Anyway - interesting colour and bears further experimentation.
Saturday, September 29, 2012
Tuesday, September 25, 2012
CiM 106: Firecracker
CiM Firecracker. A juicy and delicious new red.
CiM describes Firecracker as an Opaque, but when diluted with clear, or only partially struck - it is a transparent.
It really is a wonderful shade of red - it might be my new favorite red!
Here, on the left, self coloured, wound, relatively cool. On the right, made a gather first - heated to clear hot, self struck as it cooled. Kilned, no further striking.
Here, the one on the left was heated a lot - you see some streakiness in it. The one on the right has a clear core.
Just for fun, clear core, streak of Firecracker, allow to droop, cap of clear.
More spacers - each a slightly different shade, depending on the degree of heating.
This is a base of firecracker, encase clear, Goldstone stringer, mash, press pattern.
And finally - Firecracker. with dot of clear.
Firecracker is a transparent red - ranging from amber through orange to red, depending on the degree of striking. It does tend to develop cloudiness as it is worked, but it is a delicious and juicy colour with no hint of liveriness (brown-ness).
Yum.
CiM describes Firecracker as an Opaque, but when diluted with clear, or only partially struck - it is a transparent.
It really is a wonderful shade of red - it might be my new favorite red!
Here, on the left, self coloured, wound, relatively cool. On the right, made a gather first - heated to clear hot, self struck as it cooled. Kilned, no further striking.
Here, the one on the left was heated a lot - you see some streakiness in it. The one on the right has a clear core.
Just for fun, clear core, streak of Firecracker, allow to droop, cap of clear.
More spacers - each a slightly different shade, depending on the degree of heating.
This is a base of firecracker, encase clear, Goldstone stringer, mash, press pattern.
And finally - Firecracker. with dot of clear.
Firecracker is a transparent red - ranging from amber through orange to red, depending on the degree of striking. It does tend to develop cloudiness as it is worked, but it is a delicious and juicy colour with no hint of liveriness (brown-ness).
Yum.
Saturday, September 22, 2012
Torching for Beads of Courage @ BeadFX
Attention Lampworkers!
Support Beads of Courage - at BeadFX - Sep 29
BeadFX is having a Beads of Courage Day. BeadFX is donating torch time,
Nortel Mfg & Creation is Messy is donating glass. Lampworkers - come and give your time and talent to make beads for Beads of Courage.
Saturday, Sep 29 - 9 am to 6 pm.
Phoning to reserve a torch is encouraged - but drop-ins are welcome -
based on availability. Some glass will be provided, but feel free to
bring your own as well.
Learn more about beads of courage here: http://www.beadsofcourage.org/ pages/about.htm
Wednesday, September 19, 2012
Bead Release: Foster Fire
Foster Fire Bead Release.
It's back.
And it's good.
Foster Fire has a bit of history behind it. When it first came on the scene - quite a few years ago - I adored it. It held up to my big beads, and was the ONLY bead release that worked with those curved mandrels from Inspiration.
However, I noticed that it stopped being great - and became mediocre - and I drifted away from it - trying and liking other bead releases over the years.
Then - this came back into my hands again. "Uh," I said, "Um - I have really liked this for awhile."
Try it again, I was urged.
The story is, briefly - that the original owner and inventor - Robin Foster - sold the business - and the new proprietor tinkered with the formula.
Ms Foster has now bought her company back - can't begin to tell you how often that happens! - and is now producing it again with the original formula.
So - does it work? Oh yeah.
It does need a little drying time - about 10 - 20 mins - depending on the humidity. I find that if the bead release is dripping wet - it will pop and fly off the mandrel - so let it dry a little before using the flame to finish drying it.
Or leave over night.
It will sometimes develop small cracks in the bead release when heated - and remember - I am using a big torch (Nortel Mid-range) - but they cracks don't open up and you can actually lay down the glass over the cracks without fear of the glass sticking to the mandrel.
It does stand up to the weight of the big beads - although the intense heat does seem to make the unprotected (un-covered) bead release more subject to breaking away.
Pulling the beads, however, is a dream. These slide off like they are buttered.
And this is a huge plus as far as I am concerned. I HATE pulling beads.
So Yay! Foster Fire is back and as good as it used to be.
(Kind of nice to be able to say that about anything!)
It's back.
And it's good.
Foster Fire has a bit of history behind it. When it first came on the scene - quite a few years ago - I adored it. It held up to my big beads, and was the ONLY bead release that worked with those curved mandrels from Inspiration.
However, I noticed that it stopped being great - and became mediocre - and I drifted away from it - trying and liking other bead releases over the years.
Then - this came back into my hands again. "Uh," I said, "Um - I have really liked this for awhile."
Try it again, I was urged.
The story is, briefly - that the original owner and inventor - Robin Foster - sold the business - and the new proprietor tinkered with the formula.
Ms Foster has now bought her company back - can't begin to tell you how often that happens! - and is now producing it again with the original formula.
So - does it work? Oh yeah.
It does need a little drying time - about 10 - 20 mins - depending on the humidity. I find that if the bead release is dripping wet - it will pop and fly off the mandrel - so let it dry a little before using the flame to finish drying it.
Or leave over night.
It will sometimes develop small cracks in the bead release when heated - and remember - I am using a big torch (Nortel Mid-range) - but they cracks don't open up and you can actually lay down the glass over the cracks without fear of the glass sticking to the mandrel.
It does stand up to the weight of the big beads - although the intense heat does seem to make the unprotected (un-covered) bead release more subject to breaking away.
Pulling the beads, however, is a dream. These slide off like they are buttered.
And this is a huge plus as far as I am concerned. I HATE pulling beads.
So Yay! Foster Fire is back and as good as it used to be.
(Kind of nice to be able to say that about anything!)
Monday, September 03, 2012
Torch Test: Bethlehem Alpha: First Impressions
Holy cr4p - this sucker pumps out heat.
The first impression of this torch is that it is a stylish and sexy piece of equipment.
My initial uses - this torch can really get things hot. It is a fairly fine flame - capable of a fine point - but very intense. It doesn't have the wide flame of my Mid-Range - which allows me to easily make an entire mandrel of beads - I can easily do 8 beads at a time on the Mid-Range. The flame width is about the same as the Nortel Minor - but more intense. You really have to turn it down or work further out if you want to work cooler.
I'm currently running it off 2 concentrators - a 9 litre and a 5 litre. It is certainly possible to boil colours that you didn't know could boil.
I think I'd actually like to have one of these mounted on top of my Mid-Range.
| Intense flame - making a mess of my bead release |
My first impression is quite favourable - I'll keep you posted as I go.
Saturday, September 01, 2012
CiM 506 Moana Ltd Run
Wow.
CiM Moana - described as a "teal opal" by CiM.
The sample beads are laying on my desk - catching my eye, over and over.
CiM has classified this with the blues - as opposed to the greens - and it is that shade of blue-green that you could argue all day that it belongs with the greens - until you put it next to a grass green - and then you put it with the blues - until you put it next to a royal blue.
Truly - right down the middle - this is a translucent teal - and it positively glows. The photos do not begin to do it justice.
Below, we have (from the Left) - a Marker bead in Effetre Petroleum Green (for reference), Self-coloured Moana, Self-coloured Moana with Ivory Dots (look at that edge pattern! Whoo hoo!) - and Moana over white.
Your monitor will vary - on mine - it appears bluer than it does on my desk - but so does the pet. green - so the relationship between the two stays the same.
This is a really, really lovely colour.
Thursday, August 30, 2012
CiM 304: Sunny Side Up
Yum! CiM 304 Sunny Side Up is a deep, streaky yellow - like egg yolks! It is a rich, warm colour - and goes a little bit darker and orangey-er than the unworked rod.
I wonder if deep heating it - to clear - would give you a transparent bead? Hmmm.
Perfect colour for the fall, or sunflowers.
Tuesday, August 28, 2012
Midnight Deserted
Just trying to recreate a bead that I made a few years ago.
As I remember it, it was:
Doesn't look quite the same though. Wonder what I've mis-remembered.
Keep notes, folks. Keep notes.
Here are the originals - in a necklace.
Hmmm - the more I look at these - the more I think it wasn't ivory. Maybe DaVinci? And obviously - some have white underneath. Hmmmm.
As I remember it, it was:
- clear core
- ivory encase one end
- Sasha's Silver the other - don't make the encasing perfect (holes in the encasing show as dark patches)
- mash
Doesn't look quite the same though. Wonder what I've mis-remembered.
Keep notes, folks. Keep notes.
Here are the originals - in a necklace.
Hmmm - the more I look at these - the more I think it wasn't ivory. Maybe DaVinci? And obviously - some have white underneath. Hmmmm.
Sunday, August 26, 2012
Brass Stamps!
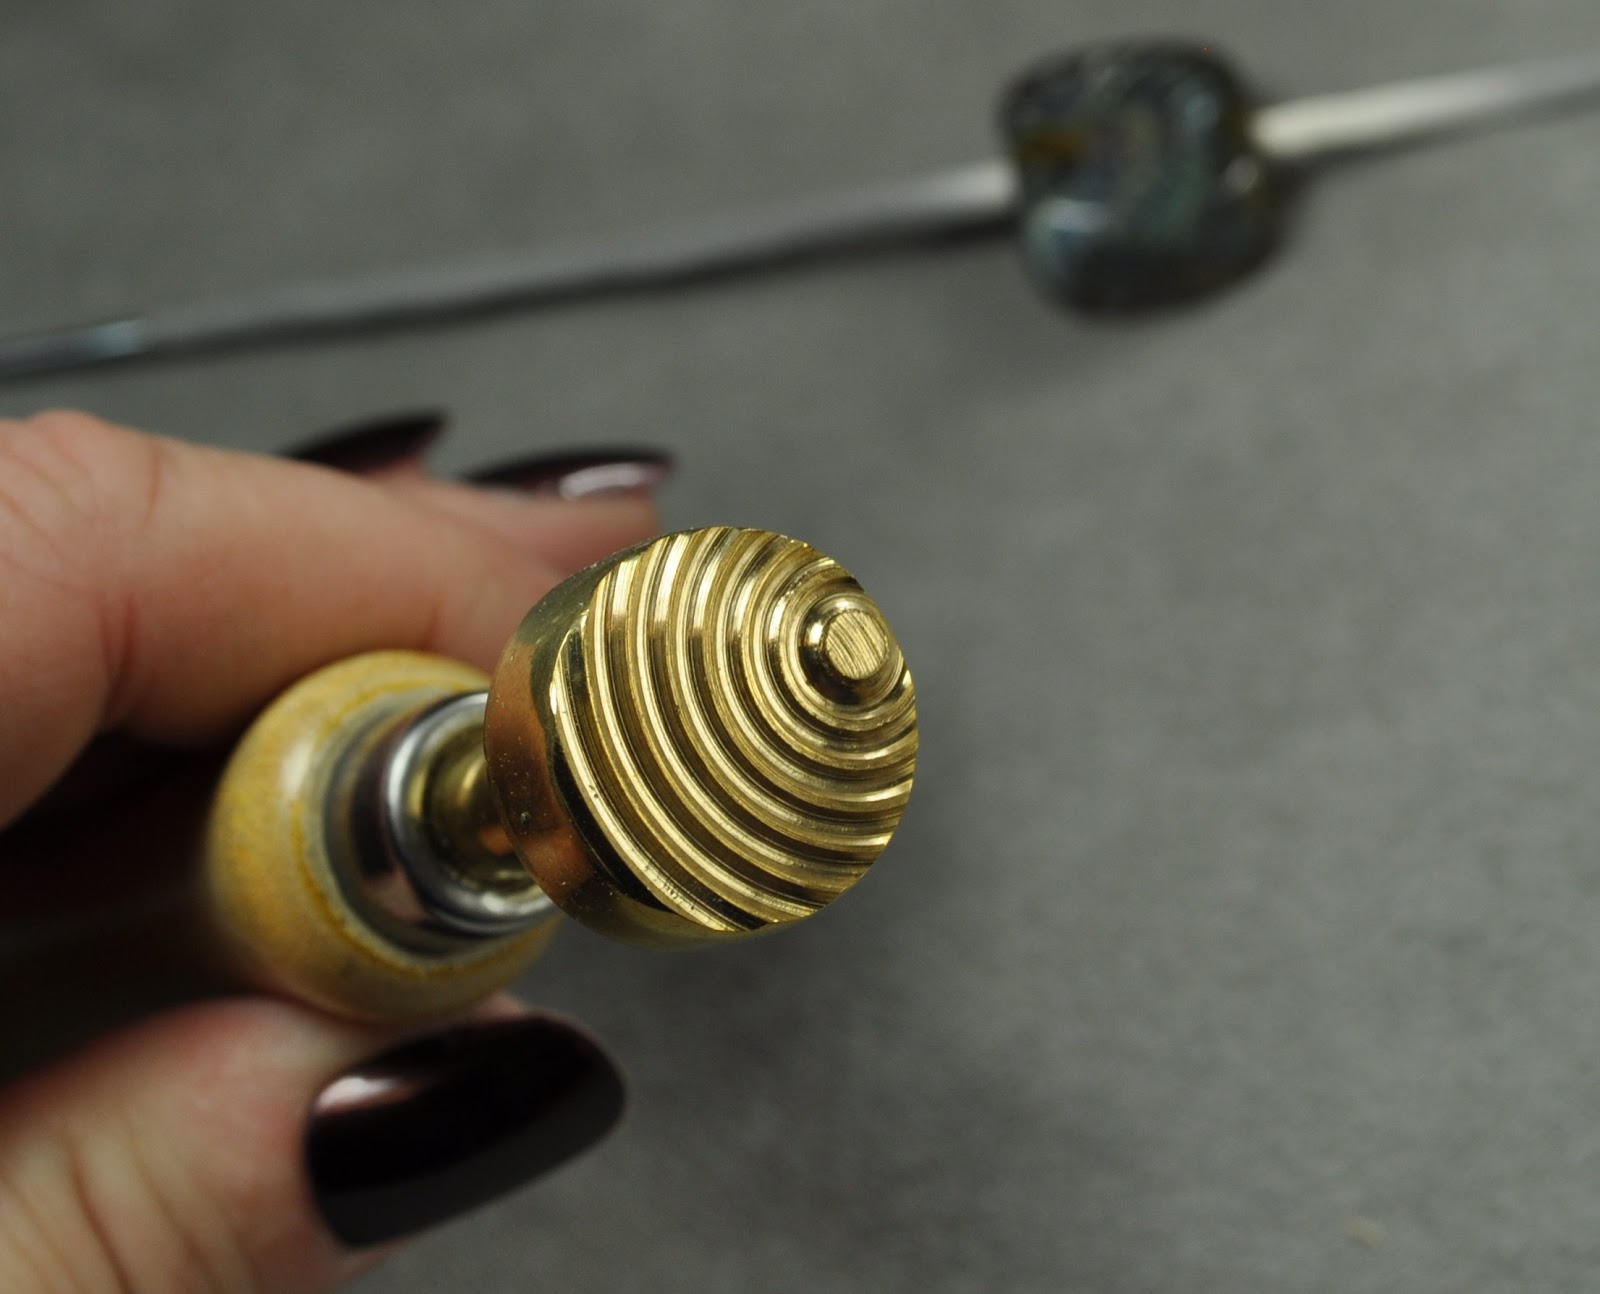
The more I use tools for stamping and pressing texture into glass - the more I like them. The very opposite, in fact, of my response to presses for shaping - which, the more I use, the less I like. ;-)
A friend brought this back for me from her travels - so no idea where it comes from. I just had time for one quick bead with it - but I'm definitely looking forward to using it more.
It really adds interest to a no-interest bead!
A friend brought this back for me from her travels - so no idea where it comes from. I just had time for one quick bead with it - but I'm definitely looking forward to using it more.
It really adds interest to a no-interest bead!
Friday, August 24, 2012
Experiment: Hadar's Quick Fire Clay - Copper on a Lampwork Bead
Some of us will stick anything on a bead. After all - if you don't try - how will you find the next wonderful thing?
Metal Clays - if you haven't been paying attention - have come a long way - with quite a few competing brands and more options than just Fine Silver anymore.
This is a fine powder - you mix it up yourself - from Hadar Jacobsen.
I poured some into a frit tray, made a white bicone, and then rolled the bead in the clay powder.
It needed a lot of heat to get it to stick - much higher than just getting frit to stick to a bead.
Heating the copper clay powder after applying it to the bead made the copper powder go black - no surprise there.
I then encased it, and finished shaping it, and kilned it.
Two observations: One is, I got pretty colours - intense dark reds and some purple blue.
And the other is - it is massively incompatible. Whoa-nelly - just look at those cracks!
Although - they just appear to be in the clear. I wonder if I did it again and didn't encase it ... .
PS. I don't know if it gives off toxic fumes. It's didn't smell particularly noxious - but that's not much to go on. It flared up and burned with a greenish flame at one point when I applied it to the bead, but not for more than a half-second. But the point is, I don't know if what I did was stunningly unsafe - if you choose to try this or other things like it - you do so at your own risk.
Metal Clays - if you haven't been paying attention - have come a long way - with quite a few competing brands and more options than just Fine Silver anymore.
This is a fine powder - you mix it up yourself - from Hadar Jacobsen.
I poured some into a frit tray, made a white bicone, and then rolled the bead in the clay powder.
It needed a lot of heat to get it to stick - much higher than just getting frit to stick to a bead.
Heating the copper clay powder after applying it to the bead made the copper powder go black - no surprise there.
I then encased it, and finished shaping it, and kilned it.
Two observations: One is, I got pretty colours - intense dark reds and some purple blue.
And the other is - it is massively incompatible. Whoa-nelly - just look at those cracks!
Although - they just appear to be in the clear. I wonder if I did it again and didn't encase it ... .
PS. I don't know if it gives off toxic fumes. It's didn't smell particularly noxious - but that's not much to go on. It flared up and burned with a greenish flame at one point when I applied it to the bead, but not for more than a half-second. But the point is, I don't know if what I did was stunningly unsafe - if you choose to try this or other things like it - you do so at your own risk.
Monday, August 20, 2012
CiM 206: Macaw Ltd Run
CiM 206 Macaw Ltd Run is a transparent orange, that needs to be struck to reach it's full colour potential.
This bead was made and put directly into the kiln with no striking. It's very similar in colour to the struck Lemon Drops (see previous post.)
From the left, we have self-coloured, over clear (interesting - again, more intense colour - like the lemon drops. Must be something to do with the additional heating it takes to melt the encasing layer smooth.), and over white.
The layer over white is really nice - nice poppy orange - I meant "poppy" as in colours that "pop" - but now that I think of it - it is very like those bright orange California poppies that grow by the side of the road.
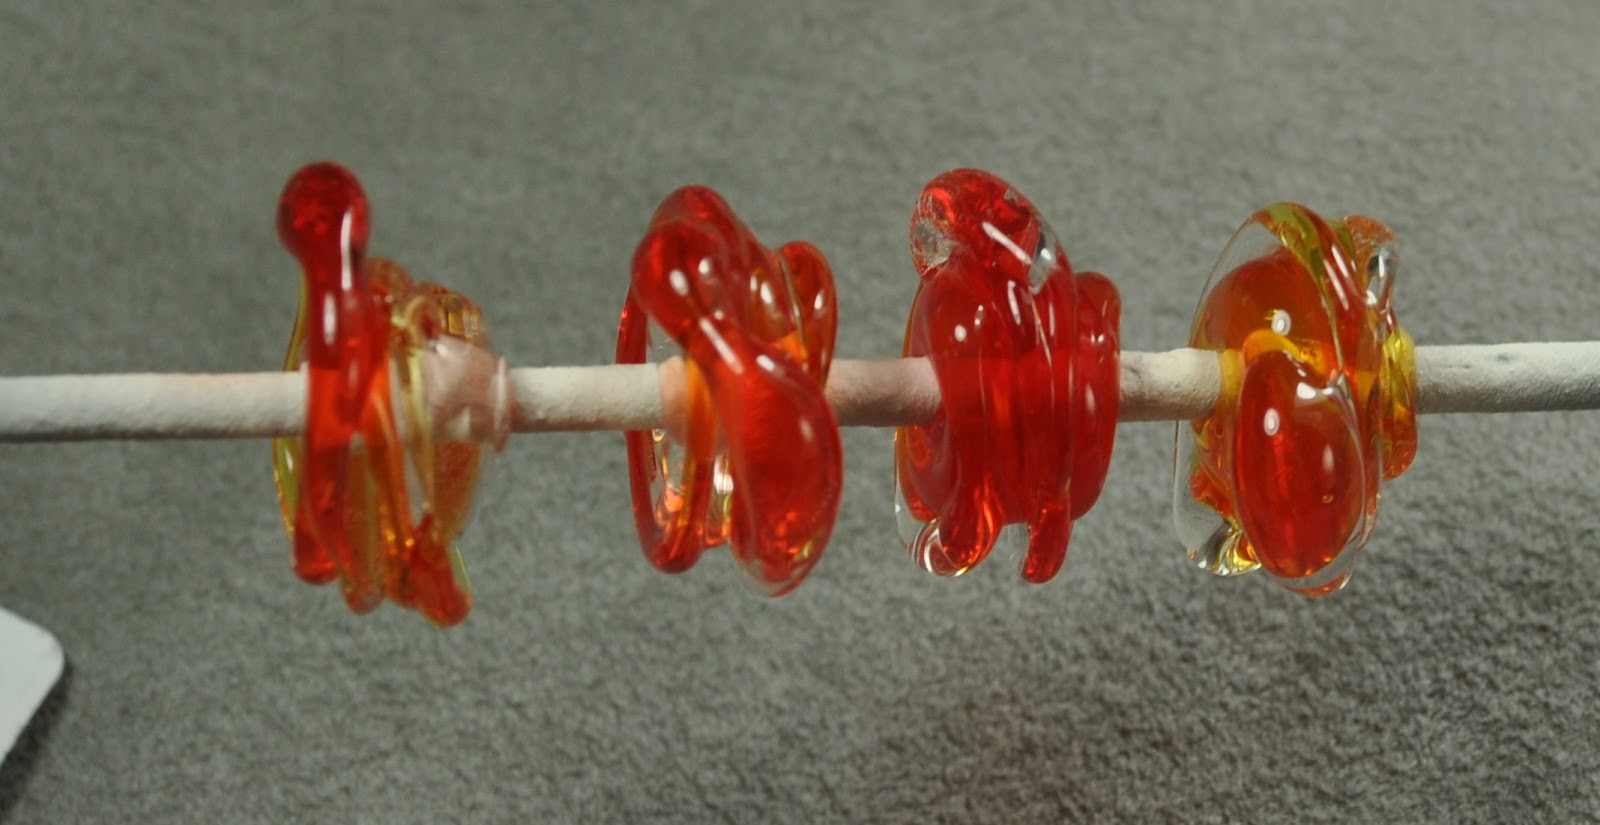
And these, wildly textured beads, (left two are Macaw over clear, right two are Clear over Macaw) - range from orange to red, depending on how much heating and cooling they got. If you wanted some variability and were going for a fire-opal look - I think this is worth playing with. I see no signs of browning or liveriness, and I don't see it going cloudy either, although, this is hardly a fair test of that.
This bead was made and put directly into the kiln with no striking. It's very similar in colour to the struck Lemon Drops (see previous post.)
From the left, we have self-coloured, over clear (interesting - again, more intense colour - like the lemon drops. Must be something to do with the additional heating it takes to melt the encasing layer smooth.), and over white.
The layer over white is really nice - nice poppy orange - I meant "poppy" as in colours that "pop" - but now that I think of it - it is very like those bright orange California poppies that grow by the side of the road.
And these, wildly textured beads, (left two are Macaw over clear, right two are Clear over Macaw) - range from orange to red, depending on how much heating and cooling they got. If you wanted some variability and were going for a fire-opal look - I think this is worth playing with. I see no signs of browning or liveriness, and I don't see it going cloudy either, although, this is hardly a fair test of that.
This is a less saturated colour than the transparent reds that we have seen from CiM recently - and seems to have the potential to range from orange to red. I think it has a lot of promise and I'm looking forward to playing with it some more.
Saturday, August 18, 2012
CiM 303: Lemon Drops Ltd Run
CiM 303 - Lemon Drops - a transparent yellow - not as intense as Effetre's Electric Yellow, but also appears to not be inclined to develop a "cloudy" or milky appearance.
It's more of a golden yellow.
From the left (picture below), we have a self coloured spacer, Lemon Drops over clear (interesting that the colour is more even!), over white (cracked - probably due to my striking and cooling and striking and cooling, etc.), and the end bead on the far right is unstruck - just made it and kilned it.
As you can see, multiple cooling and heating cycles will turn this glass orange, in varying degrees. They are showing a little redder on this monitor - the deep orange on 3rd from the left is less intense in real life- like orange crush mixed with ginger ale.
The rods, as you often see with striking colours, has a "thread" of colour down the middle - which can help you identify it when you have lots of random transparents laying around on the bench.
And here - where I just went ahead and used the glass to make a Wave bead, it was very nicely behaved. I made no effort to strike it. This particular shape is worked fairly cool as well.
I wonder what it looks like over silver foil? Hmmm.
It's more of a golden yellow.
From the left (picture below), we have a self coloured spacer, Lemon Drops over clear (interesting that the colour is more even!), over white (cracked - probably due to my striking and cooling and striking and cooling, etc.), and the end bead on the far right is unstruck - just made it and kilned it.
As you can see, multiple cooling and heating cycles will turn this glass orange, in varying degrees. They are showing a little redder on this monitor - the deep orange on 3rd from the left is less intense in real life- like orange crush mixed with ginger ale.
The rods, as you often see with striking colours, has a "thread" of colour down the middle - which can help you identify it when you have lots of random transparents laying around on the bench.
And here - where I just went ahead and used the glass to make a Wave bead, it was very nicely behaved. I made no effort to strike it. This particular shape is worked fairly cool as well.
I wonder what it looks like over silver foil? Hmmm.
Friday, August 17, 2012
Double Helix Opaque Speckled Luster - OP-509
Another Speckled Lustre from Double Helix - due to be released on their website today, along with the other test batches from the gathering. This is OP-509 - and like the 507 - the glass rods have a texture that you can feel. It's not unpleasant - not scratchy - just a very definite texture.
This first bead is a core of clear (I often put these expensive glasses over a base of something inexpensive to make them go further), encased with 509, and kilned. No striking or reducing at all. It went into the kiln a creamy colour with streaks of brown, and struck in the kiln to a deep chestnut brown - which looks blackish here - and in life - it is pretty dark.
Next up - both with a clear core and encased with 509, and struck. When struck - they were a glorious golden orange - but in the kiln - they have continued to strike to a deep topaz colour, and also develop a wonder metallic lustre.
Again - clear core - encased 509, cooled, and reduced. They were both glorious going into the kiln - rich golden orange and metallicy. They got quite a bit darker in the kiln - I think that they are over clear helps - as this glass is transparent - so you get light coming through from both sides.
Now this bead is a clear core, encased 509, reduced, BUT it was reduced WHILE IT WAS STILL GLOWING.
Notice the opacity? That's what we call "muddy." Reducing a bead that is still glowing gives you different results to reducing a bead that has been allowed to cool to the point of not glowing any more (hold the bead under the table so that you can check if all the glow has gone out of the glass.)
It's still a pretty cool bead.
This bead is: clear core, encased 509, struck, reduced on the left end of the bead, and then the whole thing encased in clear. Remember - there are just two glasses in this bead - and one of them is clear.
And for this final bead - clear core, encase 509 - pretty thin layer - some Rubino Goldstone stringer, shape and mash it, stamp it with a brass spiral stamp, let it cool, reduce it, encase it - using a big gather to cover the entire spiral stamped area at once, then the same for the other side, and fill in the encasing around it, and shape.
Yummy.
Thursday, August 16, 2012
Double Helix Speckled Lusters: OP-507
Woohoo - another brand new colour to try out! This is a specked lustre from Double Helix - listed in their brochure as OP-507, and available from them as of Aug 18. This batch is labeled "7.12.12"
This glass has a texture to the rod - those whitish speckles you can see in the photo - you can actually feel - like glassy concrete.
This first bead is unstruck and unreduced and un-everything. I wanted to see if the speckles stayed - and I really didn't expect them too - but yes - you can see a sort of starry night effect. This is a self-coloured bead - just wound it and kilned it.
For this bead, I made a core of clear, and encased with 507. I tried striking (cooling and reheating) - with no response, so I then reduced it. I over reduced it, and it went rather muddy, so I unreduced it, and re-reduced it, with better results.
For this one, I made a base of clear, encased it with 507, marvered it, and let it cool to not glowing, and then gently reduced it. This photo does not begin to show how amazingly reflective this bead is - it is oil-slick colours and mirror-bright. A very, very dramatic lustre effect. I'll try re-shooting it once I have it off the mandrel and cleaned.
This is, again, a clear core, encased with 507 - some of with was applied in a slight reducing flame. It was reduced, and encased with clear - making an effort not to un-reduce it when encasing (keep it out of the flame, much like encasing silver foil.) Finally - fine silver wire was wrapped around the bead and melted in - to form the silver dots.
This was the same technique again. Clear core, 507, reduce, encase, silver wire.
Pretty nice, eh? Definitely loving this one - wonder what they are going to call it?
Subscribe to:
Posts (Atom)