Friday, May 25, 2012

Glass on Stainless Steel Wire

You could call them headpins - but - um - big much?


 Uh, yeah - everything I make is super-sized.

Ok - the point is not the glass-tipped tiny headpins, I was thinking more of making things on the ends of wire and twisting them into bunches. Bugs, flowers, birds, etc. Anyway - what I wanted to find out was, could I use the new Stainless Steel Wire from Artistic wire in the flame and melt glass onto it.

Was it, in fact, real stainless steel?

First up, I emailed Artistic Wire and asked them if it was really stainless steel, or was that just the name of the colour. I got a response within hours, and they confirmed that their Stainless Steel wire is, in fact, Stainless Steel. (Also, their Brass is brass, and everything else has a copper core.) I also know, from previous experience, that most of their products have a thin nylon coating to prevent tarnishing - but I didn't ask about that.


I just cut some lengths and started working in the flame.


No noxious fumes or ghastly odors, so we seem to be good on the no-coating front.

Next lesson learned was that  the skinny, and not completely straight wires are tough to hold, and just about impossible to rotate in the hand. I wound up winding the glass around the wire, instead of holding the rod in one place and rotating the wire.You know, exactly what will get you into oodles of trouble if you try to make beads that way.

I then figured out that I could hold the wires in my rod grabber, and that was more comfortable. The wires still weren't straight - so rotating was now possible, but pointless.

But wrapping the glass around the wire works fine.


How to:

  1. Cut your lengths of wire
  2. Put a piece of wire into the rod holder if you have one
  3. Heat the end of the wire to a light glow (you can melt through the wire, just like a skinny mandrel, if you work at it, but light heating is fine.)
  4. Make a gather
  5. Touch the gather down on the wire, in from the end of the wire
  6. Wind the glass around the wire, wrapping around until you run out of glass or it goes stiff. 
  7. Heat the glass on the wire to smooth
  8. Repeat until you have a reasonable size that you like, and have worked your way over to the end of the wire
  9. Build some glass out on the end - covering the end of the wire and building up a cap
  10. Roll in a frit if you like, and melt in
  11. I heated these and pointed the far end of the wire at the ceiling to let the glass droop into a nice droplet. 
  12. Put the finished "headpin" into the kiln. I put on gloves, reach into the kiln with the wire still in the rod grabber, and let it go onto the floor of the kiln. (Edit. I now grab the wire with a pair of tweezers and use the tweezers to transfer to the kiln.)
  13. Repeat
They are fun, easy, and forgiving. You can mash the glass with some of your fancy mashers. Hey - how about using some of those brass presses that you have hanging around?

So, the verdict is, "Yes - it is real stainless steel and you can use it in the flame." Kewel. 

Save

Wednesday, May 23, 2012

Recycling Beads - Results

And here are the results of the broken bead fusing test.

Pretty awesome, I'd say! 


I was being lazy, and almost none of these were cleaned before fusing. I can grind that fused bead release away easily enough, probably use a flat lap to do that. However, I do observe that the half tubes of bead release have kept their shape, and so these still have a raised area. You could use the knowledge of that to your advantage, I'm sure. Maybe in deliberately creating a hollow or ridge or raised area, or open space. 


I seriously think these have potential.

Monday, May 21, 2012

Cracked Bead Recycling

This is a re-post from the Beadful Life - I contribute regularly to the blog there too. 


Here is a little peek at a project I'm doing today. What to do with the cracked beads.

Beads crack because they get too cold (while you are admiring them or you are making too many at once!) before they go in the kiln. Perfectly nice beads, cracked in half. Some really nice beads, cracked in half. Such a shame!

So when you collect enough of them, you can put them in the kiln and fuse them - melt them into cabochons, which will flatten the backs out and take the sharp edges off.

I'm sure there are real fusers out there who can talk about this at great length - I just melt glass in the flame, so I'm not doing anything fancy.

If you have a collection of half beads and want to try this, here's the low-down.


Grab a kiln shelf - one may have come with your kiln, otherwise, get one from your kiln supplier, glass supplier, or a ceramics place. Make sure it fits in your kiln with room to spare. Everything gets bigger when it is hot.

Get some fibre paper, same sources as above. Cut a piece of the paper the same size as the shelf, and put it on the shelf. It probably came in a roll and wants to curl - once you have the beads in place, they will hold it down, so just weight it down for now.

Choose beads of more or less the same size, or at least, thickness. If you have super thick beads and thin together, by the time you have flatten out the fat ones, the thin ones are going to be too thin, I think. 

Make sure your bead halves are clean and dry. You can grind off the bead release that might still be on them, or leave it - if the glass is opaque and you aren't going to use them so that the back can be seen, who cares. Otherwise, remove it. Not that I was that ambitious this morning.

If you do leave bead release on them, don't have it be damp. Damp + high temps = steam = bad things in the kiln.

Arrange them on the shelf, with lots of room.

Put them in the kiln. They are really small - so you can just zoom up to full temp. Ramp up at full speed to 1600 F.

Start peeking at about 1350 degree. Open the kiln door and have a quick look.  You probably won't see any movement. You will notice it is hot and the glass is glowing.

Keep checking, every 30 - 50 degrees. You'll notice they are rounding a bit around 1420 +. Keep going until you think you like what you see. These in the picture went up to about 1480.


When they are done, you want to "crash cool" to 1000 degrees. This helps to prevent accidental devitrification.

Crash cooling consists of opening the kiln door and letting the temperature drop.

When the kiln gets down to 1000, then run a regular annealing cycle, i.e. hold at 970 for 15 mins, ramp down 100 degrees per hour to 815, hold 30 mins, ramp down 100 degrees per hour to 500, and shut off, or whatever you prefer.

You may have to open the kiln door and cool again, because as soon as you close it - the temp will climb back up. Some kiln controllers get a little upset if the temp climbs to more than 100 degrees above what they are set for, so you might see an error message. If so, just restart your annealing cycle again.

The above picture was shot at about 800 F - no glow on the glass.

I'll show you the results when they have cooled down. Too bad I didn't remember to shoot them before starting the experiment.


Saturday, May 12, 2012

Spiral Tool

This is a cool tool that totally rules, it will make you drool.


I LOVE this tool - I am using it on everything. It's just a simple spiral. It works well - doesn't tend to stick to the glass, it just totally rocks.

This was my first use of it - on turquoise and copper green - if you care. 


I forget what these were - Sasha's silver on the bottom and Dalai Lama on the top, maybe?
 This is Dalai Lama on the top, and not sure about the bottom. The Dalai Lama struck beautifully - best I've ever gotten - probably due to the rapid cooling. To make the spiral tool work on a hot, soft bead, I place the back of the bead on torch marver. Here too, I started adding the wavy Micheal Barley tool.
  Here we go again - spiral and wavy. The bead itself it Vetro Black and Ivory, with all 4 of the frits I've been playing with lately (TAG Taxco and Deep Purple, Belladonna Royal Purple and Honey Glaze). Melt in, spot reduce, clear encase, mash, spiral.


 This is also all 4 frits, on Vetro black, encased, mashed and spiraled.


White core, honey glaze rod, dichro, clear encase. Let drip, mash, apply spiral. 


Here is the spiral again, also the wavy tool. The spiral is awesome. I'm putting it on everything. There's a serious danger of me completely overdoing it. How out of character is that? ;-)


Friday, May 11, 2012

More of the Beads from the Class - w Jeri Warhaftig

As I did with the classes I've taken in the past few years, I'm sharing what I made in the class. Not because they are wonderful - but because they are first beads and learning experiences.

And so that I can come back and look at them later. ;-) And maybe snicker a little. ;-)

Brace yourself - there's a lot of them. 

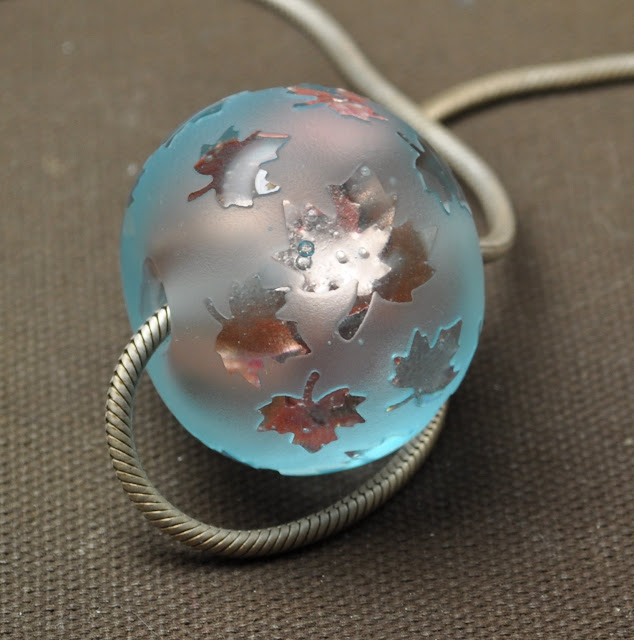
Embossed copper inclusions - you saw this bead a couple of days ago - so I'm just adding it here for completeness. 


 More copper inclusions - and learning to keep them looking coppery and shiny, instead of shifting to red. (Background glass is CiM Kryptonite, btw.)


 Getting there. Bead release broke on me though.

 Nice, but still not what I was trying to do.


Bingo! Now it's starting to work for me! 


This is the same bead, after sandblasting, btw. 


Working with Dichro. Again, bead release broke on me and so I didn't finish it. 


Which made it a good bead to test the sandblasting on. No sense of loss if it messes up! Lesson learned from this one - much more masking required.


We explored the ol' enamel + copper foil effect.  Base is Kryptonite, white enamel, copper foil.


 This is a hollow - decorated with the same enamel and foil effect, and sandblasted.


Dichro on red bead.  Happy with this one.


And on a leaf. Yeah - it's blue leaf. 
 

We also practiced encasing dichro on coloured backing. Here's the leftover chunk. 


We played with putting objects into a key mandrel. 


Silver foil + rubino effect. 

The sandblasting totally saved this bead - it was butt ugly. It was a hollow I lost control of, gave up and mashed and rolled in frit.  It is now moderately interesting.


This is what my workstation looked like after a few hours of my toolbox barfing out tools. 

(Yes - I moved the Tim Horton's bag before I lit the torch.)


 It's ... black. Actually - it's enamel.


And this is the same bead, after masking and sandblasting.


 And the other side.


 Other assorted beads. 


 So help me - all I could think of was this reminded me of those acrylic toilet seats with the plastic fish in them. 


Urg. This was a swing and a miss. 


 Hey - there's the Taxco frit on the obsidian base again!


And a proof of concept - dragons wrapped around a bead - and sandblasted. Needs work yet - but shows promise. 


Thursday, May 10, 2012

More Reactive Frit Combos

More frit combos. I think there is something to combining these reactive/reduction frits - as the unpredictability of the chemistry from the frits reacting with each other as well as the base glass give even more extraordinary results.

 This is a base of CiM Obsidian, with Belladonna Honey Glaze frit on the left, and BD Royal Purple on the right. Notice the overlap in the center.


BTW - CiM Obsidian is my new "must-have" glass - for it's reactions with silver and silver glass.


This is the combo as above, Obsidian, with Honey Glaze on the left and Royal purple on the right, but reduced.


 And this is a base of Vetro Black - with Honey Glaze on the top, Royal Purple on the bottom, reduced lightly, encased (out of the flame - to avoid unreducing) and mashed.


Awesomeness!