Saturday, July 31, 2010

Awesome Tutorial in Flow Magazine

And a big thank you to Christian Arnold for his Dragon's Eye tutorial in Flow Magazine. Even though the tutorial is for boro - I did it in soft glass.

Check out my first attempt!


How cool is that? Yeah - I got the iris all swirly - but in the context of a dragon's eye - it works. The first person to bring me a live dragon that has different eyes can complain. Besides, if any of you read any Anne McCaffery's Dragon Rider series - you may remember the description of the dragons where it would say "so and so's eye whirled angrily ... " - well maybe this was what that looked like.

I used Double Helix Nyx for the stringer for the iris. Hades black for the pupil and base, and Lauscha clear for the lens. There is a layer of light ivory around the the very small white of the eye, and skin and eyelid are CiM Gunmetal.

For the actual tutorial, you'll have to get your own copy of Flow Magazine. It's the Summer 2010 issue. You can get it from their site.

And while you are there - subscribe. It's an awesome magazine!

PS
just as a follow up - I've continued to make more of these. You can see them here on my webshots album. They make great wallpaper too.

Thursday, July 29, 2010

CiM 717 Khaki


Well - who knew? Here's a colour of CiM I haven't tried! Not even a new colour, but an old one. This is CiM Khaki.

I went looking for a grey for a horse bead, and I was wishing I had more of the CiM African Grey, but I know I am out of that. I was hunting through my CiM stash - "Oo, that looks like a grey," sez I to myself. "But it says Khaki. Better go look it up on the blog, before I make a green horse." And lo - it's not there. Ok, better try it out.

When I think "Khaki" - I think of a greener colour - although, now that I google it, Wiki has a very nice entry on the general confusion surrounding the colour. My experience with it would have come from home and my mother, who was an officer in the British Army and the British military uses a greener colour.

So - in common experience in North America - apparently Khaki is thought of more grey-like or beigey. Fair enough - no one said my experience of the world was common!

On the left, a self coloured bead, a little streaky. On the right, rolled in white frit (Effetre frit).

Here - with a stringer of Hades. Nice feathering.

And here, with a stringer of Triton, and reduced. Nice fuming effect on the Khaki. Kind of makes it ... Khaki-coloured. ;-)


Anyhoo - I think it will do nicely for the horse bead.

Tuesday, July 27, 2010

Essential Tools: Brass Stump Shaper

Another "don't leave home without it" tool. The Brass Stump Shaper. Mine used to be shiny. But I use it - a LOT.

This is the smaller one - the 1 x 2 inch. I find the larger ones are too large and too heavy for me. But this little baby - great for all sorts of things. The knife edge - excellent for hearts - dividing the top. Absolutely essential for the horse beads.

The two sides are different shapes - with different planes and angles. There is a curved edge and a knife edge, and the end is sharpened too.


As you can see - I've had mine for a while - probably almost as long as I've been working glass - it was one of the first tools I sprung for! It has seen a lot of abuse - and it still going great! Before I discovered I was a tool junkie. Ha - lookit the monster I've become!

When it comes to getting in beside the bead and straightening out a deformed and bulging side on a spacer - you can't bead the Stump shaper. You know - sometimes when they look lopsided, but there is just a little bulge - if you just touch that bulge and flatten it - then voila - poifect! Try not to hit the bead release while doing this - makes it more prone to cracking. I try to avoid disturbing the bead release at all costs, actually. (Crummy bead to show as an example - just wanted to show you what I meant by "touching the side.")


BTW - for those of you wondering about the name - it was named for Loren Stump - the person who designed it, and has nothing to do with making limbless human figures or trees. ;-)

Sunday, July 25, 2010

Essential Tools: The Rod Grabber

Such a simple tool - but I don't leave home without it! I didn't actually think this tool was that important to me - but then I didn't take it to the Happy Hour studio night - and discovered how lost I was without it!

Absolutely fantastic for using the short ends of expensive $100/pound glasses. For using the short ends rather than having to rummage through the glass in the middle of a bead. (Rule of thumb - rummaging gets you burned. Rule of burned thumb, actually)

Sure - I can stick a short end onto another rod of glass as a handle with the best of them, but this is faster, and often, serves my purpose better. It's more about the convenience than the economy of using every last little scrap.


Love this tool - consider this one a must have.

Saturday, July 24, 2010

Effetre 262 - Powder Pink - old batch vs new batch


Effetre Striking Powder Pink. Not what you usually think of when you think pink.

More of a flesh tone, really - within the rather limited palette of Caucasian of Northern European Descent and/or British Isles. ;-) With perhaps a bit of bruising.

I have two batches here.


In this second pic, the rods at the top are the new batch, and the rods at the bottom are the old batch.

The new rods are rougher in texture - you can see the texture in the picture, and significantly shockier.

When it is molten clear-hot - you can see that it is full of bubbles. If is was transparent - it would be ghastly.

You can also see little dots of something - like whatever they used as a colourant was a little bit large and did not get mixed in well.

The older batch is the dark, peachier rods on the bottom.

But - is the end result the same?

The top bead in this next pic is the new batch. Both beads went into the kiln partially struck - the bottom bead (old batch) was struck more on the left, the top bead was struck more on the right (new batch).


The colour is richer in the old batch.

Another view of the same two beads - the one with the little green marker is the old batch.

But it is hard to say that they got the same amount of heat.

This bead is half and half - the old batch on the left and the new batch on the right. At this point - it became obvious the new batch was harder to work - as it kept shocking and popping the end inch off the rod as I tried to make a gather.

The dots are CiM Hades, tiny little dots, loooots of heat.


This is the old batch on the left, and the new batch on the right. The dots are Ivory and Lauscha Turquoise, with Hades black dots. The Ivory has bled, the turquoise has reacted.

When worked like this - I don't see a big difference in the base colour - so it may be that colour wise - it might take a little longer, but you can probably get the same color from the new batch as the old batch.

But given that the new batch is shocky and scummy - even if you can see it - it feels like a swing and a miss in the quality control department.

Once again, it feels like the Italian manufacturer is passing off seconds on the North American market. (But I could be wrong - they may be selling second rate product to everyone.)

Buy the older batch first when you can. ;-)

Friday, July 23, 2010

Lauscha - What to try?

A student asked me the other day which colours of Lauscha she should try. She thought she would get some, but which colours?

Well - for me - starting to buy Lauscha glass was all about filling in colours that I wanted that were missing from the Italian color palette. Most specifically - transparent purple (blue purple, not a red purple) and transparent red.

But over the years - I tried a few more colours, and some are real winners.

As to showing you that purple - well that was a few years ago and I seem to have blended all my purples together. If I could find one I can definitely ID - I would post a picture - but I do remember that it was the Glass Daddy Purple Transparent, and it was a truly beautiful color - absolutely everything I wanted.

After that, the transparent red was the next thing I wanted. And I adore the Lauscha transparent red so much, you pretty much have to break my arm in order to get me to use another transparent red.

But there are other pretty colours. Below, from left to right, Wedgewood, Transparent Light Red, Buckhorn, Yellow, Turquoise, ...


and Olive.


The Wedgewood is a lovely purplish blue. The buckhorn goes opaque if it cools quite a bit before kilning - I use it in my horse beads and I see the difference from the areas that are allowed to get cool to the parts of the bead that stay warmer. The yellow is a wonderful, happy, sunny yellow that stays the color of the rod it come in! And the turquoise does not develop that dull grey layer that you see on the Effetre turquoise. However, it reacts so strongly with ivory as to be quite unattractive. Instead of a light grey line, you get a big ugly smear. And the olive is a slightly streaky color.

And of course, there is the clear. The famous Lauscha clear. The holy grail of soft glass clear.


Wow. Isn't it beautiful? Let's look at another picture.


All together now, ooooh. Aaaahhhhh.

Dazzling, isn't it? Oh, it is soooo worth it. It is somewhat stiffer - and I like that - it stays where you put it, but some of you may like the waterier clears. For sculptural and encasing - it is gorgeous.

The Lauscha does tend to want to be kilned at a higher temperature - put it in the kiln glowing, and garaged higher - about 970F and annealed higher and more slowly.

And occasionally you will find a color/annealing combination that makes the clear unhappy. Usually more heat in the annealing or a longer, slower anneal solves it.

They have also done some very nice transparent pinks - but they seem to come out in such limited quantities, never to be reproduced, that I would rather look to CiM for pinks for production work. At least you know their colours will be around a year later. Buy and try the pinks for sure - but don't lose your heart to them!

Thursday, July 22, 2010

Manmade Ruby


In the spirit of trying the coloured Aqua Cubic Zirconia - here is a man-made ruby.

I'll concede that the bead is a bit weird - it might have been better to have a game plan going it - but on the other hand - hate to sink a lot of time into it and have it not work out because the ruby burns.

This was dropped into a pre-made depression. It is not encased.

Seems to work just fine.

Wednesday, July 21, 2010

Polariscope - A new Tool


I've been doing, or attempting anyway, more sculptural items lately - and in particular - working off mandrel and trying to get my head around the way of working - in which you work from one end to the other, never going back into the flame and allowing the glass to cool to room temperture. (Annealing happens later.) This allows you to work much larger and not have to keep the entire piece warm - but I have to admit - it is something of a leap of faith after working with a "must keep the glass warm" mindset. Old habits die hard - and it is such a reflex to keep flashing the item into the flame, that to not do it requires conscious thought.

One of the tools I thought I would use to try to get my head around this a polariscope.

A polariscope allows you to see the strain in clear and light transparent glass. Perhaps this way I can get a better sense of where I am creating strain in the sculptures, and adjust the way I am making them, if necessary!

This is the polariscope - some assembly was required. The thing to remember is the blue dot on the base glass lines up with the blue dot on the top screen. The object to be viewed goes between the top glass screen and the backlit screen of the base. It included a light bulb - and I have to say - whatever else comes of this experiment - I am in love with the lightbulb! A halogen bulb in a heavy, heavy glass bulb. It pumps out a tonne of heat and it a lovely, bright light.

Oh, I miss real light bulbs - I'd soon raise bees and make my own beeswax candles than use compact fluorescent bulbs.

Testing the Polariscope

Firs - I wanted to check that it is all set up right and working correctly. I took some clear plastic, a baggie as a matter of fact, and viewed it under the polariscope. I know that it should look relatively even, like this. I have to admit - this plastic seems fairly stressed to me. But evenly stressed.

Then I took the baggie and tore and pulled and poked and stretched it. Now - it is quite a different picture - you can clearly see the stress in the rainbow patterns in the middle.

Next - let's check out some rods of clear - these have been used, and so the ends are somewhat stressed from heating.

Next - let's look at some actual stuff. This flameworked sculpture has been through an annealing cycle - so I would expect this one to look fairly good. And - in fact - she does. (That bright rectangle is the flash from the camera - nothing to do with the polariscope or the glass being viewed.)
This one, however, has not been annealed yet. It doesn't look too bad, but I can see a definite difference, especially from the upper torso to the lower, and the arms.

I don't really know how to interpret what I am seeing in greater detail yet. Guess I'm going to have to do more research. In the meantime - gotta love those rainbow colours!

I'll keep you posted as I learn more.

Monday, July 19, 2010

Using Colored Cubic Zirconia in your lampwork beads

Up till now - I haven't really played too much with using colored CZs in lampwork. (If I want color - I just put a dot of transparent color over the encasing.) Lately - I have been experimenting with using larger and larger CZs, and with not encasing them, to great success.

I have been using 4 mm Round CZs, unencased, and they have been working fine. Sorry - can't show you pics - it's a top secret project.

I did try a 10 mm heart CZ - and I could successfully make an impression in the glass - but couldn't get the stone hot enough to stick and couldn't find my tweezers to pick it up and place it in the depression. Note to self - always make sure the fine tweezers can be found before starting in with the CZs.

I'm pretty sure that gluing the stone into the hole it left will work. As soon as I pull the bead and clean it - I'll show you that one.

However - what I did want to share with you is that I thought I would try some colored stones. I decided to try some Aqua colored CZs. Aqua is one of the trickier to make CZs - and consequently - highly expensive - more so than regular colors. I read Heather's test of the same CZs for firing - and how they went brown. Additional testing however revealed that they retained their color when fired in activated charcoal to reduce oxygen. Interesting. So - encasing perhaps?

This was the first test subject. On the side that I did not encase the CZ - sure enough - it went slightly greenish/yellowish.


On the other side, immediately encased - it retained it's colour. They are not a very strong aqua colour - so they tend to look clear. Except that I think they show up better on the clear glass than if they were actually clear.


Here is a another spacer - the brownish smear is a reflection from a CZ that burned (reduced?) on the other side of this bead.

Here is the good one and the discolored one, side by side. The discolored one went on at an angle and had the edge poking up, unknown to me, until I saw the colour change. It's actually not inherently un-attractive.

More success with the second spacer - although you can see that I didn't get them all encased quite quickly enough. There is a hint of discoloration.


So - aqua CZ's need to be encased right away if you don't want them to turn into amber CZs. ;-)

Tuesday, July 13, 2010

Effetre Caribbean

Here's another interesting new glass from Effetre. Again - like a cored cane with a transparent centre.


This one is a blend of greens and turquoise, and it very nice. Not nearly as dramatic as Calico Cat - but nice.


Does the turquoise react with Ivory? Why, yes it does!


As I went to make the first bead, I noticed some reduction - so I turned the oxygen up. But, a few beads later, what if I deliberately reduce them? Then what? Well - check this out!


And from the other side.


Ain't that cool? These were worked in a soft, bushy flame, as opposed to reducing afterwards.

Caribbean - has some drama to it after all!

Monday, July 12, 2010

Effetre Calico Cat

I love this - oh my. Gonna buy me pounds of this!

This glass is lyrical - evoking all kinds of memories and ideas.

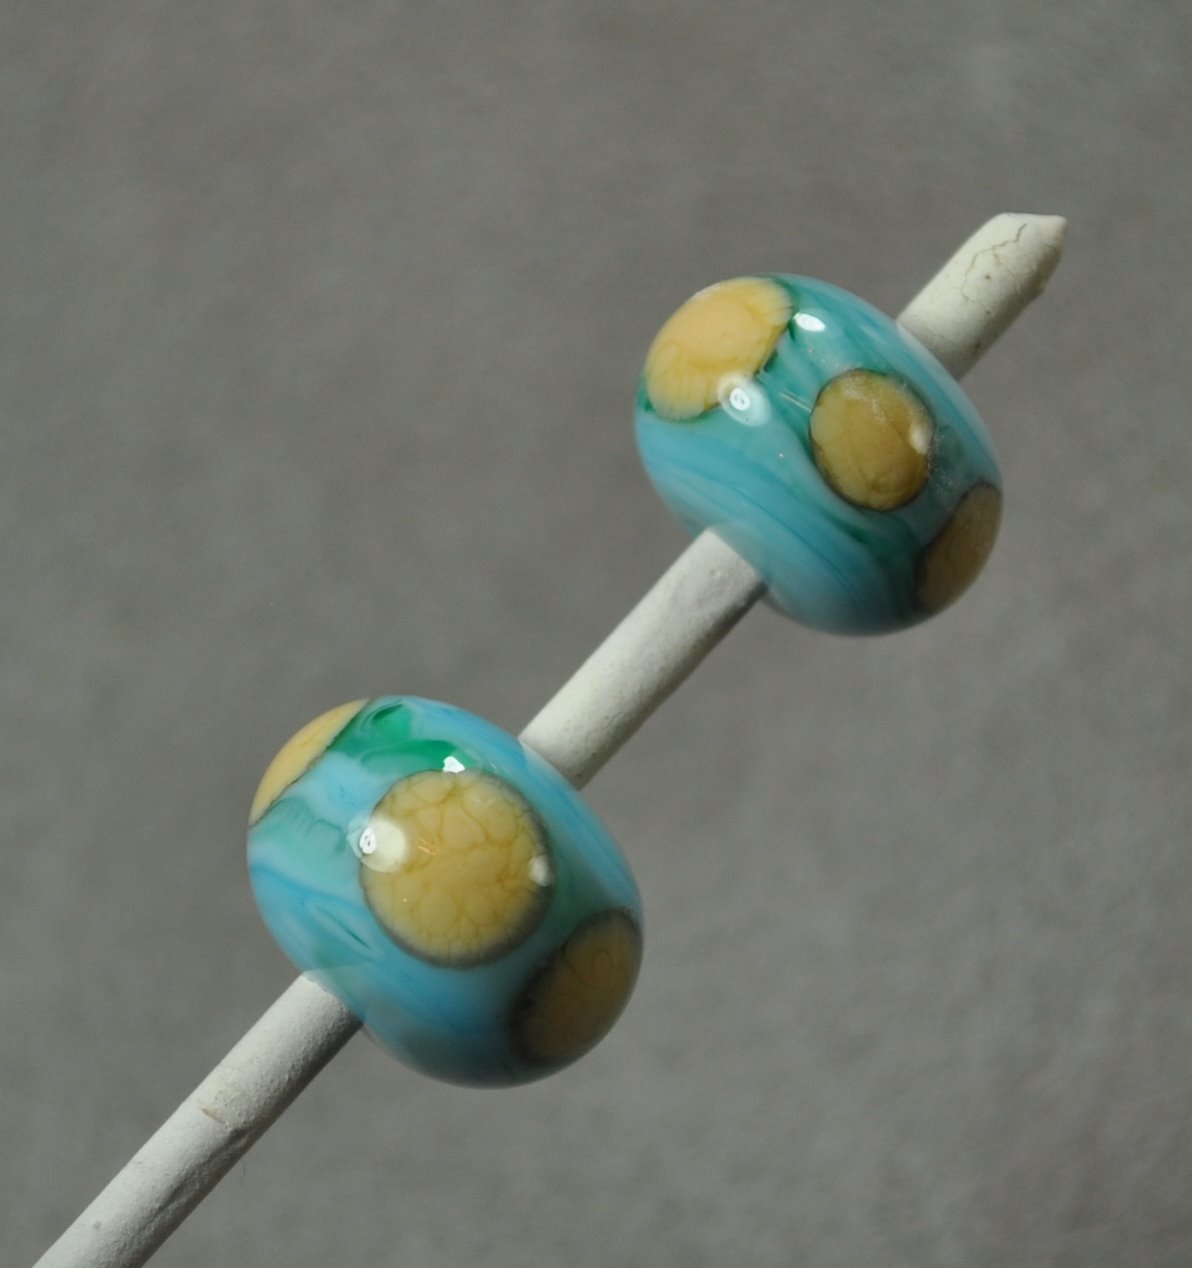
The rods - a cored cane - reminds me of Turkish Delight, with a jelly center! It appears to have a layer of EDP in there too!

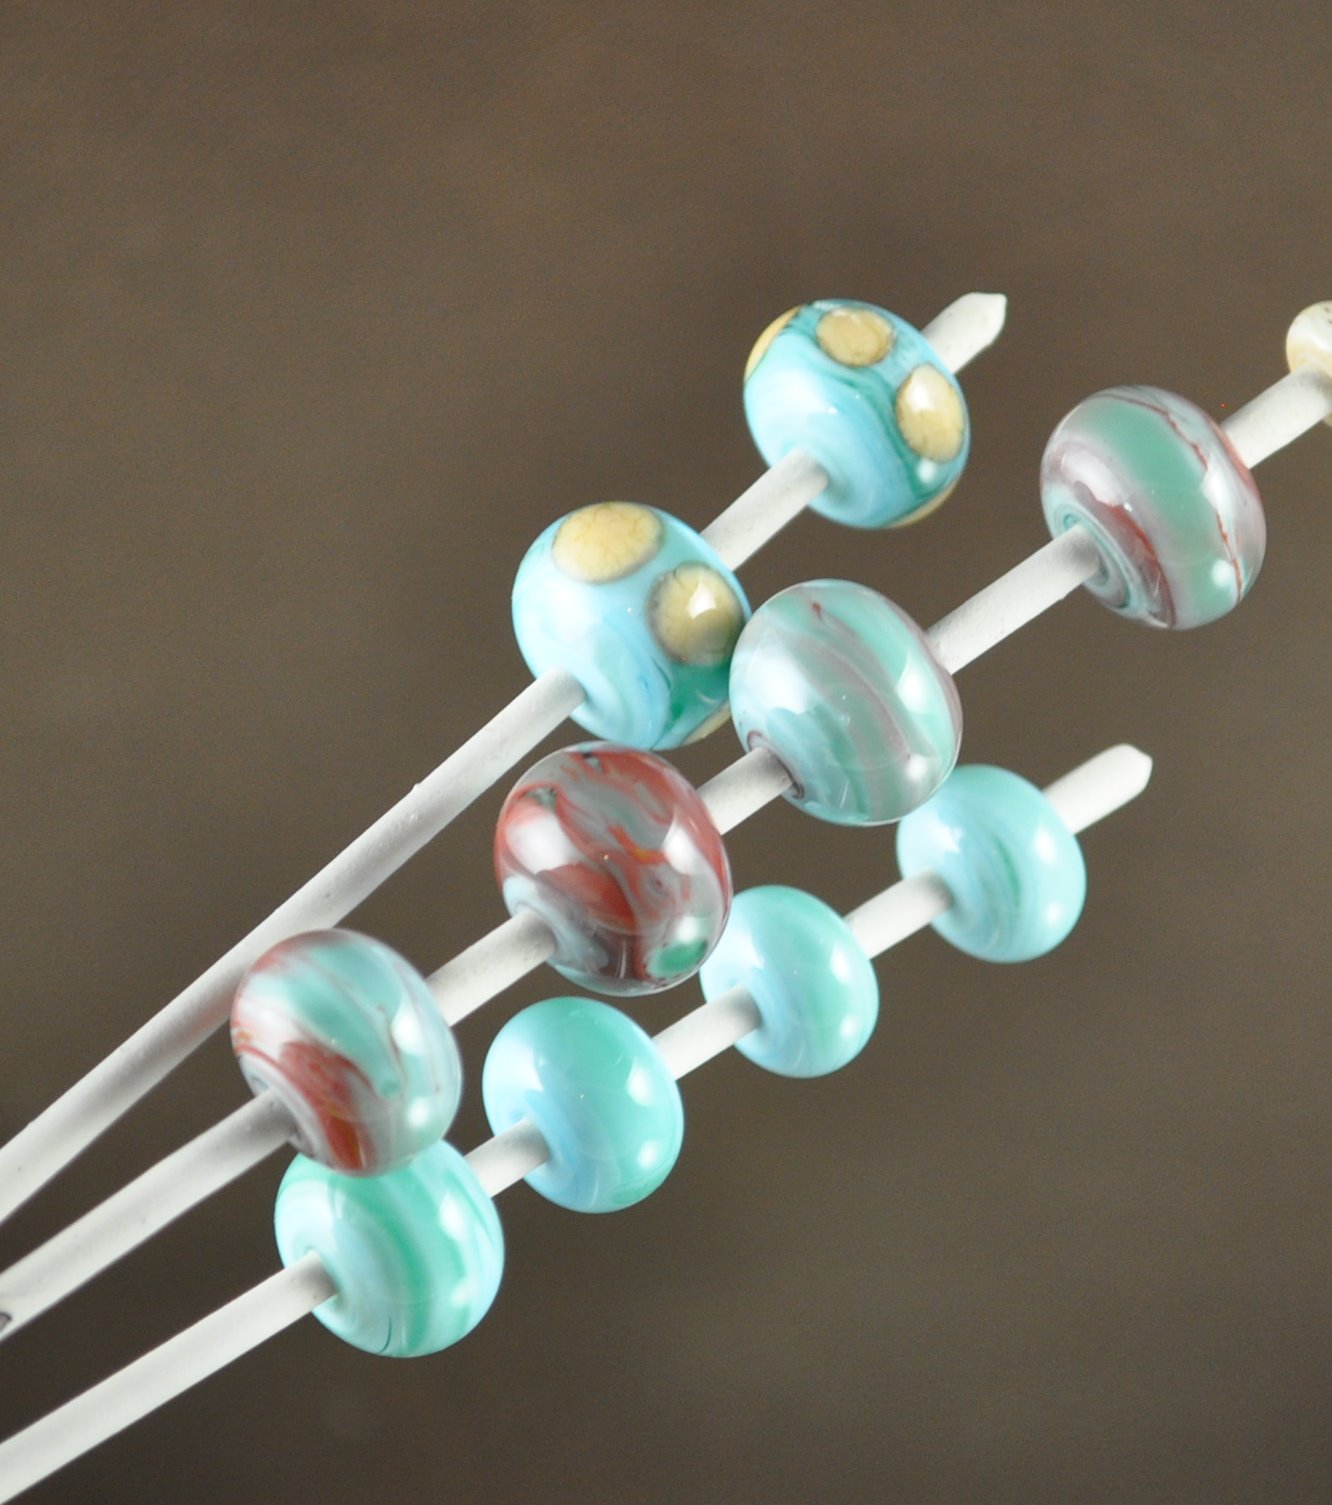
And it makes up into the most amazing streaky beads. Not a subtle streakiness - but in your face streaky.


I rather thought it looked like it was devtrifying - going matte - and while I ensured the above beads stayed glossy by warming the surface to glowing and then kilning them, I thought I would confirm the devit with this bead. This was allowed to cool a little and then given a gentle re-warming, without bringing the surface to glowing again. And sure enough - some matte areas. I'm guessing this is the result of the EDP looking layer.


I seriously expected the beads to be more purple when they came out of the kiln - they certainly looked purple going in. So - whether that was a kiln-strike or just that you can't see the colours well when hot - we'll have to wait to get more to find out - as I blew through all I had last night!

But this put me in mind of two poems I remember from my childhood - on Calico, and by extension, Tortoiseshell cats. BTW - a Calico is Black and Ginger and White, a Tortoiseshell may have cream fur, but not white. Tortoiseshell is a sex-linked gene - they are always female, or in the rare, rare cases they are male, they are sterile. Kewel, eh?

I googled the poems - here they are. The first is a funny little kids' poem. The second is a rather deeper statement on the value of appearances. When I was young - I could recite these, and many others too - but now it's just snatches here and there I remember. Fortunately - googling them is easy!

The Duel
by Eugene Field

The gingham dog and the calico cat
Side by side on the table sat;
T'was half past twelve, and (what do you think!)
Nor one nor t'other had slept a wink!
The old Dutch clock and the Chinese plate
Appeared to know as sure as fate
There was going to be a terrible spat
(I wasn't there; I simply state
What was told to me by the Chinese plate!)

The gingham dog went "Bow-wow-wow!"
And the calico cat replied "Mee-ow!"
The air was littered, an hour or so,
With bits of gingham and calico,
While the old Dutch clock in the chimney-place
Up with its hands before its face,
For it always dreaded a family row!

(Now mind: I'm only telling you
What the old Dutch clock declares is true!)
The Chinese plate looked very blue,
And wailed, "Oh, dear! what shall we do!"
But the gingham dog and the calico cat
Wallowed this way and tumbled that,
Employing every tooth and claw
In the awfulest way you ever saw--
And oh! How the gingham and calico flew!
(Don't fancy I exaggerate--I got my news from the Chinese plate!)

Next morning, where the two had sat
They found no trace of dog or cat;
And some folks think unto this day
That burglars stole that pair away!
But the truth about that cat and pup
Is this: they ate each other up!
Now what do you really think of that!
(The old Dutch clock it told me so,
And that is how I came to know.)

THE TORTOISESHELL CAT
by Patrick Reginald Chalmers

The Tortoiseshell cat
She sits on the mat
As gay as a sunflower, she;
In orange and black you see her blink,
And her waistcoat's white, and her nose is pink
And her eyes are green of the sea.

But all is vanity, all the way;
Twilight's coming and close of day,
And every cat in the twilight's gray,
Every possible cat.

The tortoiseshell cat
She is smooth and fat,
And we call her Josephine,
Because she weareth upon her back
This coat of colors, this raven black,
This red of the tangerine.

But all is vanity, all the way;
Twilight follows the brightest day,
And every cat in the twilight's gray,
Every possible cat.

Saturday, July 10, 2010

Say Hello to My Little Friend


I have a new friend. A new bestest friend.

An assistant. A helper. Someone to lend a hand.

I have a rod warming rack. It is way cool.

The weather broke last night - and we finally got some rain and some cooler weather. So - after heating up the beadFX studio last night and today - I thought I would give it a shot.

I have been wanting one of these for years - ever since I saw one at the ISGB gathering in Kentucky - and I flashed on what a timesaver it would be to have the rods pre-heated and handy like that.

Of course, the recent class taken with Lucio Bubacco just served to re-emphasize that - and spurred me to get one!

This is an impressively well-made tool. Note the join at the corner of the rack - not just welded, but the corners fitted into each other.

The decorative flame cutout is a nice touch too!

I had to do some tidying and re-organizing to get it into position. It also needed the addition of a brick under it to add some height, as I prefer to leave the angle of the torch as is.

So - does it work? Yes, yes it does.

Rods melting quicker due to pre-warming. No shocking when re-starting the rod.

Didn't try it on anything uber shocky yet - will have to find something that shocks a lot and try it out.

It did seem to make the night's beads go more quickly and there isn't the usual spray of broken glass around the torch after tonight's session. I would know - as I had to sweep/scoop up the old piles of instanta-frit.

I'm very happy - it looks like a winner. I would say it was worth the wait - but I think I would have liked to have had this years ago.

Friday, July 09, 2010

It's too hot

Not too hot to torch - just too hot to heat up the house and blow away the air conditioning. However, I do have some very cool new tools to play with - so as soon as the weather breaks - I'll be back at ya with news and reviews.

Cheers.

Sunday, July 04, 2010

Shane Fero DVD: Fire in Flight


Watch Shane Fero make his delightful little birds - ok, not so little - but utterly delightful.

The techniques shown are based on using soft glass tubing - so it not a lot of it translates directly to bead making. If you are interested in sculptural work - this is definitely interesting for the different approach taken. Again - it might be hard for most people to adapt some of the techniques to their own work, but I always find it valuable to see other ways of working.

This is a FireLady Production - and everything I have see from FireLady has been top quality video with commercial quality production values - and this is no exception.

A nice little video with a lot of wow factor and some "holy ----, you can do that?" moments.

Saturday, July 03, 2010

Update on Graphite Shaper with non-functional handle


A little while ago, I reviewed a tool with a handle that I said was "not-usable." As soon as you started to use it - the heat transmitted through the handle made it so hot that you could not finish the bead.

Apparently - I was not the only one complaining.

And the company - to their credit - listened.

Their tools now come with a foam covering that stops the heat transmission dead. It is a slip on handle. It fits tightly, does not slip - stops the heat, and does not burn wildly. I tried. If you stick it in the flame and hold it, you can get it to burn, but it goes out when you take it out of the flame - unless you've really had it in there a long time.

And it's comfortably squishy.

Kudos to them for listening - this handle is now a win!

Now, as to getting a decent shape with the tool - that is another matter for another post. The deficiency there may be all mine. ;-)