Saturday, September 26, 2015

Another Look: Avorio ...

Damn. I really like this glass. The blue is the Avorio Dark Lapis, the middle ivory is Avorio Viola or Percinval (sp?) - I can't tell them apart, and the tiger stripe sky is Avorio Nero, over a base of white.

Damn.

The

Thursday, September 24, 2015

Book: The Starving Artist's Lampwork Project Book

I can't recommend this book.


While this book is described as:
The Starving Artist's Lampwork Project Book includes 18 illustrated step-by-step lampworked glass projects for the beginning to intermediate lampworker. Starting with a brief tutorial of basic lampworking methods, the techniques and projects included here were originally created for use in rehabilitation centers for soldiers returning from overseas after World War II. Also known as scientific glassblowing, lampwork is a method of manipulating glass rods and tubes in a gas torch flame to construct a variety of practical and artistic items. No furnace is required, and the necessary tools and materials can be readily obtained at reasonable cost.

You actually get a better sense of the book from the description inside the front cover: 

The Starving Artist's Lampwork Project Book  includes 95 pages, filled with lampwork projects that originally appeared in a series of training manuals that were created during World War II for use in the rehabilitation of veterans returning from military service overseas.

Each project includes a list of all the materials required and detailed, step-by-step illustrated instructions for creating your own lampworked masterpieces.

We've digitized the illustrations from one of those rare, original volumes, enlarged and cleaned them up where necessary, and reset most of the original text. We also updated the contents and added a new section of resources for today's lampworker.


This book is effectively a reproduction of a glass working book from the late 40's, early 50's. And that's exactly what it looks like. And reads like. And while it might have value for scholars who are researching WWII rehabilitation programs - I think those people (both of them) would be better served by tracking down the original copies.


If you have never picked up a glass bead or seen a torch - this book is not going to help. I thought I might find some ideas for projects that have fallen by the way side and could be resurrected, but, no.  If you have, it's still not going to help.

If you must buy it - bear it mind that it is cheaper on the publishers' website than it is on Amazon. But 30 seconds of googling and a trip to youtube are going to get you way better info than you will find here. Give it a miss. Sorry.

Tuesday, September 22, 2015

Eye Candy

Woohoo - I actually made some jewelry for ME! I know - pretty radical.

Two bracelets in beads that I made a while back, and found while I was looking for beads to put out for sale. I had already pre-selected them and put them aside separately - so what the heck.

Lots of high-silver colours and reduction here. The opal beads with the reduced trails of Ekho (?) are pretty cool. (Right side.)


I remember making the pebbly shaped beads (back half) with a flattish side - thinking that they would be nice in a bracelet that way.


Sunday, September 20, 2015

More on Cabochons

Early in the year - I picked up this tool from CGBead Rollers. They had a booth, and I had an opportunity to buy some tools in person, which is fun, because you buy things you would never buy online.

 In particular - they told me that it was an experimental item, a special request, and given that I don't see it on the website, if you want one too - you are also going to have to request one.

Anyway - as I mentioned a couple of days ago - I have been making cabochons, but keeping the back flat and stable is always the challenge. This - I thought to myself - could solve that little problem.


 It has 3 slots, to accommodate the size of mandrel or punty that you are using.


But having used the Jelveh Cabochon maker - I suddenly had an idea. Why not use a marble mold to shape the FRONT of the cabochon (I had been using gravity, surface tension, the natural flow of the glass to make my dome shape) and use this for the back.


So with the marble mold (or in this case - a round bead mold) flat on the table, I  pointed my molten gather of glass down into the cavity that best fit the glass I had melted, and rotating it a little and keeping it centred, pressed down the back with the slotted marver.

 As you can see in this re-enactment - it worked pretty good!


I'm quite excited about these - because these are a much deeper dome - I just find the more rounded shape more beautiful.
 And the size is still manageable for normal people who haven't yet come to believe that 40 pound jewelry is desirable. And of course - this works with any cavity type mold that you have. It's the same idea as a bead press, but the orientation is different, and the emphasis is on the flat back instead of the bead shape.

So woohoo! Inspired by the cabochon tool - but off in a new direction! Tres kewel!

Friday, September 18, 2015

Cabochons - Cabochon masher tool

I picked up this cabochon mashing tool, Jelveh's Cabachon (sic) Maker - I was browsing Etsy - looking for something else entirely - of course.

I have been making cabochon-y type objects for awhile, and it is not hard to do, but keeping the back flat and stable can be a little frustrating. So when I saw this - it was - "I have to have that ..." .

 When it arrived, I realized it was quite a bit smaller than I had anticipated - probably because I have a collection of Jim Moore's magnificent mashers - which are all very large. So that was pretty much what I had in my head.

 You can see that it is a flat masher with a cut-out on one side for the mandrel, and ...
 a concave, half-lentil masher on the other.
 Here it is with the ubiquitous Windex bottle for size comparison.

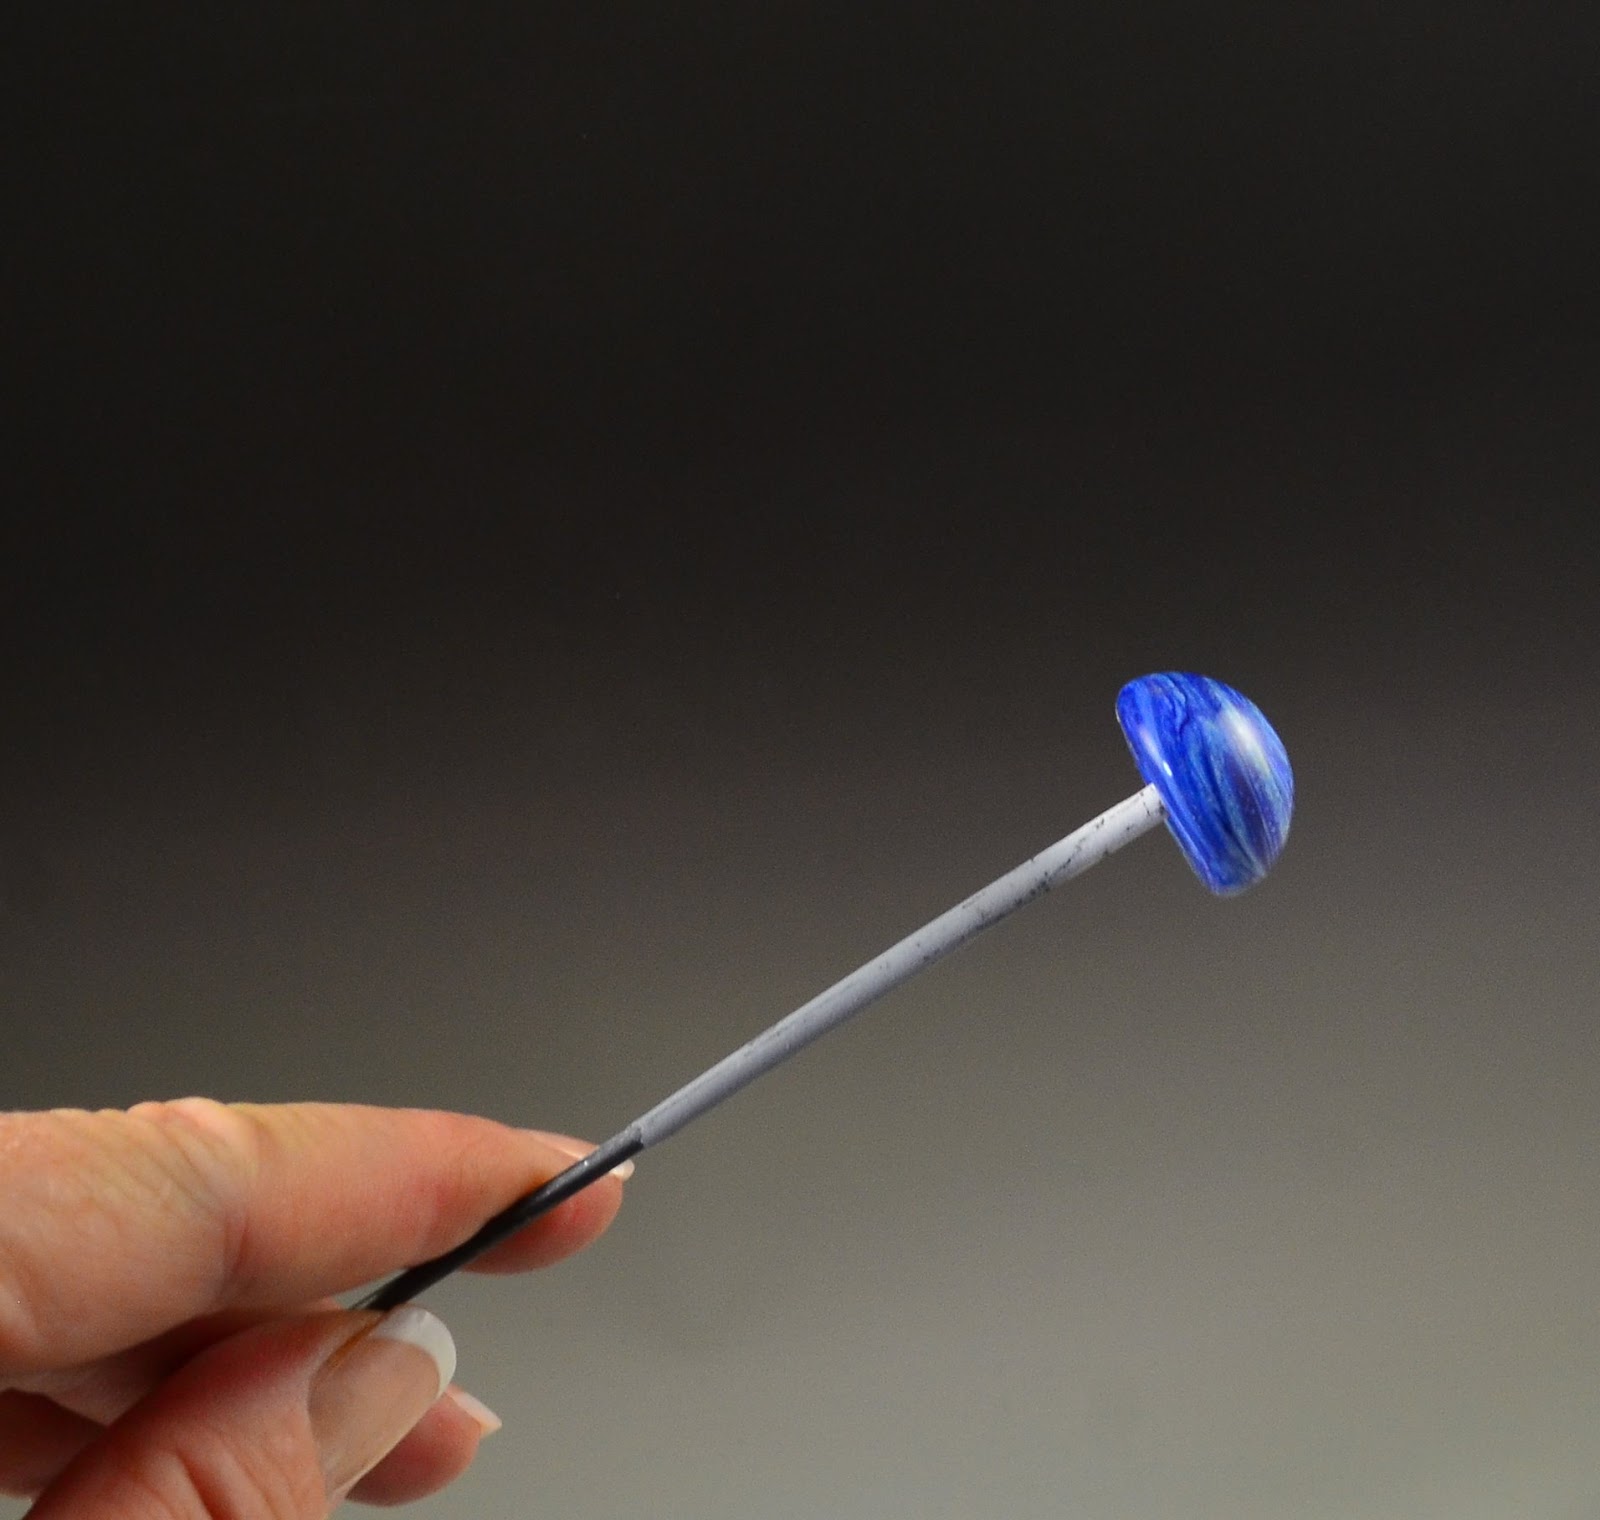
 It's function is to make cabochons on the end of a mandrel. Without the glass punty - you spend less time farting around separating them, and they are much thinner. (No reason you couldn't add a glass loop and turn them into pendants - just sayin'.)

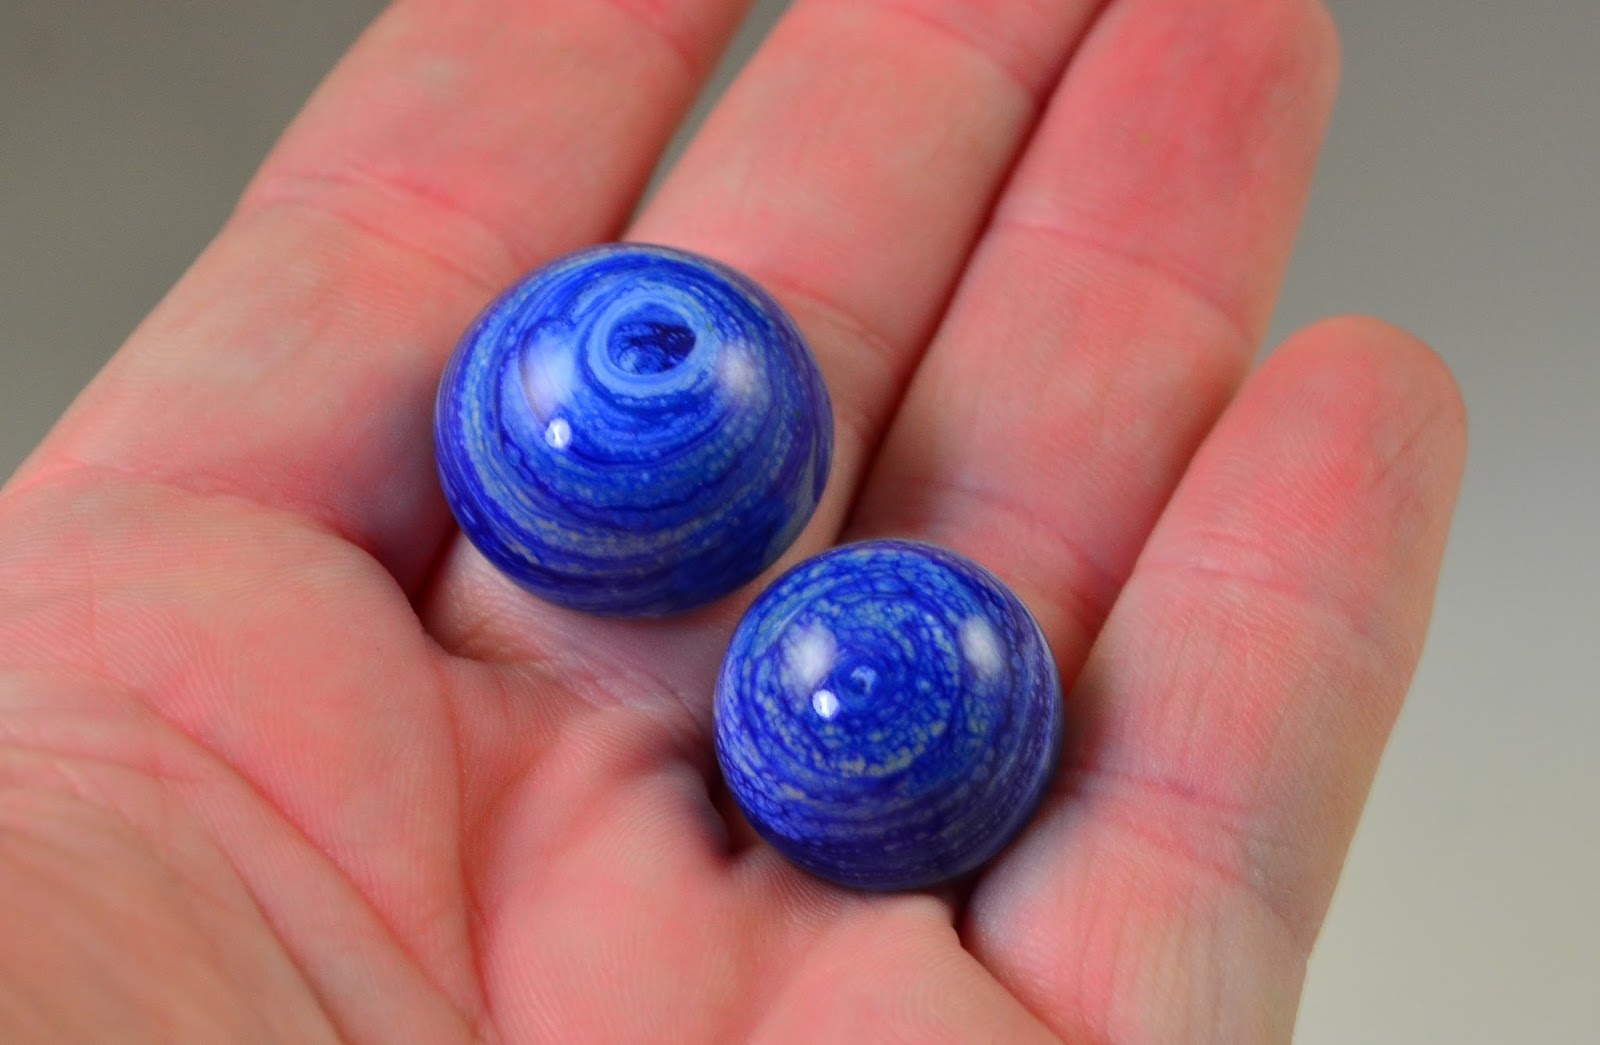
On the left - Dark Fossil. On the right, random left-over high-silver twistie.

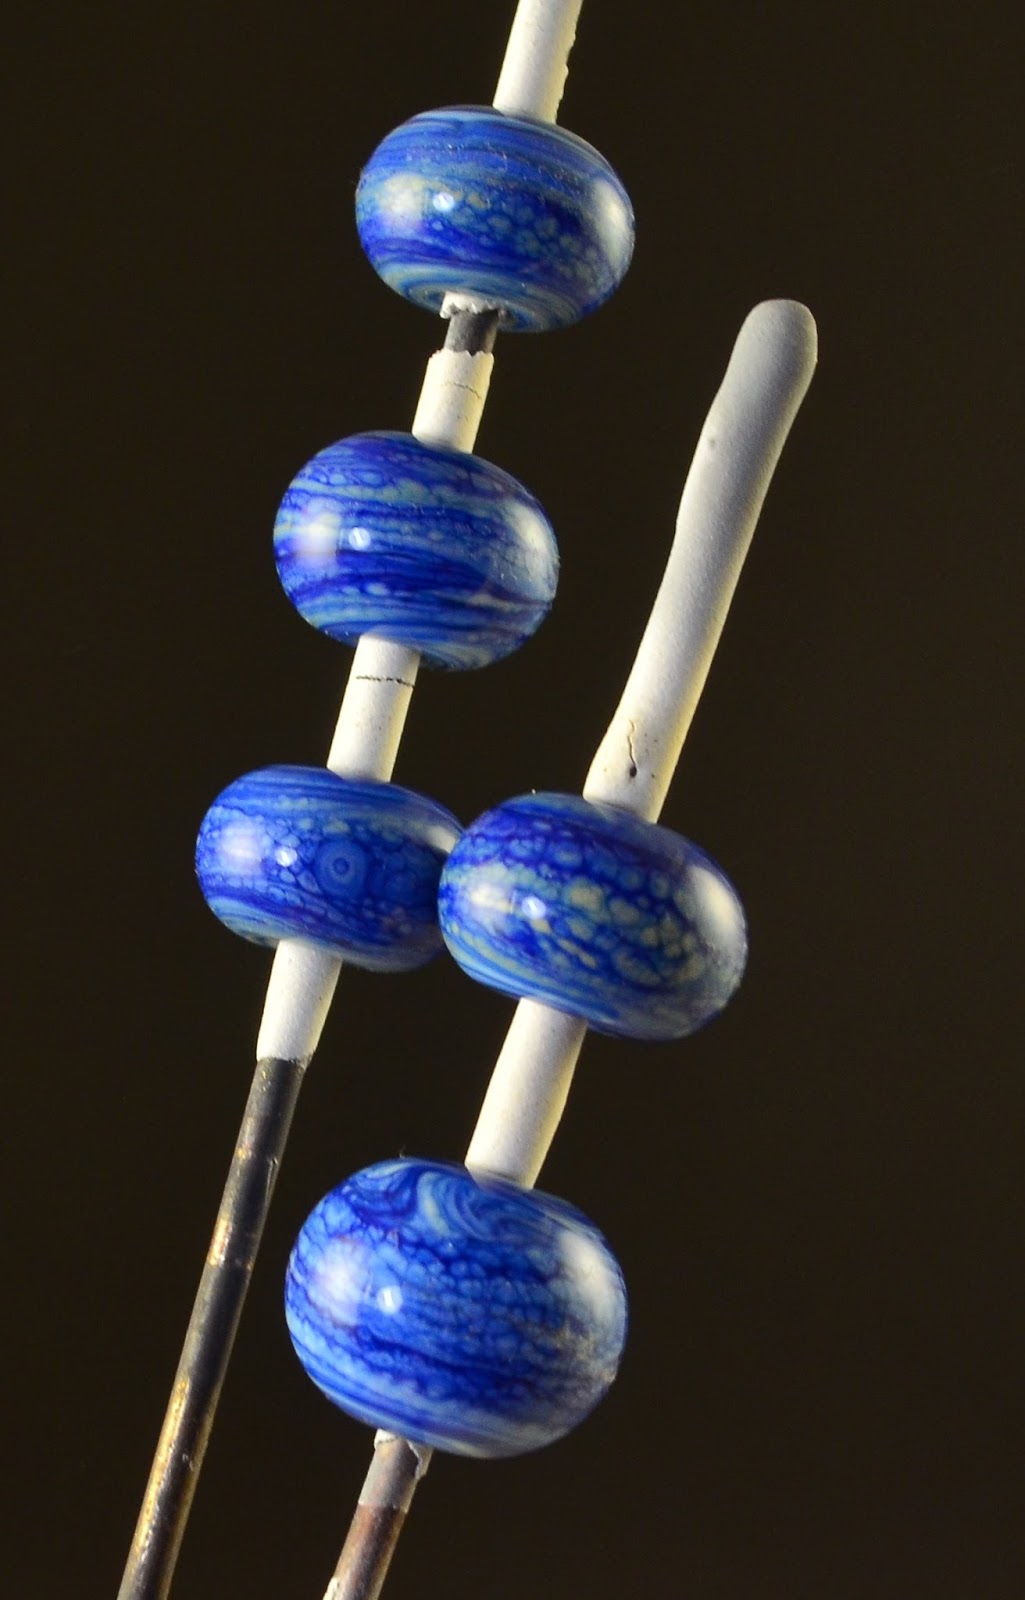
These two below are made on a loop of stainless steel wire, instead of a mandrel (I wanted the wire attached for use after.) These are a little irregular in shape - with the doubled wires on the back, they are a little harder to rotate smoothly.

Shots of the backs, two on wires, and two on mandrels. 

It only took me a couple of cabs to realize that rotating the mandrel while gently mashing/shaping gave me better results - instead of having a ridge on the back (see left most and right most above) where the glass oozes through the mandrel access slot.

The metal is not brass as this photo appears to indicate - that's a reflection. 

Better shot of the best one so far. 
 And the back after pulling off the mandrel. Yes - I used a dipped mandrel.
 While the masher is smaller than I anticipated, and probably smaller than I would have requested had I been specifying it, it does actually make a nice, manageable size cab. That would make a nice ring.
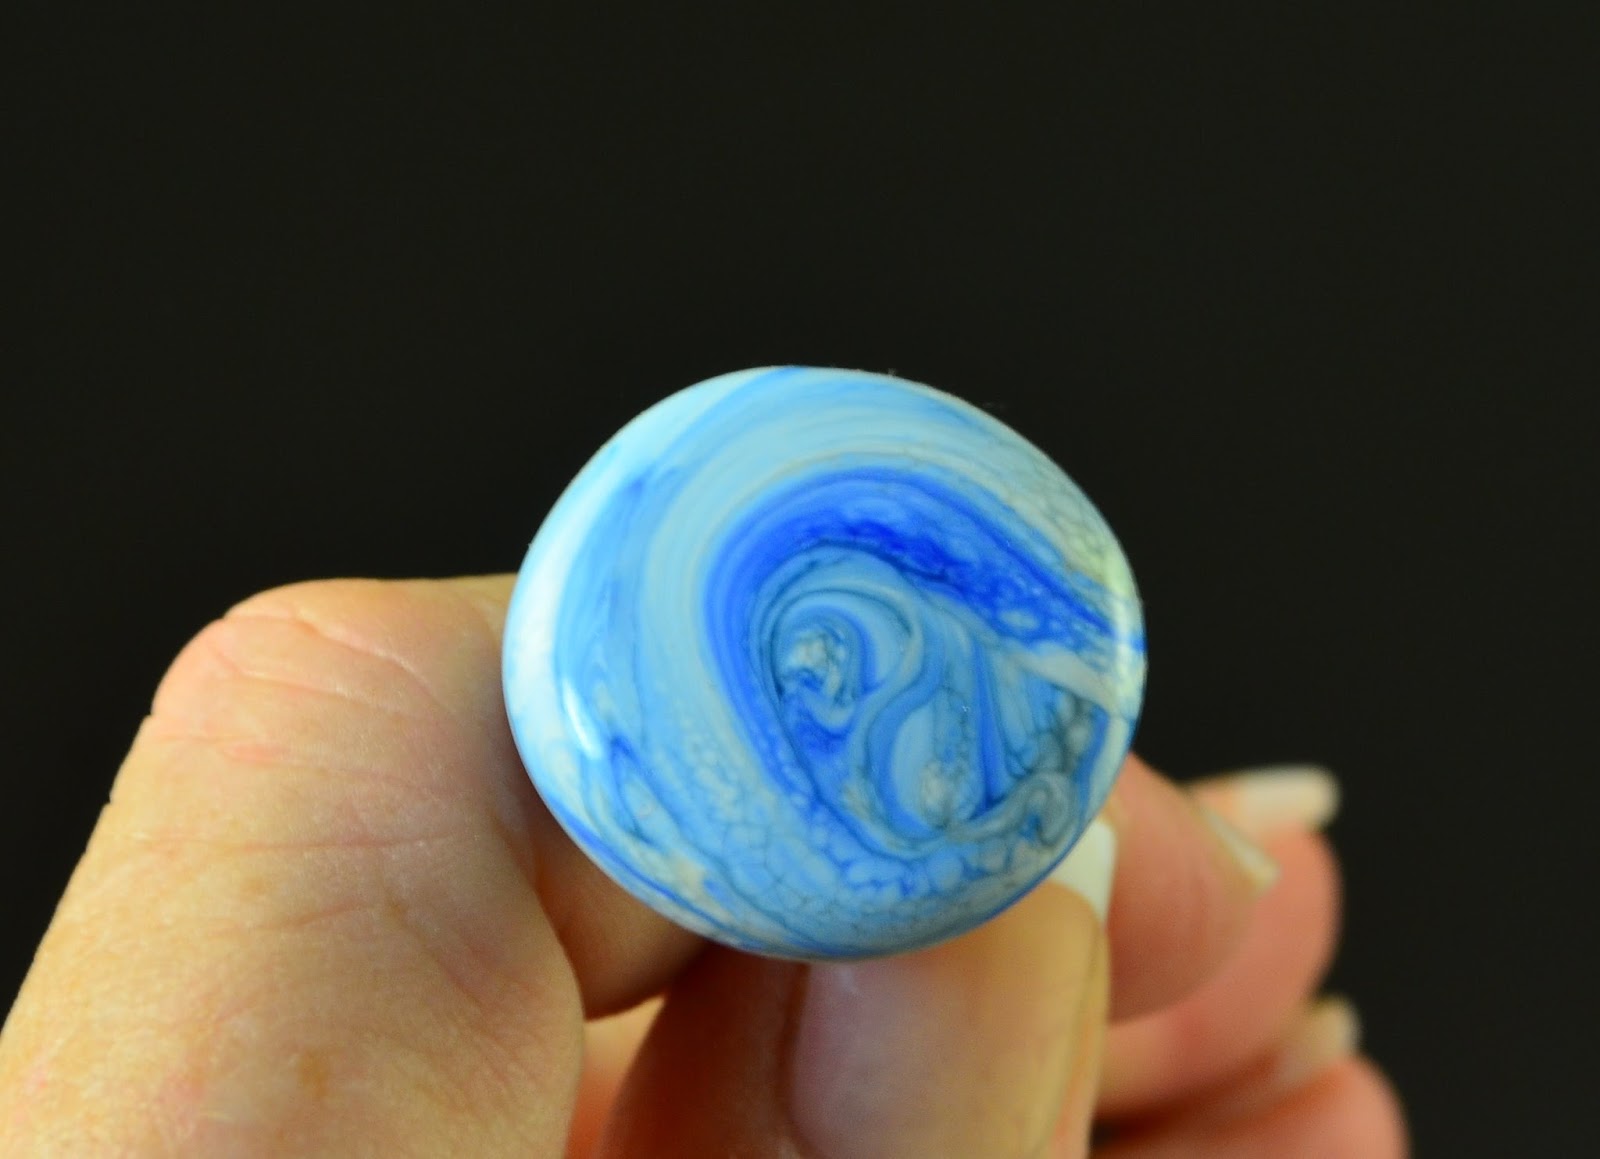
 Here is another one - made on a single wire. I coiled the end of the wire to catch more of the glass and make the connection stronger.
 From the bottom, you can see the coil. A wire sticking straight into the cab, given the shallowness of it, didn't seem too secure. The coil gives the wire more surface area to hang onto.


So, overall - I'm pretty happy with it. It's well made, the spring action in the handle is adequate, the two parts come together to be parallel at the point of closure - which is exactly where you would want it for this. The concave part is beautifully polished. Overall - this is a win.

I would probably still want a larger size if they had it, with a deeper cup. But that is just me. More is more!


Tool is available on Etsy here, or ask your favourite glass tool store if they can carry it.

Wednesday, September 16, 2015

Effetre 291: Avorio Light Lapis

This is Avorio Light Lapis - which appears to be a blend of Ivory and Light Lapis. A couple of days ago - I reviewed Avorio Dark Lapis - and it is yummy yum yum. This is also nice, but not as dramatic.

I mean, if I didn't have the Avorio Dark Lapis to compare with - I would like it just fine, but in comparison ... well, it is much tamer.

But - not everyone like the colours as strong as I do, and sometimes they all over power each other, so I can see that this could be a winner for some! 

 Three self-coloured spacers.
 Same three - up close. Very nice patterning in the ivory.

And this cabochon. Again, more on these in another post.

Monday, September 14, 2015

New Favourite Glass - Effetre 293: Avorio Dark Lapis

This is my new favourite glass - not that I have fallen out of love with Dark Fossil or Raven Sky, but this is truly wonderful.

This is Effetre 293 - Avorio Dark Lapis. As you might guess, Avorio is Italian for Ivory, and this glass appears to be a streaky blend of Ivory and Lapis.

Oh myyyyyy.


 Above is the glass rods - and below - self coloured spacers. Yep - just wound off the rods - nothing else done to them. Aren't they gorgeous?
 Here in much stronger light.
 And with a contrasting background.
And two very yummy cabochons. (More on cabochons in upcoming posts.)


I have 4 Avorios to test - this is the first of them - and they appear to be a line of something plus ivory. I'm pretty excited to get to the rest of them as well.

I did experience a bit of shocking - but it wasn't extreme, and given the colours - worth it. 

Saturday, September 12, 2015

Eye Candy

A little eye candy for today.

A necklace - made with my Sundered Heart design, accompanied by a couple of chrysalis style beads, in a colour I call "Electric Lava." It is one of the Dichro on coloured glasses - on opaque red.

The sundered heart is not supported in the middle - symbolizing loss and the pain of saying goodbye.

The warmth of the gold plated chain and findings go so nicely with the vibrance of the colours.