Showing posts sorted by date for query molds. Sort by relevance Show all posts

Sunday, March 08, 2015

Fun New Murrini Tools

While I was in Tucson - I stopped by the new Glass Artists Bead Show - there's a story there, but that's for a different post - anyway - CG Beads was there - the Bead Roller folks, so I stopped in to look.

Now I'm mostly too free-form for bead shaping roller type tools - and while I think they are fine - most of my presses migrated to the BeadFX studio for anyone to use there. However, when I saw these,

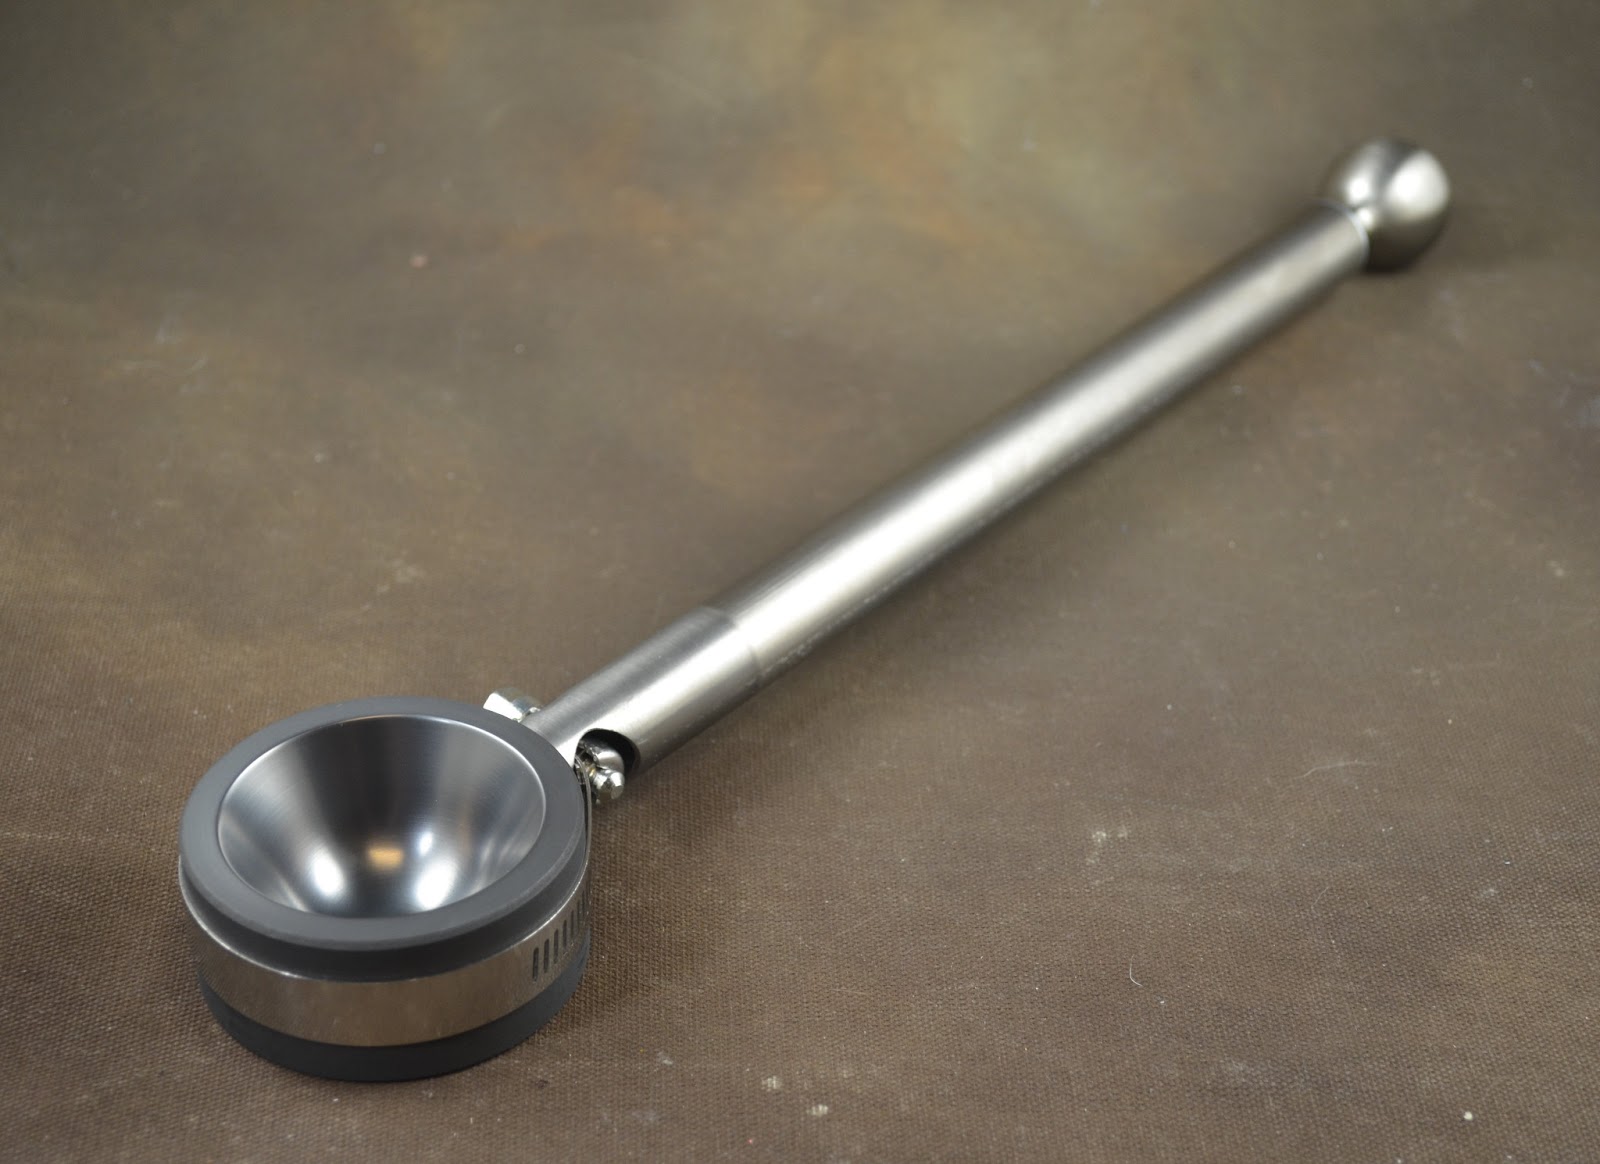
 I was ... oh - it's an optic mold. With a handle ... because ... and the gal running the booth finished my sentence - "optic molds get hot."

We actually repeated that about three times, like a mantra. Because - this is effing brilliant.


 You can see here with a little bit more of an angle that there is a handle on the back. Hold the handle, plunge the glass in, and you are in no danger of trying to hold onto the hot mold - which is cool the first time you use it, and burn-inducing every time thereafter.

If you are still scratching your head on what it is, it's for making murrini. Get a blob (gather) of glass hot - plunge it into the hole, it takes on the shape of the hole, you then add colour around the outside, and stretch out into cane, and slice it up into murrini.

 See, nice, easy flower murrini.


OK - next cool murrini tool - this murrini holder. Stand your murrini slices in the cavities so that they stay upright, don't fly away, roll away, etc.


Plus nice lentil or cabochon cavity up at the end. 

So now you can use the murrini you just made, without half of them flying away as you try to apply them to the bead.


 Another brilliant tool.

So, two great tools for the murrini enthusiasts, or those that might want to be. ;-)


There is, btw, a nice little description of how to use the cross shape mold (above) on the CG Beads page.

Saturday, November 22, 2014

Effetre 724 Buffy

You have to try this, I was told.

The packet of glass was labelled "Buffy."

I have a dog named Buffy, you see. Although she is not this colour. She is mostly inky black with a sprinkling of sand in her fur and tan points.

However, the name was amusing.  ;-)


When working it - it appears to get a layer of transparent topaz on the top. 
 In a spacer bead - this cools to a variable streakiness.
 It appears to react nicely with silver - this has some trails of some random dark high silver glass on it - you can see the reaction at the sides of the marks, but I noticed someone else trying it with silver wire and getting a nice reaction - so definitely experiment with that.

It's variability serves it well in rapid cooling situations, i.e. in brass presses and molds, see the three faces in the top left. 


Oh, and because you asked - this is the real Buffy.


Tuesday, March 25, 2014

Push Molds: Burgard - Cat and Face


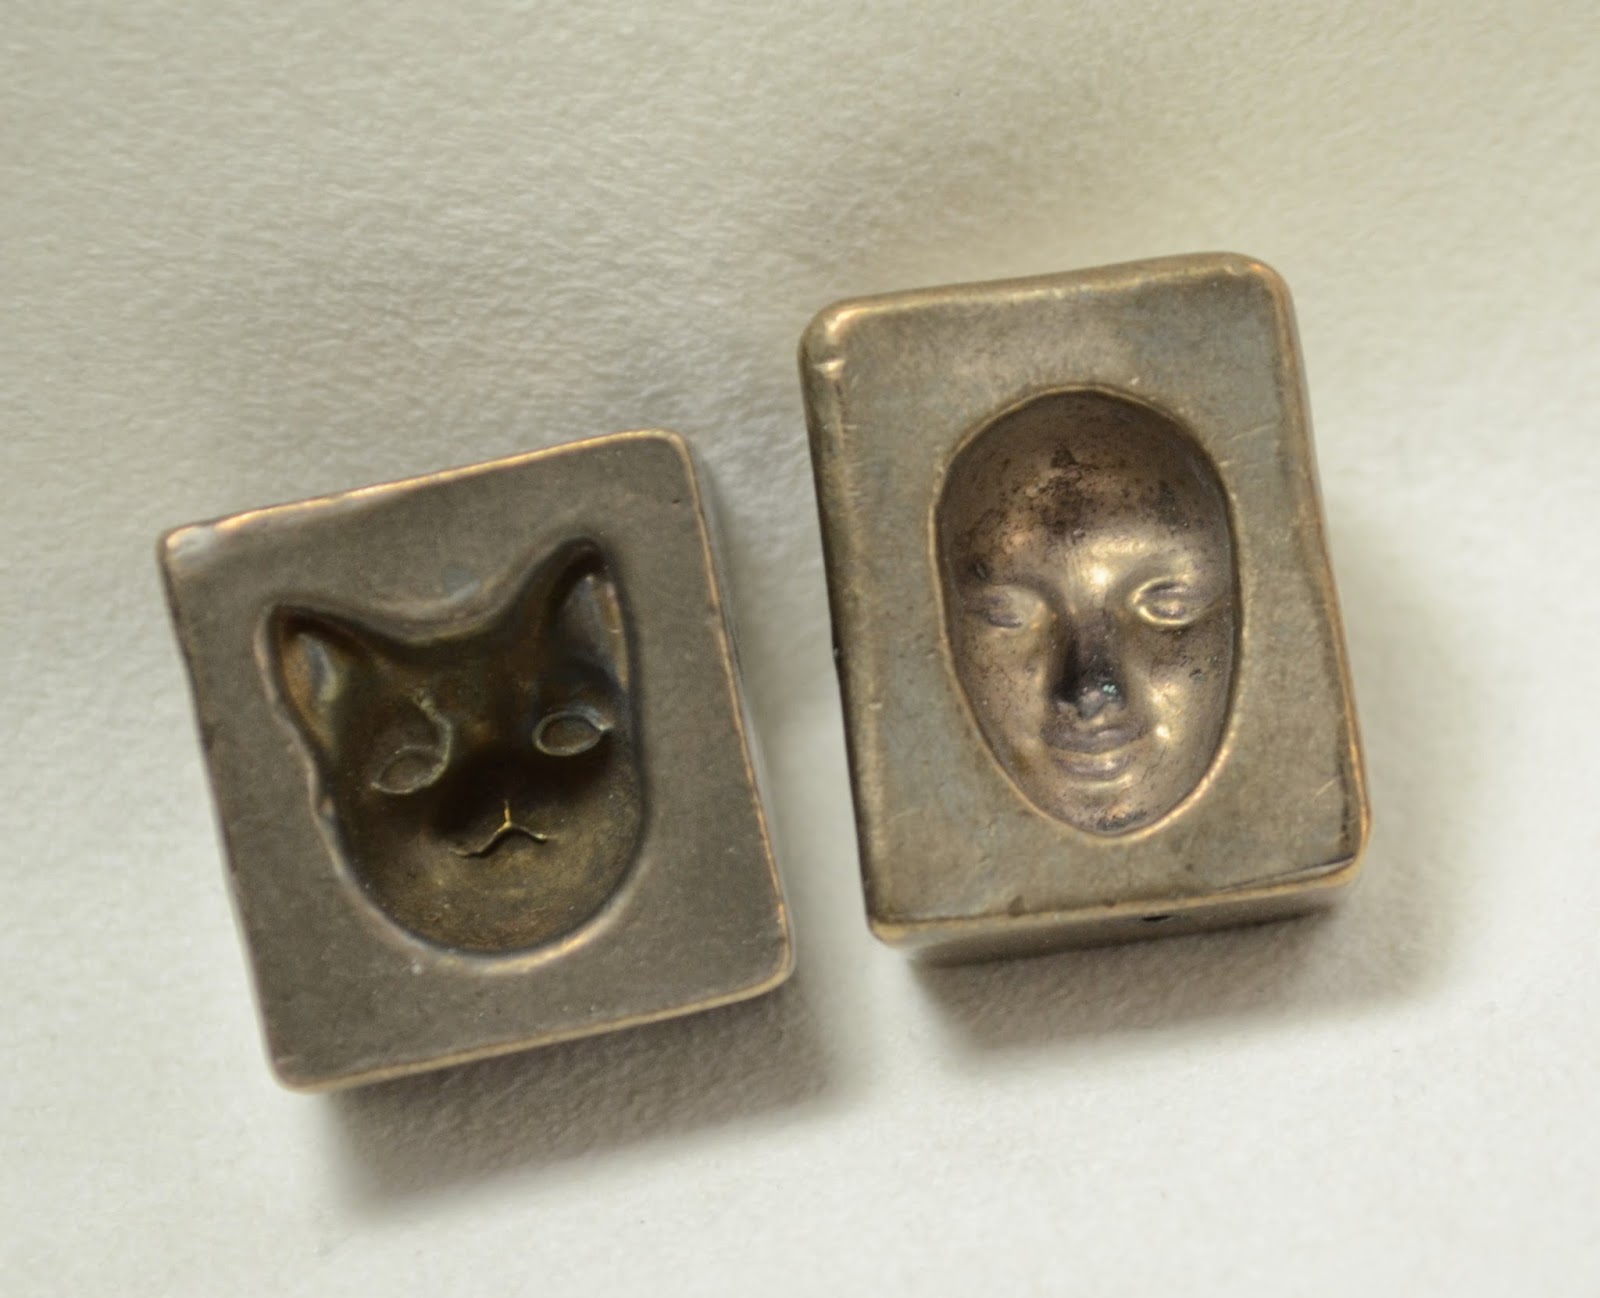
When I was down in Tucson - I picked up a couple of the old Burgard push molds. They were on the discontinued table of one of the big vendors. So far as I know - they are no longer being made. The backs of them are signed and dated, the cat is dated 1998 and the face is 1999.

These two are actually small enough for soft glass (most of the molds I see work better for boro and are huge). I'm sure many soft glass users are just baffled by them, however. "It's not a press and it doesn't have a mandrel slot."

I do want to give you a close look at these so you can see the scale of them, and understand that they are a concave mold - because the photos do that tricky thing where they seem to reverse themselves and appear to stand out, and then recede. 


 Go on - stare at those two faces - raised, inverted, raised, inverted.
 There - that makes it clear - it's a cavity.
 It's "Mc-Cavity - the mystery cat"
 This also makes the size of them clear too - the face mold is about an inch long for the entire mold - the face itself is 17 mm long and about 5 mm deep at the bridge of the nose. The cat is a little deeper.


 I just did a couple of quick ones to see how they worked - needed more glass here to fill up the ears. I just melted a gather of glass on the end of a rod and pushed it in. Make sure the mold is on the table by the way - it's going to get hot.
 Did a pick-up of frit on this gather first - and put the gather on the end of an old, bent mandrel.

If you don't firepolish the heck out of it - the detail is quite nice.

The picture is crap - but the faces came out quite nice - ready to be embellished or integrated into something else.

If nothing else, you could make some nice little cabochons with these.

If you see them languishing on a sale table somewhere - pick one or two up.

They are practically collector's items now!


Tuesday, April 09, 2013

New Marble Mold

Indulged myself in a new marble mold. I made a large marble the other day that got away from me - it was actually too large for the molds that I have, so "aha," I thought - "That's an excuse to move up to a larger mold!"

I get my Marble molds from San Grumbling, who is the guy that Drew Fritts recommends in his book. I've had my other molds a few years, and I had forgotten how truly gorgeous they are when new.

These are just beautiful marble molds, beautifully made, and beautifully balanced. The graphite is silky smooth, fine-grained and highly polished.


Totally worth it - this is a tool for life!

Thursday, November 03, 2011

Bead Shaper - Bamboo

Well - isn't this one fun? This is another of those funky graphite bead molds shaper doo-hickeys. This one was rather fun to use, for a change. The shape - well - it's so distinctive that I'm not sure what to do with it - but it was fun anyway. It's called Bamboo, but I find myself thinking of it as a chunky dog bone.

Here is my completed bead. Perhaps this shaper worked for me because I just relaxed and didn't sweat the shape too much.
Here is the bead - this is made with Rb Multi-Dark.
 
To get the shape right for the shaper, I started with a cylinder, built-up the ends a little with a disk at each end, and fattened up the cylinder in the centre. It worked pretty well. I'm quite pleased with it!

Friday, May 13, 2011

Graphite Shaping Tool - Saucer/Disk Bead


Well, well, well. I do seem to be on a roll! Success also with this shaping mold.

I think perhaps I have changed my approach to using these fundamentally - building up the glass slowly and gently and using the mold/shaper to finesse the shape - rather than hoping it will do all the shaping at once.

Also - I have adjusted my expectation that the bead will perfectly mirror the exact shape of the cavity and use it to shape the bead, not form it, if you see what I mean.


A selection of practice disks. Yeah - some of the holes aren't perfect - which is something I HATE about using molds - it seems that in order to preserve the shape of the hole, you need to be very conservative with the shaping at the edges. Or maybe I just need a narrower footprint and less pressure.
I also can't abide chill marks - so I tend to loose some shape definition that way too. I'm happier with this bead - which has good ends and no chill marks than ...

... I am with this one - which matches the cavity perfectly, but has a ridge one side at the hole.

A half dozen choices of various sizes. If you stare at this image long enough - it reverses in your brain to look like a relief image of 3 dark beads on a mandrel - then flips back to looking like cavities.
Anyway - really progress in getting my head around using these graphite shaping tools.

Wednesday, May 11, 2011

Graphite Shaping Tool - Finally - One I Understand!


Finally - A graphite shaping tool that instantly makes sense to me!

No ends - so it doesn't matter how long you make the bead! Which tends to be my problem with molds and shaped marvers - too much glass - spilling out the ends, and then knocking the bead release and breaking it, and then it all goes downhill from there.

"Aha" sez I when seeing this one! This is a shaper for me!

And, in fact - it works really well. I really like using this tool!

And with two sizes of grooves - you have some choices of sizes.

If you've been making, on planning on making, bead handles for the bead accessories, like bead pens, letter openers, cutlery and other stuff, this is a great shaping tool. It is a whisker wider than the letter openers need - which is longer than the pens and some of the other items. But, you can make a reference mark on the graphite with a Sharpie, and use it to check the length as you work.

Did you know you can write on graphite with a Sharpie(tm) brand permanent marker and, in defiance of all odds, it shows up on the graphite, and does not burn off. Sharpies are amazing. I have no idea what is in them.

Here, you can see the profile of the two grooves in the tool. The back is flat, which is also handy for straight marvering.

Here you can see a bead in the slot - obviously I don't hold it this way in the flame - I just have a shortage of hands when it comes to operating the camera.


And the larger slot. The handle gets noticeably warm after a lot of marvering - but the squidgy rubber coating keeps it handle-able.


To use this - start small - I started with a very thin wrap of glass in the center - and marvered it out on a flat marver - then went to the grooved marver. I added glass in the center, and melted it and mavered it in, to get the size - and extending the length. When I had the size correct in the middle, I built up the ends to match.


Beads above are Raku Jitterbug frit on Hades. Bead below is Ghee + Ivory and reduced + Psyche, raked, and then reduced again.

Friday, May 28, 2010

Marble Molds - More on Shaping Tools and Making Marbles


In the resulting discussion on graphite shaping tools, some of you mentioned the Infinite Rim Marble Molds, designed by Drew Frits.

Ah - now these are gorgeous tools! I have had a pair of these for years - long before I started blogging, which is why it never occurred to me to mention them.

These are an absolute joy to use - if you have the cup shaped marble molds, I suggest you put them down and go order some of these. Oh sure, they are made to last forever, from high quality graphite and with a superior handle. Yes, they are beautifully balanced and elegant to use. But more than that, they actually work. (Go read Drew Frit's description of how they are different and how they work, in a nutshell - you are using the edge of the cup to shape, not the bowl, and because it is tapered - you have an infinite choice of edges to shape on.)

It is easy to shape a marble with them. Or whatever you have that you want a rounded edge on, tidy up an implosion pendant or some such - I use them all the time. I use the extra big one a lot too for transporting off-mandrel stuff to the kiln - I warm it in the flame, knock the item off the punty into it's spacious cup, flame polish the punty mark, carry it to the kiln and gently slide it out of the cup onto the floor of the kiln without the whole slippery tweezer trauma thing going on.


You can see the construction and the quality of the graphite. This is the big one, it is 1.5 inches at the widest part.

This is the other one, with 4 cavities on one side, from 1/2 to one inch, and ...
1.25 inches on the other. This angle shows you the shape of the cavity.

And again, you can see it's not merely a half sphere carved out of the graphite.

Course, if you want to know more about making Marbles - I also suggest and recommend Drew's book, "Torchworked Marbles, Vol. 1 Beginner to Intermediate Techniques." This is not an "eye-candy" book - in fact - the only colour picture is the cover.

What it is however, is packed with good, solid information, lots of steps and diagrams and detailed instructions. When it says "beginner to intermediate" - what it will do is take you from beginner to intermediate marble maker.


The book is primarily geared to soft glass, but covers boro as well. It contains a lot of very interesting information about colours and useful details about using them such as "bleeds - encase to control." or "won't cover black." He also has some very good tips on using punties so that you aren't fighting with thermal shock all the time.

It also has a section on mixing your own colours, including his own recipes, right down to the specifics of how much to use.

If you seriously want to get your head around marble making - buy a couple of his marble molds and his book. You'll be good to go.