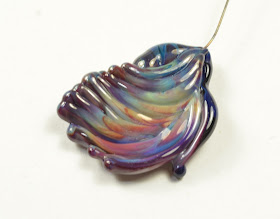
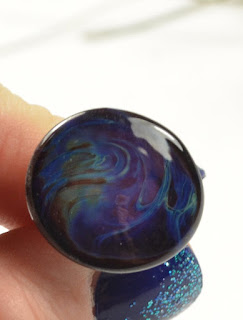
This piece - I did not put in the kiln. (And it cracked.) This is freakin' awesome. This is the back. This I would be happy with to get on a consistent basis.
And this is the front - with the spiral pressed into it. The back is nicer. I left this one out of the kiln to see if I would get different results from the ones that I annealed. (As I have been finding that with the reduction glasses.) (FWIW - for this striking glass - I can't see any difference between the annealed and the unannealed - that I can lay at the doorstep of annealing, anyway.)
My basic approach was to get it melted to clear, so hot that it was drippy and out of control. I would then make the whatever I was making, let it cool to no-glow-at-all, and then strike it gently in the edge of the flame. This worked fabulously as you can see above. However, because I was heating it gently - I never got enough heat into it to firepolish out the chill marks from the mashing - and that makes me crazy!
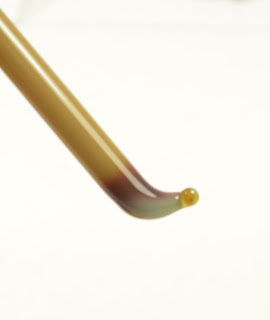
Here is a the grouping, you can see I got quite a variety! The rods themselves are a light tawny brown. When heated to clear - it is a slightly greenish clear that you get.
And the rods do hint at the possible colours.
 With this style of piece, there is less opportunity to get it so hot. There is a lot of colour there - too bad about the mud puddle in the middle.
The other side is nicer.
This one, I didn't strike at all - I just put it in the kiln a greenish transparent. You can see, it struck on it's own, but mostly it's just black.
Double Helix says of Skylla:
Skylla is a silver striking and copper ruby glass. The silver strike produces bright blues, purples and teals while the copper ruby produces reds when applied in thin layers all the way to black if thickly applied. (See above!) Skylla has several improvements over our previous silver/copper striking colors. The colors are brighter, the reset is complete, the nucleation is heterogeneous and the copper ruby is redder.
For best results follow the striking sequence; Reset in a hot flame, Cool until the glow fades, Reheat at the tip of the flame.
This was made the same as the first above - but kilned. I would venture to say that this shows a nice example of the Copper Ruby.
Again - not enough heat during striking to polish out the chill marks.
And backlit.
This one is quite opaque. And more of the light sagey green.
and the flip side.
Blobs (I won't dignify them with the word "dots") of clear - it does brighten and lighten the colours.
And the other side. Could be useful for saving a very dark piece.
Don't know what happened to this one. Maybe I over struck it.
And the other side.
This one has a base of clear, and the Skylla, and a cap of clear on top. The fuchsia is nice, but why is it in a band and not all over?
And here is the back, which I frankly like better.
Backlit.
And this one, over white. Very dark.
Skylla, at first glance, seems capable of some extra-ordinary colours. How you work them into your bead without losing control or over-striking seems to be, as usual, the issue.
I think that I am frequently happier with the back of pieces than the front is telling me something, but I'm not sure what. Am I striking the backs less or more? I'm not sure. More testing might reveal an answer.


No comments:
Post a Comment